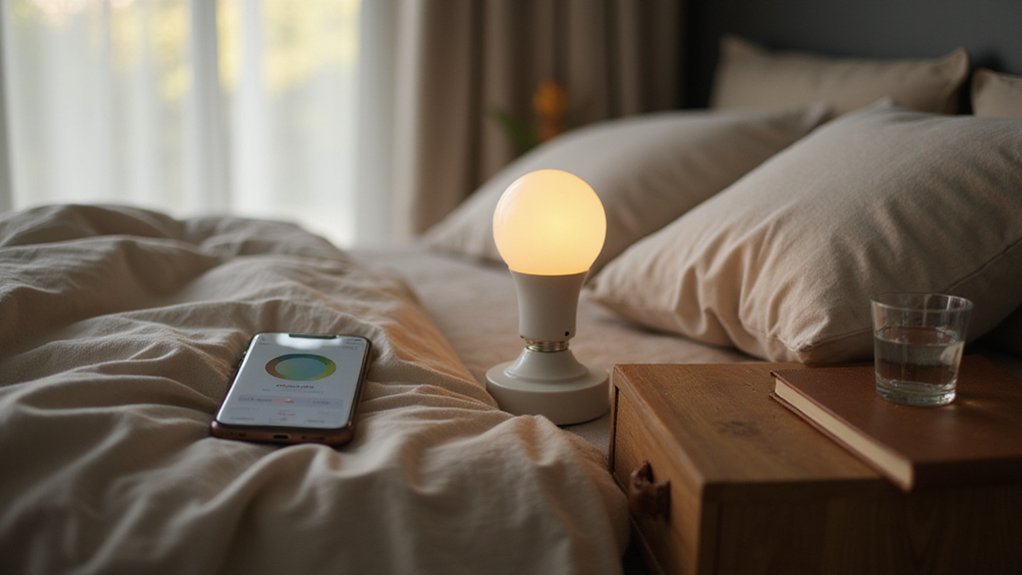
Ever wonder how your light bulb can turn on and off or change color with just a tap or voice command? Smart light bulbs pack tiny computers and wireless radios inside them, allowing you to control brightness, color, and schedules easily from your phone or smart speaker.
They use minimal power and are designed to be part of your connected home. Keep reading to see how they actually work behind the scenes.
So, What Makes a Light Bulb Smart?
A smart light bulb’s core feature is its built-in microchip and software that transform a standard LED into a programmable device. This integration includes a microcontroller that interprets user commands and a converter that handles household voltage, allowing for seamless control. As a result, you can adjust brightness, change colors, and set schedules directly from your phone or voice assistant, eliminating the need for manual switches. The LED-based design not only enables multiple customizable lighting options but also significantly reduces energy consumption compared to traditional incandescent bulbs. These bulbs typically last up to 50,000 hours, offering long-term durability. With firmware routines running automatically, your smart bulb adapts to your habits, creating efficient, mood-enhancing lighting without extra effort on your part. For a similar integration of technology into your furniture, consider how a vanity or desk can balance style and function in your space. Network connectivity allows these bulbs to communicate with your home Wi-Fi for remote control and automation. You can even update your existing ceiling fixtures using a can light conversion kit to integrate these smart features into your home.
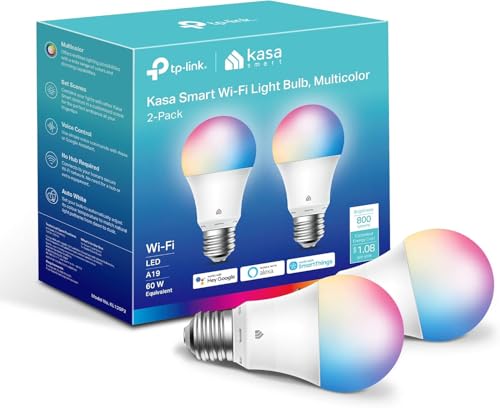
Multicolor & Auto White: Dimmable 16 million colors and warm to cool whites(2500K-6500K). Set your bulb to automatically adjust its color temperature to match natural light patterns from dawn to dusk. Explore endless lighting possibilities to create your favorite light effects for everything from a dinner party to a late-night study session. Great for holiday decorations.

Easy Voice Control: Our Alexa light bulbs are compatible with Alexa and Google Assistant for easy voice control. Adjust color, set timers, and automate lighting effortlessly. Note: This bulb only supports 2.4GHz WiFi.
How Smart Bulbs Connect to Your Home Network
Most smart bulbs connect directly to your home Wi-Fi, usually on the 2.4 GHz band. When setting up, you’ll open the app, enter your network password, and the bulb joins your local network. This means no hub is needed, and your phone or voice assistant talks to the bulb directly. Some bulbs use Bluetooth during initial setup, then switch to Wi-Fi for more reliable control. Since low power consumption is important, these network-connected bulbs still operate efficiently and maintain a sleek look. For a budget-friendly DIY approach, you can repurpose mid century modern nightstand components to house a smart bulb, ensuring the fixture remains stylish. The wall switch must remain in the “always on” position to retain app control, or the bulb will disconnect from remote access. Flickering can sometimes occur if the bulb is connected to a dimmer switch incompatible with the LED driver. For those prioritizing style, roller shades and solar shades offer similar trade-offs in balancing light control and aesthetics.
During pairing, make sure your phone and bulb are on the same 2.4 GHz network. Keep the wall switch on, or the bulb will turn off and go offline. For hub-based systems like Philips Hue, they typically use Zigbee and connect via Ethernet or a dedicated hub, reducing Wi-Fi traffic. To add such systems, follow the app’s pairing instructions, power-cycle the bulb until it flashes, and you’ll be connected.
Inside the Bulb: The Microchip, LED, and Wireless Module
Inside a smart bulb, you’ll find several key components tightly packed into a small housing. The microchip acts as the control center, executing firmware that processes commands from your app or voice assistant. This microcontroller oversees functions like brightness adjustment, color changes, and scheduling, with its solid-state design ensuring long-term reliability. These early designs pioneered the integration of microelectronics into lighting, accomplishing all functions via a single-chip 4-bit microcontroller embedded directly in the bulb base. The LED engine provides the actual illumination and features precise current regulation through multiple channels for accurate color rendering and smooth dimming. For those seeking top performance, models reviewed in night light guides often emphasize consistent brightness and value.
A driver circuit supplies a steady, constant current to the LEDs, ensuring consistent brightness and color output. The wireless module—either Bluetooth, Wi‑Fi, or Zigbee—receives remote commands, allowing you to control the bulb from anywhere. It requires continuous power to stay operational even when the light is turned off, maintaining responsiveness and connectivity.
All these electronics are integrated seamlessly, making the smart lighting responsive and easy to program without needing to flip the physical switch. This compact, integrated design enables smart bulbs to deliver customizable lighting with reliable performance over time.
Wi‑Fi, Bluetooth, Zigbee, or Matter: Which Is Best for You?
Wi‑Fi is the most straightforward option, connecting your smart bulbs directly to your router without the need for extra hubs. This setup is ideal if you have just a few bulbs, as it simplifies installation and use. However, it can lead to network congestion if you scale up, since each bulb uses bandwidth and contributes to Wi‑Fi traffic. Additionally, Wi‑Fi consumes more power than other protocols, which might impact energy efficiency over time. For larger setups, the proper closet rod size depends on the total weight and span length of your lighting fixtures. When evaluating quality and value, you should consider that top‑down bottom‑up roller blinds also require precise measurements for optimal light control. If you are building a custom storage solution, DIY closet materials like wire shelving can help reduce overall project costs.
Bluetooth is best suited for small, local control. It connects directly to your phone or tablet, making setup simple and quick. This option works well if you only want to control a few bulbs in one room. But without a bridge or hub, Bluetooth lacks remote access and automation capabilities from outside your home environment. Its range is limited, so controlling multiple bulbs across a larger space can become unreliable.
Zigbee forms a low-power mesh network ideal for whole-home lighting. Because each bulb repeats signals for others, it provides reliable performance over large areas without taxing your Wi‑Fi network. The trade-off is that you need a compatible hub to coordinate the system, adding initial setup complexity. Zigbee offers good scalability, making it suitable if you want a robust, interconnected smart lighting system.
Matter, the newest standard, emphasizes interoperability across brands and devices. It works through compatible controllers, enabling local control and seamless integration with various ecosystems. While Matter simplifies cross-brand compatibility and offers versatile control options, you need a controller or hub that supports the standard. It’s ideal if you want future-proof flexibility and easy management across different smart home products.

Voice Control: Get hands-free control of your lights with your voice via Amazon Alexa or Google Assistant; Perfect for times when your hands are full or entering a dark room

Brightness Dimmable: With a dimming range from 1% up to 100%, the Kasa Smart Light Bulb, Dimmable helps you set the right brightness for any mood or activity. Ideal for kitchens, reading nooks, living rooms, and bedroom lamps. Special Features: Dimmable + Energy Monitoring.
Why Some Smart Bulbs Need a Hub (and Others Don’t)
Direct-connect bulbs, like LIFX or TP-Link Kasa, communicate directly over Wi-Fi or Bluetooth, allowing them to join your network without extra hardware. This simplifies setup because you don’t need an additional hub. However, losing central control during internet outages can be a downside. The main consideration is how many bulbs you plan to install and how much network traffic you’re willing to handle—fewer bulbs mean less strain on your Wi-Fi. If you only need to control a handful of smart bulbs, direct connect options are straightforward and cost-effective. But for larger setups or more integrated smart home systems, using a hub might provide better stability and centralized management. Choosing between storage solutions can also help organize your space, but for lighting, a hub’s reliability often outweighs the extra cost. For precise control over your lighting, consider consulting a dimmer switch wiring guide for DIY installation tips. When weighing your options, consider how style and cost factors influence your overall room design, much like selecting window treatments for light control and privacy.
How Voice Assistants and Apps Actually Control the Light
Once you’ve set up either a direct-connect or hub-based system, controlling your lights with your voice involves a few key steps. While deciding whether a lamp or table suits your space prioritizes style, cost, and function, the technology for smart bulbs remains the same. When you give a command like “turn on the kitchen light,” your voice is picked up by your smart assistant, such as Alexa or Google Home. The assistant doesn’t understand the command directly; instead, it sends the instruction to the manufacturer’s platform. That platform then transmits the command to your smart bulb. This process ensures your voice command is translated into a digital signal that your bulb can interpret.
Before using voice commands, app integration is essential. You must pair your bulb with its manufacturer’s app first. For example, with Alexa, you add your device through the “Lights” section in the app. Naming each bulb accurately enhances command precision. Once paired, you can control brightness, change colors, or turn the lights off remotely through the app—all without needing a hub. This setup ensures seamless integration between your voice assistant, app, and smart bulb. For accurate positioning, you could also use a tape measure to ensure the bulb is properly aligned in its fixture.
How Much Power Does a Smart Bulb Actually Use?
A smart bulb’s standby power draw is typically between 0.2 and 0.5 watts. This small, ongoing energy use results in only a few cents added to your monthly electricity bill. When the bulb is turned on, it usually consumes about 6 to 11 watts, comparable to a traditional 60-watt incandescent bulb but with much greater energy efficiency. Over the course of a year, the cost of leaving a single smart bulb on or in standby mode is usually less than a dollar to a few dollars, depending on your local electricity rates. This minimal consumption is similar to how window valances add subtle style without significantly altering a room’s energy profile. For comparison, cutting LED strip lights incorrectly can damage the circuitry and void warranties, so proper techniques are essential. However, unlike a salt lamp, which poses potential safety risks if licked due to its salt content and moisture, a smart bulb’s standby power draw is completely harmless to interact with.
The total standby cost increases with the number of bulbs. For example, twenty idle smart bulbs draw roughly 10 watts collectively, which can add around $8 to $13 annually to your electricity expenses. Keep in mind that actual energy costs are heavily influenced by how often you use the bulbs actively, which makes usage habits more impactful than standby power alone.
To keep electricity consumption manageable, choosing LED smart bulbs is highly recommended because of their low power draw both when lit and in standby mode. Limiting the amount of time you have these bulbs turned on also helps control your energy expenses. While the standby power is minimal, it is a worthwhile trade-off considering the convenience, remote control, and automation benefits that smart bulbs provide.
How to Set Up Your First Smart Light Without the Headaches
Before you start, ensure your smart bulb matches your socket type, such as E26 or E27, and verify if it requires a hub or operates directly over Wi-Fi. Not all smart bulbs are compatible with every home system, so double-check compatibility to avoid setup headaches later. Turn off the fixture, let the existing bulb cool down, then carefully remove it. Screw in the new bulb tightly, restore power, and watch for it to flash, indicating it’s in pairing mode. Download the manufacturer’s app, create an account, and grant the necessary permissions. Keep your phone close while entering your 2.4 GHz Wi-Fi credentials to ensure a stable connection. Once paired, leave the wall switch on to allow remote control through the app. Test the basic on and off functions immediately to confirm successful setup—this prevents lighting issues caused by missed steps. For best results, refer to the best times for testing your outdoor smart lights to coincide with Pittsburgh’s Light Up Night schedule. Only proceed to add voice assistants after confirming the bulb works correctly in the app. After naming the bulbs in the app for easy identification, you can schedule and automate them for convenience. As you organize your setup, remember that a dedicated bedside fixture can simplify daily control, much like choosing a nightstand with a drawer keeps essentials within reach.

Higher Brightness: With over 1000 lumens (120V), these smart bulbs can brighten large space for your home. Get high brightness (75W Equivalent) and vibrant colors(CRI90+) while saving more on your energy bill.

16 Million DIY Colors: Govee smart light bulbs own millions of color and 54 preset scene modes, you can explore your favored one or pick one suits your moods most, bringing yourself a real fantastic lighting experience(Working Voltage: AC 120V).

【Alexa & Google Home Voice Control: Hands-Free Convenience】As smart bulbs that work with Alexa & Google Home, it supports voice commands to turn on/off, adjust brightness, and switch colors—perfect for cooking, baby care, or remote work. No hub required: download the AiDot App, integrate with Alexa/Google Home, then link the LED light bulbs to alexa devices or google—3 simple setup steps. It connects to 2.4GHz WiFi, ensuring stable, lag-free voice response for effortless control from anywhere
Smart Bulbs With Sensors: Motion, Daylight, and Automation
Because heat from the bulb can interfere with delicate sensing components, built-in motion detection inside a smart bulb is rare. Manufacturers usually rely on separate PIR sensors that detect infrared heat changes in a room instead of physical movement itself. Sensor placement is critical; battery-powered units like GE Cync’s wire-free model can be positioned almost anywhere, while Hue’s requires a hub for installation. These sensors integrate motion detection with daylight sensing, ensuring the lights only activate when needed—if the room is already bright enough, they won’t turn on. For automation, you can set specific time-of-day rules in the app, with some systems like Hue allowing up to ten different scene triggers, including softer night mode responses. The low-power wireless design simplifies setup, and scheduling deactivate windows help prevent false triggers during certain hours.

PIR Motion & Dusk to Dawn Activation: Motion sensor light bulb automatically lights up in the dark (8-16 feet) when motion is detected, and it turns off after 30-45 seconds. It activates only at night or in low light (<15Lux), remaining off during the day

AUTOMATIC SWITCH: Motion sensor light switch automatically turns the lights on when you enter the room and off when you leave, great for bathrooms, garages, laundry rooms, or closet light switches

Motion-Activated: The wide sensing angle of 180degrees detects motion up to 19.69ft-65.62ft away, detecting motion more accurately with its sensitive motion sensor. The adjustable timer can be set for tests, 1, 3 or 10 minutes.
How to Build Smart Bulb Routines, Scenes, and Schedules That Work
To build effective smart bulb routines, start by selecting a clear trigger—such as a specific time, sunrise, or a sensor event—using the app or a hub like Alexa. These triggers set the foundation for your automation. Next, link actions like turning lights on, dimming, or changing color to those triggers; this way, your lights respond automatically to your preferences. For accurate timing of natural events like sunset, you must enter your ZIP code in the speaker app to ensure location-based routines function properly.
Managing routines carefully is crucial. You can create multiple schedules for each device, but always check for conflicts to prevent one automation from overriding or interfering with another. For scene creation, group bulbs by room or zone, then assign a consistent name like “Movie Mode” for quick, easy recall. Time-based schedules work best for scenes: select your bulb, set the time, and choose the days you want the scene to activate.
For more complex automations, chain triggers—such as a door opening—so lights change color or brightness upon specific events. Always test new routines immediately after setting them up to ensure they work as intended. Before adding more automations, disable those that might conflict. Organize bulbs by zones to keep your system simple and manageable, reducing the risk of automation conflicts and making adjustments easier.

Voice Control: After being paired with the free Smart Life app via Wi-Fi, these smart bulbs work with Alexa and Google Assistant for hands-free voice control.


[Decorative RGB Lighting, Not for General Lighting] This E12 candelabra bulb features a CA11 design and measures 38 × 119 mm. Ideal for adding colorful ambient lighting to chandeliers, wall sconces, lanterns, and seasonal displays. Designed for accent lighting rather than primary white lighting. E12 base only—check your socket size before purchase. 2.4 GHz Wi-Fi only; not compatible with 5 GHz Wi-Fi. Not compatible with Tuya, Smart Life, or Thread.