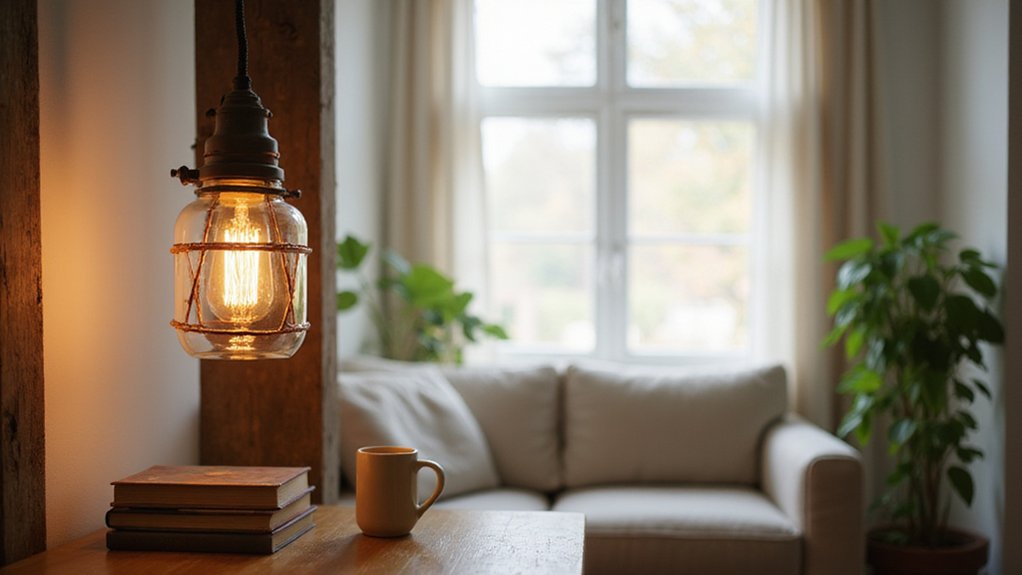
Looking to upgrade your space with a stylish pendant light but don’t want to spend a fortune? You can create eye-catching fixtures using everyday household items like bowls, jars, or baskets.
With a few simple tools and some DIY know-how, you’ll be able to customize size, color, and style to match your decor perfectly.
Keep reading to learn how to craft safe, beautiful pendant lights you’ll love.
Why Make Your Own Pendant Light?
Making your own pendant light saves money and offers complete control over its appearance. Store-bought options can be expensive, but crafting your own allows you to customize size, color, and style to perfectly fit your space. With simple fabrication techniques, you can produce a durable, high-quality fixture at a fraction of retail prices. Creating your pendant light also provides a satisfying sense of achievement, knowing it was built by your hands. Additionally, repurposing household materials like baskets, wire, or jars helps reduce waste and adds a unique, personal touch to your lighting. This project is more than just a lamp—it’s a distinctive focal point that reflects your creativity and style. For those seeking inspiration, reviewing top table lamps can help you decide whether a pendant or a freestanding fixture best suits your decor. Before starting, consider whether a vanity or desk is better suited for your room’s layout, as the pendant’s placement should enhance the functional purpose of the furniture beneath it. If you notice the light flickering after installation, it may be caused by incompatible dimmer switches rather than a flaw in your DIY design.
Gather Essential Materials for DIY Pendant Lights
To start building your DIY pendant light, you need to gather both electrical components and shade-building supplies. For the electrical part, select a pendant cord set, an LED bulb with low wattage, wire strippers, and electrical tape. These ensure safe wiring and proper illumination. Protective gear like rubber gloves and a drop cloth are also essential to keep yourself safe and keep your workspace clean. For a more reliable solution, consider using a can light conversion kit to simplify the wiring process for existing recessed fixtures. When selecting your bulb, look for top smart bulb lamps that offer better performance and value for your setup.
For the shade, consider your color scheme early; options include natural or dyed jute, twine, or yarn, or you might opt for paper that can be painted or patterned. Material durability is important—choose non-flammable options like metal or coated bamboo, especially near the bulb. Additional supplies include balloons for shaping, Vaseline to aid in adhesive removal, strong glue, and scissors for cutting. To ensure the pendant light doubles effectively as a gentle night light, prioritize bulbs with excellent quality and performance. Mounting hardware requires a screwdriver and a drill, while drywall anchors help secure the fixture without causing damage to your ceiling.

【Simple Solution】: Add bright light to the place where no lamps, or you need overhead lighting, with on-off switch, you don’t have to plug and unplug to control bulb each time. This plug-in pendant light cord is also a nice socket for custom projects, make your room lighting more creative.

Dimmer on off Switch -Choose your own brightness. Come with an on off dimmer switch in the light cord, you can adjust the brightness for your old fashion bulb with our cord kit.

【Easy Installation】The pendant light kit comes with all the installation hardware and instructions required for installation, you can install it easily. The length of the cable can be easily installed and adjusted as needed. You only need to hang it and install a light bulb to work normally.
Build a DIY Pendant: Cone or Paper Design
To build a cone- or paper-style pendant light, start with a sheet of cardstock, ideally 8.5 by 11 inches. This size allows you to test the shape before committing to your final material. Roll the sheet into an asymmetrical cone and secure it with tape, ensuring the shape is stable. At the apex, cut a small “X” and push a 1/4-inch to 1/2-inch machine screw through this hole. Align a second hole at the opposite side and secure it with a nut around the cord. Tighten everything firmly to avoid movement. For a leather version, bevel and burnish the edges before stitching with a cross-stitch pattern. When using vegetable tanned leather, you can cut the parts with a laser cutter and clean the stitching holes with compressed air and isopropyl alcohol-moistened yarn. You can also experiment with creative materials such as soaking textiles in gypsum, air-drying clay molded over a plastic form, or adding decorative patterns with paint pens. Be inventive with finishes like beveled seams to give your pendant a polished look. Similarly, maintaining your finished pendant can be done by using fabric roller blind cleaning methods to gently remove dust without damaging the material. When installing the pendant, use a level to ensure it hangs straight, just as you would when hanging a curtain rod. For the best results, apply a squeegee to smooth out any wrinkles or air bubbles in the material after securing it.

CARD SIZE: 8.5" x 11" letter-size cardstock sheets measuring 11.0 inches long & 8.5 inches wide provide ample space for booklets, report covers & brochures

NEENAH INDEX WHITE CARDSTOCK: The smooth texture and crisp white color of our 90 lb cardstock produces high resolution images and prints for attention-getting and professional documents

Smooth finish for superior printing results
Turn Bowls, Baskets, and Jars Into Lights
To turn bowls, baskets, and jars into lights, you need to prepare each for wiring carefully. For jars, select thick lids to ensure stability and drill a hole in the center for your cord kit. Clean the jars thoroughly to prevent debris from interfering with the wiring. You can cluster different-sized jars at varying heights to create an eye-catching statement piece, just as you would when adjusting grommet curtains to achieve the perfect drop length. When working with bowls, find the center point where you want the cord to exit. Drill a hole for a plug-in socket or insert a battery-operated LED push light inside for a wire-free option. Material pairing enhances the look: pair a fancy salad bowl with metallic gold interior paint to give it a chic, polished appearance. Choosing between single and double cell construction applies a similar logic to selecting the right opacity for your shade. Design customization allows for further creativity—clear plastic bowls can be hung using shower curtain rings for a DIY-style lamp. For baskets, choose lightweight materials like bamboo or seagrass to keep the structure manageable. Drill a centered hole in the base of the basket, then thread the cord through and secure it with shade rings. To maintain an elegant look, avoid plastic prints that can detract from the overall aesthetic. Use pipe plates if the basket is heavier to ensure the light fixture remains securely attached. For a secure mount, ensure brackets are rated for the weight of your fixture, similar to selecting a sturdy curtain rod bracket for heavy drapes.

Easily convert your Mason Ball Jars to Unique Conversation Pieces with our easy to use DIY Lamp Light Kit!

EASY TO USE - convert your Mason Ball Jars to Unique Conversation Pieces with our easy to use DIY Lamp Light Kit!

3 Table Lamp Bases in Different Sizes—Compatible with various ceramic vase and vase: Having studied the opening sizes of most ceramic jars, vases and decorative bottles, we have designed 3 metal bases with different diameters (6cm, 9cm and 12cm). Whether you’re using a narrow-necked vase or a wide-necked ceramic vase, this table lamp fitting will sit securely on the opening, providing you with a warm glow
Wire Your DIY Pendant Light Correctly
Start by turning off the breaker—don’t just trust the switch. Use a non-contact voltage tester to confirm the circuit is dead, ensuring safety before handling wiring. Always consult a licensed professional before attempting electrical work if unsure. Next, focus on color matching: connect the ceiling’s black (hot) wire to your fixture’s black wire, white to white, and the bare ground wire to ground. Strip about an inch of insulation from the ends of each wire, making sure the wire insulation remains intact to prevent exposing excess copper. When stripping wire, twist the strands tightly to keep them organized for a cleaner connection. For a clean, safe finish, carefully scrape away any adhesive residue from the wires using a utility knife or plastic scraper. Ensure brackets are spaced evenly along the rod to distribute weight properly and prevent sagging.
Bend the copper wire into a U-shape to fit into screw terminals easily. Secure each connection with a wire nut and give each a gentle tug to confirm it’s tight. Fold the wires neatly into the junction box, keeping the nuts upward for safety. When threading the pendant wiring through the stem or chain, leave approximately six inches of wire for working length. Finally, tighten the socket base screw to hold the wire securely and prevent twisting, ensuring a durable connection.

Product Contains: This package includes 2 PCS lighting chain links and 2 PCS eye nuts.

IDEAL ELECTRIC SET: Engineered using the premium grade material, perfectly finished, and equipped with a toggle switch for switch-on and switch-off purposes, this highly reliable track light adapter is great for illuminating seasonal decorations and brightening all craft projects!
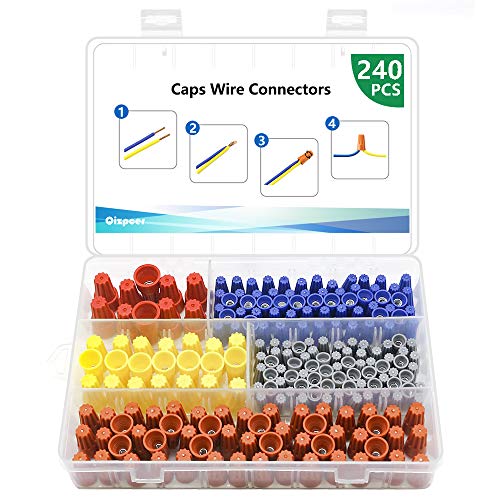
Easy Practical: Great for connecting wires without soldering; push the stripped conductors into the connector and screw on
Polish Your Pendant With Paint and Sanding
To achieve a smooth, durable finish, start by lightly sanding glossy surfaces with 220-grit sandpaper. This step improves paint adhesion by removing the shine and creating a slightly abrasive surface. Wrap the sandpaper around your finger or use a sanding block to reach into holes and edges, smoothing rough or sharp areas.
After sanding, wipe everything clean of dust and residue using a damp cloth or tack cloth. This ensures no particles are left behind that could interfere with the paint’s adherence or finish. Once the surface is clean and dry, apply painter’s tape to protective areas like cords and sockets, pressing edges firmly to prevent seepage and keep electrical contacts untouched.
When ready to paint, shake the spray can thoroughly to mix the contents. Hold the can about 8 to 12 inches from the surface and spray in smooth, sweeping motions. Using affordable spray paint keeps costs low while achieving a modern look. Apply multiple thin coats rather than one heavy coat; this prevents drips and results in a more even finish. Hold the can at a 45-degree angle to avoid paint entering the socket or bowl areas.
Let each coat dry for approximately 15 to 20 minutes before applying the next. If a finer finish is desired, lightly sand the surface with 400-grit sandpaper after the final coat to smooth out any imperfections. Allow the paint to cure for at least 24 hours before reassembling. Inspect the finish with a folded paper towel to catch any snags or rough spots, ensuring a professional-looking, durable result.
Hang Without Hardwiring for Renters
Renters can enjoy pendant lighting without hardwiring by using temporary installation methods. One straightforward approach is to install a swag hook directly into a wood joist by drilling a small hole and twisting in a screw. If no joist is accessible, toggle bolts can catch behind the drywall and secure the hook flush against the ceiling. For a damage-free option, high-strength Command strips or heavy-duty double-sided mounting tape can hold the fixture’s weight. To ensure a secure connection, wrap sturdy paracord tightly around the strip with electrical tape. However, relying solely on tape and command strips can cause failure if the tape unravels, so reinforcing with duct tape and allowing adhesive to set properly is critical for stability. This approach mirrors a key principle from choosing recessed lighting for low ceilings, where maximizing clearance and avoiding bulky fixtures is essential. Understanding the purpose of an end-of-bed bench can similarly guide your choice of temporary lighting to complement your bedroom’s scale and function. These methods provide a clean, professional appearance without requiring permanent changes, allowing you to enjoy pendant lighting worry-free. For the best results, always match the bulb size and base type to your fixture’s socket to ensure proper fit and brightness.

INCLUDES - 40 Clear Command Decorating Clips and 48 Small Command Clear Indoor Strips; use 1 clip for every 2 feet of lights

INCLUDES - 40 Clear Command Outdoor Light Clips and 48 Small Command Water-Resistant Strips

ONE LIGHT CLIP HOLDS ROPE LIGHTS UP TO 3/8-INCH THICK: One package of Command Clear Outdoor Rope Light Clips includes 12 clips and 16 small water-resistant Command Strips; one light clip holds rope lights up to 3/8-inch thick
Avoid Common DIY Pendant Light Mistakes
First, ensure your pendant light functions correctly and appears intentional by following essential safety steps. Turn off the power at the circuit breaker before beginning any work. Take a photo of the existing wiring—this helps you reconnect everything accurately later. Use a voltage tester to verify that the power is off.
Next, verify polarity and proper earth grounding with electrical tests. This ensures safety and compliance. Stick to installation guidelines for hanging heights: typically 28 to 34 inches above a kitchen island, which provides good task and ambient lighting without obstructing views. For general rooms, maintain at least 7 feet of clearance from the floor to prevent accidents. Push all wiring and connectors into the junction box after installation to ensure proper enclosure, preventing code violations and safety risks. When converting a can light, ensure the junction box has a proper cover to maintain fire safety ratings. Even simple fixtures require the proper drape over the junction box to avoid exposed wiring and ensure a clean finish.
Don’t misjudge the fixture size. Calculate the ideal diameter by adding your room’s length and width in feet, then converting that sum to inches. For example, a 10 by 12-foot room calls for a fixture around 22 inches in diameter. For islands, keep pendant width to about one-third of the island’s width to avoid overpowering the space.
Ensure your ceiling electrical box can support the weight of the fixture—consult the fixture’s weight specifications. Reinforce mounting points with structural elements if necessary to prevent tilting or falling. Finally, choose dimmer switches compatible with LED bulbs and select warm white bulbs in the 2700K to 3000K range to create a cozy atmosphere.