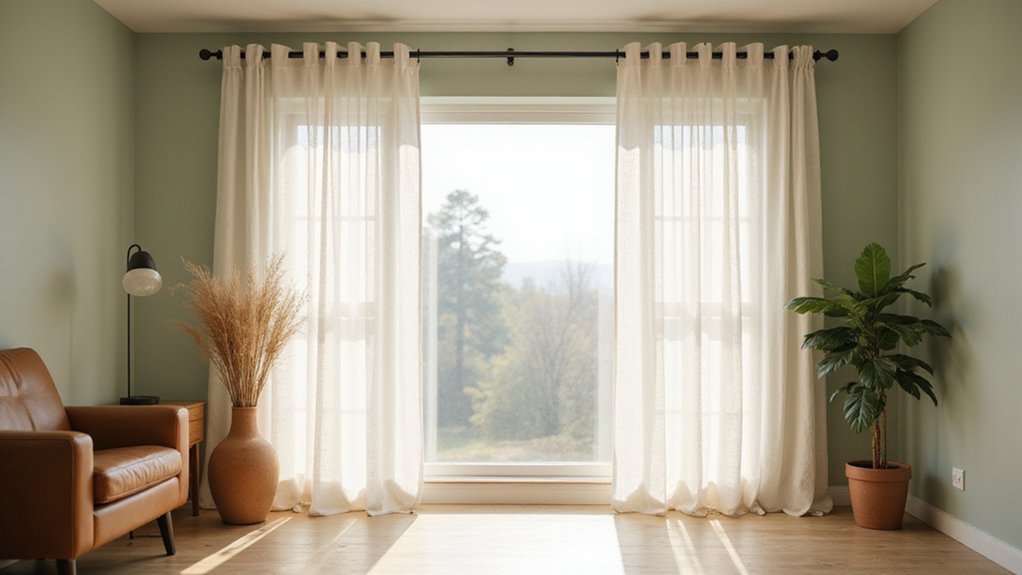
Getting bay window curtains just right can feel tricky with all those angled sections. The key is measuring each part carefully and choosing the right brackets and rods to fit the unique shape.
With a little patience, you can hang curtains that look both polished and functional.
The following steps will guide you through creating a beautiful, custom finish for your bay window.
Measure Each Bay Window Section Individually for Curtains
Measure each bay window section individually by noting the distance from its outer edge to the point where the sections meet. Include an additional 12-inch stackback allowance per panel to ensure curtains can be pulled back without blocking the window. Record these measurements as A-B, B-C, and C-D for each segment. Be sure to measure from point A to B for the first panel and continue the process for each subsequent section. For a budget-friendly approach, consider using easy DIY curtain rods made from materials like copper pipe or wooden dowels to save on hardware costs. To achieve a clean finish at the edges, first remove the old window film using a heat gun or hairdryer to soften the adhesive. If LED bulbs are installed nearby, ensure they are on a compatible dimmer switch to prevent LED bulb flickering from electrical interference.
Your fabric choice affects how much extra width you need to add. For light, unlined drapes, add 10% to each side to ensure full coverage. For blackout curtains with lining, add 15% per side. Additionally, add 20 to 30 centimeters on the first and last sides to facilitate neat stacking when curtains are open.
Precise measurement of corner span angles is essential. Identify an unobstructed horizontal band across the wall, mark a corner point, then measure 24 inches along each adjacent wall. Record the distance between these two points to capture the exact angle, which helps in creating a proper curtain fit around irregular corners.

Sturdy Construction: Crafted from high-quality steel 1 inch curtain rod is built to last. Its solid construction ensures stability , withstanding daily use and the test of time.

- Rust Protection and Easy Installation: Mayrhyme bay window curtain rods feature a zinc alloy connector design with cap covers, making them more convenient and quick to use compared to traditional iron screw connectors.

Package & Size Details:Set includes 2 Black pieces of corner curtain rod connectors (inner diameter 1 inch / 2.5 cm) Also included are 2 hex wrenches and 6 hex screws for easy installation. Designed to fit 1-inch (2.54 cm) diameter curtain rods with a precise inner diameter of 2.62 cm, ensuring a snug, stable fit that is neither too loose nor too tight. Please measure your rod diameter before purchase for best compatibility
Pick Curtain Rods and Brackets Built for Bay Windows
Standard straight curtain rods cannot navigate the angles of bay windows, so you’ll need specialized hardware like swivel elbows or hinged joints. These connectors link straight rod sections at each corner, allowing the rod to follow the window’s bends smoothly. For a typical three-section bay window, choose rods with three separate pieces that fit together seamlessly. Materials like wrought iron or steel are recommended for durability and strength, especially on larger or heavier curtains. Keep in mind that larger diameter rods, such as 2-inch ones, require fewer brackets—about four—compared to smaller ½-inch rods, which might need up to seven brackets for support. Many brackets come in various colors to match your decor style. Pre-assembled corner rods from brands like Rod Desyne can provide a precise fit, making installation easier. To assemble, lay everything out on the floor first, starting with the center section, then secure each segment with self-drilling set screws. Attach finials and brackets securely, ensuring everything is tight before hanging your curtains. Remember, only curtains on rings can move continuously across the entire bay, so plan your curtain style accordingly. For the best nighttime reading experience, consider pairing your bay window curtains with a top bedside lamp that offers adjustable brightness and warm lighting. For added visual appeal, choose a lava lamp that creates a soothing, retro glow in the corner of the room. A practical DIY tip is to measure each window section individually to ensure your custom rod pieces align perfectly with the bay’s unique angles.

Package: The package includes 1pcs corner curtain rod connector with 2pcs screw drivers.The curtain rod corner connector is suitable for curtain rods with up to 1 inch (2.54 cm) in diameter

Package & Size Details:Set includes 2 Brushed silver pieces of corner curtain rod connectors (inner diameter 1 inch / 2.5 cm) Also included are 2 hex wrenches and 6 hex screws for easy installation. Designed to fit 1-inch (2.54 cm) diameter curtain rods with a precise inner diameter of 2.62 cm, ensuring a snug, stable fit that is neither too loose nor too tight. Please measure your rod diameter before purchase for best compatibility

Flexible and Adjustable: Angle adjustment to meet your needs, from 90 degrees to 180 degrees.The screw in the middle is for fixing the corner connector, and the 2 screws on both sides are for fixing the curtain rod, firm and strong. The hole connecting curtain rod is wrapped with smooth angle, which makes it more fit and beautiful.
Mark Bracket Spots 4–6 Inches Above Each Window Frame Angle
Mark each bracket spot 4 to 6 inches above the top of the window frame angle. This height creates the illusion of taller ceilings, making your space feel more open. For low ceilings, placing brackets at this height works better than mounting just below the ceiling. Use a level to ensure your marks are straight and evenly spaced. For bay windows, it’s important to place brackets at each corner where the angled joints meet for added support. Place a bracket at each corner where the bay sections meet to support angled joints. If your curtain rod span exceeds 4 feet, add extra brackets along the length to prevent sagging and keep the curtains hanging smoothly. Double-check all markings with a level before drilling to avoid misalignment, ensuring your curtain hardware is both secure and visually balanced. When selecting hardware, remember that a chest of drawers often prioritizes vertical storage, but for curtain rods the same principle of balancing visual height and function applies. Consider using mesh storage bins for holding small curtain accessories like rings and clips to keep them tidy and accessible.
Install Curtain Rods for Bay Window Curtains
To install curtain rods for a bay window, you need an adjustable rod designed for angled sections or straight rods for multiple panes. Start by gathering a drill, level, tape measure, and anchors. Use the “high and wide” rule to determine the correct height; mounting a few inches above the window improves light blockage and proportion. Dry-fit the rods with finials to check that the 4-inch wall projection fits well. The kits include components such as finials, brackets, and joining pins to ensure proper assembly across sections. For easier installation, use a dimmer switch wiring diagram to ensure your lighting control is correctly positioned near the bay window. Remember to review the step-by-step guide for additional tips on securing brackets and adjusting angles. A best light books review suggests reading materials with clear instructions to achieve professional results.
Mark bracket locations carefully using a level to ensure proper alignment. Pre-drill pilot holes for each mark, then tap in the anchors flush with the wall. Secure the brackets by driving in the bottom screw first, then double-check alignment before tightening the top screw. If your bay window has multiple sections, connect each bracket with grub screws to lock in the angles. Slide the rod into the mounts, verifying that each section stays level as you go. Choose curtain fabrics that are durable and easy to clean if your rods will support heavy drapes, ensuring your window treatments stay looking good over time.

【Complete Installation Kit】Package Includes: 2/4 Wall Mounted Angled Brackets, 2/4 Swivel Connectors, Matching Screws & Expansion Anchors (Quantity varies by set). All hardware pre-packed for immediate drilling setup.

L-Shape corner curtain rod for windows: Boasts a 0-180° rotatable elbow connector, 2-sided curtain rod offers 2 versatile combinations to match bay windows, sliding doors or large windows with corners.

【0-180° Rotation】The bracket can be rotated 180 degrees and can support shower curtain rods of various angles, which is very convenient to use.
Pleat, Hem, and Hang Curtains on the Installed Rods
After installing and aligning your curtain rods, it’s time to pleat, hem, and hang each panel. Start by calculating your fabric gathering: multiply each bay section’s width by 1.5 to 2.5 to achieve the desired fullness. Consider that consistent brightness levels from high-performing night lights ensure uniform illumination, a principle that applies when setting pleats for even light distribution. Fold the curtain in half, then create accordion pleats from the edge inward every 4 1/4 inches, pressing firmly with an iron to set the pleats. For a clean finish, consider how alternating light control provides both privacy and a view, similar to the function of zebra blinds. Hem each panel to your chosen length, leaving an extra inch so they just touch the floor after settling. Attach the curtains to rings or hooks, clipping the front-facing pleats while allowing the rear pleats to hang loosely. If you prefer a sleek look, opt for hidden rings that keep the rod out of sight. For precise fits, always measure each bay section individually rather than assuming all angles are identical. This method ensures proper curtain stacking when open, maximizing light control and keeping the arrangement neat across all bay sections.
Adjust Rods and Attach Finials for Symmetry
To achieve a symmetrical look, you should start by dry-fitting the rods and attaching finials before mounting anything to the wall. Unpack all the rods, slip on your curtain rings, and test the extendable rod’s fit between the brackets without screwing them in. Adjust the rod length by pulling the ends out or pushing them in until you get an exact fit. For a modern look, consider choosing a blackout curtain fabric that matches your room’s color scheme for improved light control.
Check that corner connectors and finials align correctly with each rod section, considering your chosen curtain style. This pre-assembly step ensures your fabric won’t bunch unevenly later. Make sure there is equal space on both sides of the window to maintain symmetry. For a similar principle of balanced control, three-way dimmer switch wiring requires careful alignment of traveler wires to avoid uneven lighting. Using the correct type of bracket hardware can also simplify the adjustment process when fitting rods at odd angles.
Once everything is properly aligned, secure the rod sections and finials with self-drilling set screws. This locks everything in place and prevents loosening over time, giving your bay window a balanced and finished appearance.
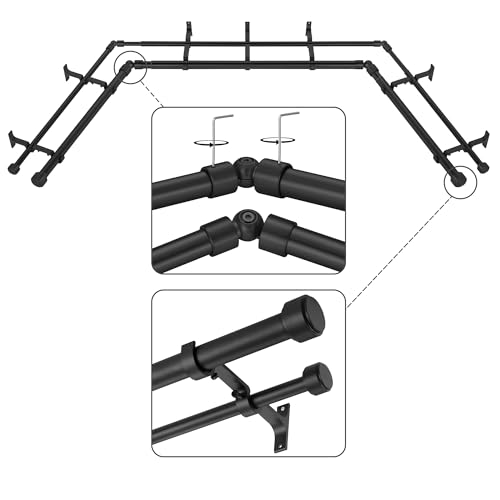
Double Curtain Rod for Bay Windows 3 Sided - Double curtain rods can be used to match two colors or two different styles of curtains to increase the visual interest and appeal of the window area.1-Inches front rod in is perfect for hanging room darkening or blackout curtain panels and 5/8 Inches back rod is ideal for hanging sheer panels.

Double Curtain Rod for Bay Windows 3 Sided - Double curtain rods can be used to match two colors or two different styles of curtains to increase the visual interest and appeal of the window area.1-Inches front rod in is perfect for hanging room darkening or blackout curtain panels and 5/8 Inches back rod is ideal for hanging sheer panels.
Double Curtain Rod for Bay Windows 3 Sided - Double curtain rods can be used to match two colors or two different styles of curtains to increase the visual interest and appeal of the window area.1-Inches front rod in is perfect for hanging room darkening or blackout curtain panels and 5/8 Inches back rod is ideal for hanging sheer panels.
Finish With Clip Supports for a Professional Look
Using clips with supports in the right way creates a professional, seamless look for your curtains. Just as in furnishing a room, weighing cost and function helps you choose the right clip supports for your bay window curtains. Acrylic wands support lightweight fabrics by nearly hiding their support system, which is perfect for a clean appearance. For heavier drapery, choose metal clips that match your curtain ring loops to prevent slipping. Attach 14 clips per panel at 4¼-inch intervals, focusing only on the front pleats to create an accordion-like fold. This ensures your fabric patterns stay uniform and your colors remain consistent. You can vacuum the curtains with a brush attachment to remove dust before ironing, as recommended for fabric blinds.
Before attaching the clips, fold your curtains in half and press the center pleat with a high-heat iron to smooth out wrinkles. Pre-attach the clips to the rod first to make installation easier and more accurate. When everything is in place, adjust the bottom accordion pattern, straighten the fabric, and fluff it to add volume. Step back to evaluate your work—your curtains will look polished and symmetrical, highlighting your bay window’s beauty.
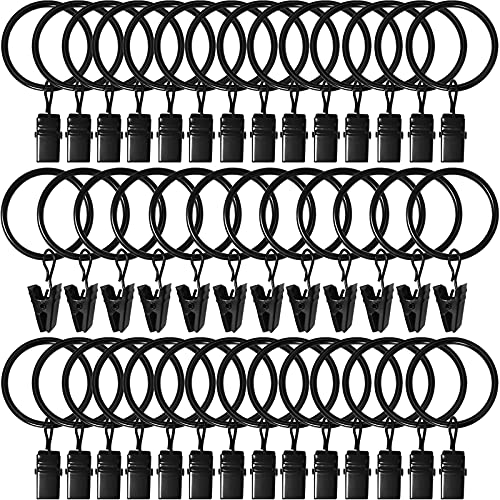
CURTAIN RINGS CLIPS PACKAGE: Set of 40 strong curtain rings with clips. Clip rings for curtains decorative drapery window.

【Curtain Rings with Clips Package Including】➤This set comprises 42Pcs clip rings curtains.These curtain clips with rings are with high quality and multi-purpose,which perfect for hanging your daughter's bows headbands,photo,party light,Christmas light hangers,lanterns,tent,object storage etc.

14 rings with clips to hang curtains