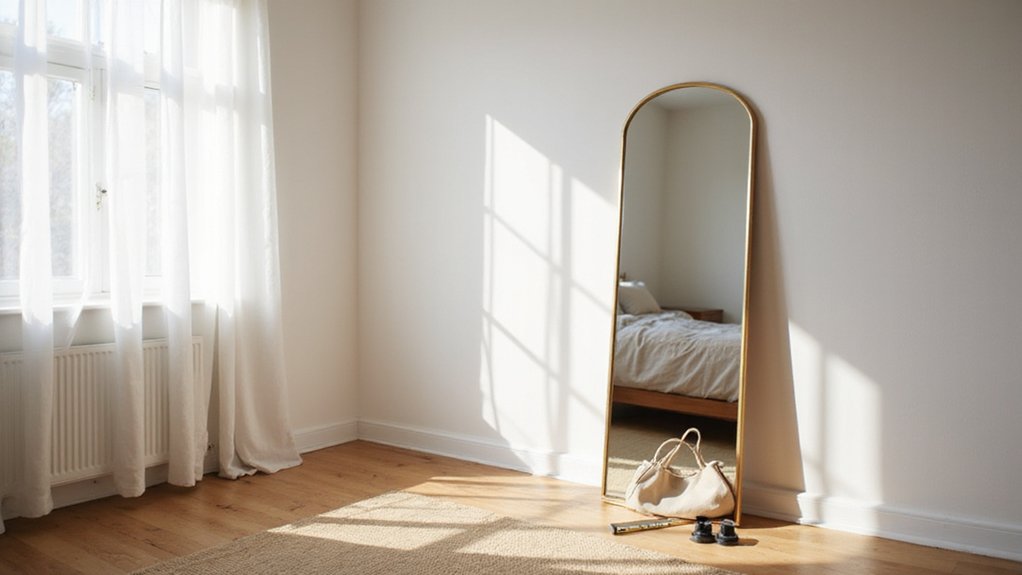
If you’ve ever wondered how to hang a full-length mirror securely without it falling or tilting, you’re in the right place. A properly installed mirror can be a stylish addition to your space and safe to use.
In this guide, you’ll learn how to find the right spot, choose the best mounting hardware, and prevent wobbling, so your mirror stays perfectly in place.
Keep reading for all the tips you need to get it just right.
How Much Does Your Mirror Weigh? Start Here
The weight of your mirror is significantly affected by the frame style. A hardwood or metal frame can add substantial pounds, sometimes pushing a 27-pound glass piece over 35 pounds total. This matters because it influences your choice of wall anchors and mounting hardware. If you are choosing a mirror for a room that also needs a vanity or desk, consider how the wall anchor requirements might differ from those of lightweight furniture. Additionally, the frame also contributes to the overall style and cost of your mirror, making it a key factor in your decision. If you are building a mirror setup near closet shelves, similar wall anchoring considerations apply.
For example, a standard 36 by 72-inch mirror with 6 mm thick glass and a frame can weigh between 90 and 125 pounds. To estimate your mirror’s weight accurately, use the formula: length multiplied by width multiplied by thickness multiplied by the density in consistent units. Alternatively, you can rely on quick estimates per square foot. Always factor in the frame’s weight when planning your wall mounting solution.

Complete Value Pack: each kit includes 20 durable mirror clips, 20 heavy duty screws, and 20 sturdy wall anchors; With enough hardware for multiple projects, it's the nice all in one solution for your home renovation needs

Anchor and screw Kit Includes: 25 Pcs Zinc Metal Drywall Anchors, 25 pcs #8 x 1-1/4'' Phillips Screws

Dual Screws Mounted Hardware: The old designs are only can be fixed by one screw, but each of this new upgraded mounting hardware can be fixed by 2 screws. So the mirror will be more firmly fixed on the wall.
Where to Place a Full-Length Mirror: Height and Centering
To place a full-length mirror for the best look and function, center it at your standing eye level, which is typically between 57 and 65 inches from the floor. This ensures comfortable, distortion-free reflections for most people. Position the bottom edge 6 to 12 inches above the floor to allow full-body coverage, including your shoes. Adjust this height based on your height: if you are under 5’3″, lowering the bottom to around 29 inches can be more appropriate; if you are over 5’9″, raising it to 35 to 39 inches might work better. Always consider your wall height and visual balance—leave about 6 to 12 inches of space above furniture to keep the mirror anchored and prevent it from appearing as if it’s floating. Measure the mirror’s center, mark the desired height on the wall, and verify the view before drilling or mounting to ensure the placement suits your space and aesthetic preferences. If your mirror is positioned in a room with dimmable LED bulbs, ensure the LED bulb flickering is not caused by an incompatible dimmer switch, as this can create a distracting visual effect. When planning the mirror’s placement, consider how the curtain rod height above the window will affect the room’s overall visual balance and symmetry. For a clean and dust-free reflection, regularly dust the blinds using a microfiber cloth or a vacuum with a brush attachment to prevent buildup on nearby surfaces.
How to Find Studs and Choose the Right Anchors
Once you locate a stud, confirm its center by marking both edges and measuring the midpoint. This ensures your fasteners go directly into the strongest part of the wall. Whenever possible, drive screws straight into the stud for maximum support, especially for heavy or valuable mirrors. If hitting a stud isn’t feasible, choose heavy-duty anchors suited to your wall material—never rely on weak plastic anchors, as they lack the strength needed for heavy loads. Pre-drill pilot holes for your screws to improve alignment, reduce the risk of splitting the wall material, and ensure the mirror hangs securely. Use a tape measure with marked increments to measure 16 inches from an identified stud to locate subsequent ones, verifying each spot with a magnet for confirmation. For a more budget-friendly approach to wall upgrades, consider DIY installation to save on professional labor costs. Applying basic carpentry skills can help you build custom supports for the mirror, similar to constructing a frame for a closet organizer. When cleaning the wall surface beforehand, use a squeegee and soapy water to remove dust and ensure the mounting tape adheres properly.

COMPLETE SET FOR VARIOUS MOUNTING NEEDS: This Heavy Duty Toggle Bolts Assortment Kit includes 164 pieces of drywall anchors, toggle bolts, and screws in multiple sizes to fit different installation requirements. The set contains 40pcs #6×1", 40pcs #5×1", 40pcs #7×1", 20pcs #6×1-1/5", 12pcs #8×1-3/5", and 20pcs black #8×1-1/4" wall anchors, along with toggle bolts in 1/4" (4pcs), 3/16" (12pcs), and 1/8" (16pcs). Ideal for mounting shelves, mirrors, or curtain rods.

Complete 160-Piece Kit for All Your Hanging Needs: Includes 80 heavy-duty steel self drilling drywall anchors (0.47x1.18inch) and 80 hardened screws, all neatly organized in a durable plastic storage box. No more searching for mismatched hardware - everything you need is ready in one kit for picture frames, shelves, curtain rods, wall decor, and more

MULTIPLE SIZE OPTIONS – This heavy duty toggle bolt assortment includes 3 sizes (1/8 in, 3/16 in, 1/4 in) to help you choose the appropriate size for drywall anchor applications based on wall type and intended use. Suitable for selected hanging projects such as hanging pictures, curtain rods, and plants when used correctly. Please refer to the size chart and installation guidance before use.
Choose the Best Hardware for Hanging Your Mirror
Choosing the right hardware is crucial because it ensures your mirror stays securely mounted without risking damage or injury. Always match the hardware’s rated capacity to your mirror’s weight, ideally choosing hardware rated at least 25% higher for safety margins. Wire-hung mirrors require two hooks spaced evenly for balanced support, while heavier mirrors benefit from French cleats that distribute weight evenly along the wall, with some 18-inch French cleat brackets supporting up to 300 lb for large mirrors. Material considerations are also important: drywall may need anchors or toggle bolts, while masonry walls require specialized hardware like masonry anchors. Your aesthetic preferences matter too—cleats remain hidden for a clean look, whereas D-rings are more visible but versatile. Always read the packaging for explicit weight limits and wall compatibility. Adding bumpers or felt pads can prevent scratches and shifting, keeping your mirror stable and perfectly level. Never guess—pick hardware rated for your mirror’s weight, suited for your wall type, and aligned with your design goals. For a budget-friendly approach similar to DIY shoe rack projects, you can use simple wood cleats or repurposed lumber to create a custom hanging system. Ensure bracket placement follows even spacing principles similar to those used for curtain rods to maintain balance and stability. When joining multiple sections of a large mirror frame, consider using soldering iron techniques for secure metal connections, just as you would when joining LED strip lights.

Each set comes with 12 heavy duty picture hangers,48pcs screws,and 1 bubble level.The cost-effective bulk packaging is ideal for personal use,ensuring you have enough hardware for all your picture and mirror hanging needs. With a universal fit for all frame sizes and mirror types, this picture frame hanging kit is the ultimate one-stop solution for all your wall hanging requirements.
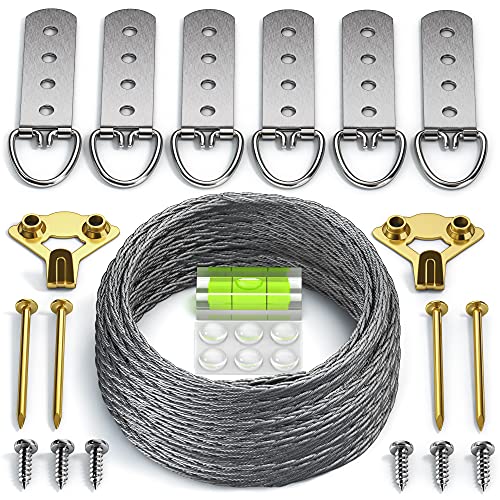
★ ALL-PURPOSE PICTURE HANGING TOOL KIT – Ideal for every DIY project this kit to hang pictures comes with all the tools, hardware, and accessories you’ll need to hang frames, clocks, mirrors, or pictures on drywall, studs, or wood surfaces.
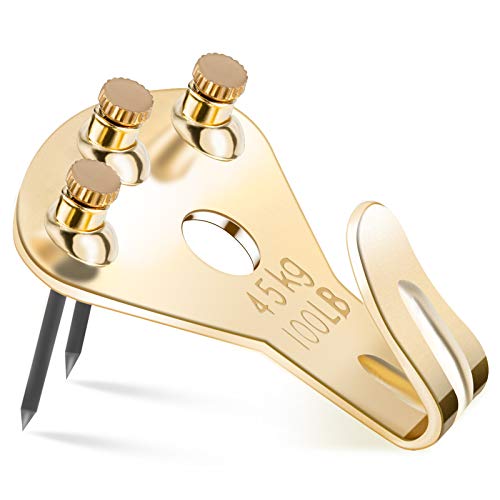
【HEAVY DUTY PICTURE HANGERS】Our picture hangers can support up to 100lbs, these picture frame hooks can steadily hang heavy pictures, clocks, mirrors.
How to Mark Hook Placement Without Mistakes
To mark hook placement accurately, start by measuring the distance from the top edge of the mirror to the hanging point, such as the highest part of a D-ring or the support points on a wire. This measurement is crucial because it ensures the hooks will align correctly and keep the mirror level. Use a tape measure for precise results rather than estimating, as small errors can lead to crooked displays.
Next, draw a level horizontal line on the wall at your desired top position. Center this line from the wall’s midpoint to ensure symmetry. To transfer the mirror’s hanging points, apply painter’s tape to the back of the mirror, mark the hook locations directly on the tape, then carefully transfer those marks to the wall line. For two hooks, record both the horizontal spacing and the vertical drop from the hanging system. For secure support, use drywall anchors to ensure the hardware can hold the mirror on drywall or plaster walls. Similar to choosing between single and double cell cellular shades, weighing the support structure against the weight of the object is essential for a stable result.
Only mark where the hooks will sit, not the screw heads. Double-check the measurement from the top of the mirror to the hanging point against your marks. Verify that your level lines are accurate and that the spacing matches the hardware. This method reduces mistakes and guarantees a professional-looking, secure installation.

Tough steel hooks that dig deep into drywall - Hold up to 40 lbs each, built to last through all your hanging needs.

VERSATILE SIZES FOR VARIOUS PROJECTS – This wall anchors and screws assortment kit includes five essential sizes (#5*1",#7*1",#6*1-1/5",#8*1-3/5") It works for all types of hanging installation needs, and pairs great with a drywall repair kit. the plastic wall anchors and phillips wood screws are neatly packed in a compact organizer box.

Secure Your Decor with Ease: When it comes to keeping your home organized and showcasing your valuable decor, finding reliable wall mounting hardware is essential. That's precisely where QUALIHOME double headed wall screw anchors step in. These drywall screws provide exceptional security for all your wall additions, ensuring they remain securely mounted.
Secure the Hardware and Hang the Mirror Safely
After marking your hook positions, ensure you choose hardware rated well above the mirror’s weight to create a safety margin. For mirrors over 40 pounds, opt for cleats or heavy-duty brackets rather than basic hooks, which may not provide enough support. If your mirror’s frame has D-rings, screw them directly into the solid frame material, not the backing board, to avoid weakening the mount. Check your wall’s compatibility: if you can’t hit a stud, use toggle bolts rated up to 50 pounds for drywall installation. For masonry walls, drill with a hammer bit and insert expansion anchors designed for that surface. Always drive pilot holes into studs to prevent splitting. To choose the perfect storage solution for your baby’s essentials, refer to the best nursery dressers reviewed in our guide. Tighten the wall-side cleats firmly before attaching the mirror. When selecting your lighting for the room, consider whether soft white or warm white bulbs best suit the mirror’s reflective qualities. Finally, gently shake the mirror to verify it is secure; no shifting indicates the hardware is properly installed. Always use step-by-step instructions to check that each connection is tightened in the correct order before final testing.

For 1/4" Thick Mirrors: Designed with a 0.35" gap, these frameless mirror clips ensure a proper and precise fit for 1/4" thick mirrors or photo frames. Ideal for vanity, gym, yoga studio, dressing, and salon mirrors in residential and commercial settings

【Strong & Secure Hold】 Made of premium stainless steel with a durable black finish, "J" mirror clips provide reliable support for large and heavy frameless mirrors.

[ 6mm Thick French Cleat Heavy Duty ]: 18 inches long, made by heavy duty aluminum with 6mm thick, the french cleat supports about 140 pounds max. Plastic anchors in the hardware kit make the screws fixed better in the wall, and help to provide secure and reliable hanging.
Level, Add Bumpers, and Check Stability
Start by leveling the mirror before marking or hanging. Place a level on the wall to create a straight reference line, then transfer your screw marks carefully. For two-point systems, measure the spacing between hooks and mark the center point to ensure accurate placement. Using tape as a temporary guide can help keep your measurements aligned during the process.
Next, add rubber or felt bumpers near the lower corners of the frame. These bumpers protect the wall from scratches and paint transfer, reduce the risk of the mirror slipping or tilting, and help create a small gap for airflow. This helps prevent moisture buildup, which is particularly important in humid environments. For plaster walls, avoid using drywall hangers and instead use toggle bolts for heavy items to prevent damage. Similarly, when wiring any nearby LED strip lights, ensure the power connections are secure and the adhesive backing is firmly attached to avoid sagging or loose wires. For a professional finish, consider matching the wall mounting approach with the switch wiring to ensure all hardware aligns safely. Before beginning electrical work, always turn off power at the circuit breaker to avoid electric shock and ensure safe handling.
After hanging the mirror, check its stability. Gently nudge the frame to make sure it doesn’t rock or shift. Confirm that the frame sits flush against the wall and that the hardware remains seated properly. Re-level the mirror as needed, making small adjustments for a perfect, straight finish. Finally, verify that the bumpers are symmetrical to prevent tilting and ensure the mirror is secure, straight, and protected.
Common Mistakes That Leave Your Mirror Crooked or Unsafe
Even with careful leveling and bumpers in place, common mistakes can still leave your mirror crooked or unsafe. Hanging it too high creates a large floor gap, making it ineffective for checking your shoes. To avoid this, align the center of the mirror near eye level for practical use. Weak hardware is a major glass safety risk; plastic anchors or flimsy hooks can fail under weight. Always choose hardware rated for the mirror’s actual load and secure it into wall studs or heavy-duty anchors. Ignoring your wall type is another mistake. Installing on drywall without proper anchors can cause the mirror to fall. Check your wall material in advance and use the correct anchors. Skipping alignment checks can result in a crooked installation. Plan your height and drill points before mounting, and avoid repositioning, which can damage walls. Lastly, avoid placing mirrors in areas like walkways where they pose collision hazards. Leave at least 18 inches of clear space in front of the mirror to ensure safety and a polished look. For optimal nighttime visibility, consider night light reviews that evaluate brightness and safety features alongside your mirror placement.