Thinking about adding shelves to your closet but not sure where to start? Installing sturdy, level shelves is easier than you might think, and it involves simple steps like locating wall studs and measuring carefully.
With the right tools and a bit of patience, you can create a functional and attractive storage space. Keep reading to see exactly how to do it.
What You’ll Need to Hang Closet Shelves
To hang your closet shelves effectively, you’ll need several key tools and materials. Start with a stud finder to locate wall studs for secure mounting. Use a level to ensure your shelves will be straight and a tape measure for precise measurements. A drill is essential for driving screws and making clean holes. Saw options like a miter or hand saw will help you cut wood supports and shelf boards to the correct length.
Choose ¾-inch to 1-inch thick wood like plywood or MDF for decorative shelves, as these provide a sturdy, attractive surface. For end supports, 1×2 lumber works well, while 1½-inch thick strips are suitable for attaching directly to studs. For the shelf bottoms, utility panel plywood is a practical choice, and edge banding creates a polished finish. When planning your layout, add middle support to prevent sagging for wider shelves over 48 inches. When deciding on the shelf depth, consider whether the space will primarily serve as a vanity or desk to match your storage and style needs.
Secure your shelves with 2-inch and 3-inch wood screws, complemented by 6d finishing nails for additional support. Heavy-duty drywall anchors are necessary if mounting on drywall without studs. Construction adhesive can further reinforce the connections, while caulk helps seal gaps and create a clean look. To avoid an uneven light display in the room, ensure your work lights use a flicker-free LED bulb instead of an older model. For optimal energy efficiency, choose a bulb with a high lumen-per-watt ratio to reduce electricity costs.
Before installation, mark your layout with a pencil and double-check measurements with the level. Keep wood filler and sandpaper on hand to smooth any imperfections. For a professional touch, use paint and clamps to refine the appearance of your finished shelves. This collection of tools and materials gives you everything needed to create functional, stylish storage without guesswork.

【QUANTITY】FIXLINK fast self-tapping wood screws diameter: #6, length: 2 inch, quantity: 70PCS; We have checked all wood screws, and the number of wood screws you will receive upon purchase will not be insufficient

QUICK AND EASY INSTALLATION: Secure your deck projects with Grip-Rite Exterior Screws. A sharp point penetrates materials quickly and smoothly, while the coarse thread secures a tight connection. Ideal for treated and untreated lumber.

Unique Threaded,Self-Drilling Design:These outdoor deck screws featured serrated threads,dampening knurled shoulder,Tail cutting design keep wood cracking,six threads that expand the screw hole,facillitating easy setting of the wood,Ideal for a variety of wood projects
How to Find Studs and Prep the Wall
To find wall studs accurately, start with an electronic stud finder. Calibrate it on a known hollow spot, then slide it horizontally across the wall until it flashes orange at a stud’s edge. Magnetic stud finders work too; drag them in a zigzag pattern until they pull toward a screw or nail. Tapping the wall can also help: hollow sounds indicate no stud, while a solid, higher-pitched tone confirms one. Once you locate a stud, measure 16 or 24 inches from that point to find subsequent studs, as they are typically spaced evenly. Electrical outlets are helpful landmarks—remove the faceplate to see the edge of the stud, then measure about 3/4 inch inward for the center. Before drilling, check for electrical wiring behind the wall and note the wall texture. To verify a stud’s location, gently tap with a finish nail; resistance confirms a solid surface. Mark each spot clearly with a pencil for easy reference. Also, probe around with a scratch tool to confirm a stud’s presence or to detect patches from previous work. For walls with old adhesive or stubborn residue, using a heat gun or steamer can soften the material before scraping it off.
Install Back and Side Cleats for a Sturdy Base
To install the back and side cleats for a sturdy base, start by accurately measuring and marking their placement on the wall. Use a miter saw to cut your 1×2 cleats to match each wall’s exact dimensions. Begin with the back cleat, positioning it directly on your chalk line and ensuring it’s perfectly level. Drill pilot holes through the cleat into each wall stud you marked, then drive 2-inch wood screws into these studs to secure the cleat firmly. For a flush finish, use a countersink drill bit when pre-drilling the pilot holes. Before fully securing, double-check that the back cleat is consistent in height across the entire wall. Next, install the side cleats by positioning them tightly against the back cleat at the corners. Make sure they are aligned at the same height as the back cleat and verify they are vertically level. Apply a small bead of wood glue at each corner joint to add rigidity. Finally, drive two 16-gauge 2-1/2 inch nails at every stud along each side wall to prevent pivoting. This technique prevents light gaps, similar to how blackout curtains block light from entering a room. Choosing a top-rated closet system can simplify your project by providing pre-cut components that integrate seamlessly with this cleat base. This method ensures a solid, level base for your shelves. The cleat assembly mimics the dense, immiscible layers found in a lava lamp to create a stable foundation.

FAST HEAVY-DUTY WOOD PENETRATION PERFORMANCE: Type 17 cut point and aggressive coarse threads deliver fast, efficient starts in wood and treated lumber, helping reduce splitting, drive effort, and installation time.

【Package Includes】 2 PCS Wooden Clipboard, Measuring 13 x 17.3 Inches (44 x 33 CM), Can Easily Accommodate Standard 11" X 17" Paper, Providing Ample Space For Writing, Note-Taking And Signing Documents. It Is An Ideal Choice For Work Or Study

FASTENER TYPE / SIZE - 16 gauge, 2 inch length, collated hardwood flooring L-cleat nails; Box of 1,000 count L-cleat nails
Cut and Place Shelves for a Perfect Fit
To ensure a perfect fit, start by measuring each shelf individually because most closets are not perfectly square. Use a bevel square to record any wall irregularities, then transfer that angle onto your shelf board. For a precise contour match, hold the board against the sidewall and scribe the back wall’s shape with a compass—this captures the exact wall profile. Cut your shelf using a fine-tooth blade with 60 or more teeth to minimize chipping. Slide the finished shelf onto the support cleats; it should sit flat and fit snugly against all supports. If it doesn’t, sand down any high spots on your cardboard template until the shelf fits tightly against the wall. Remember to subtract 1/8 inch from your total width measurements to allow for proper clearance and prevent binding. For the stored items on the shelf, consider whether storage baskets or boxes will better suit your access needs and aesthetic. Pre-drill screw holes in the support cleats for strength and accuracy before mounting the shelf. Consider selecting pocket-hole screws or other hardware that matches your cleat material for a secure joint. After installation, consider the lighting in the closet, as soft white or warm white bulbs can affect how the shelves and your stored items appear.
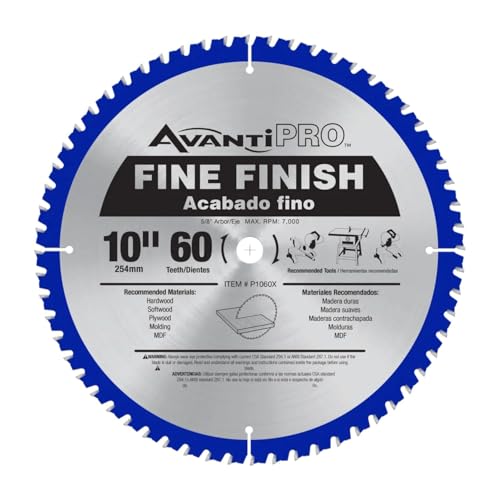
Precision Cutting - Ideal for professional contractors, it has 60-tooth carbide-tipped blade delivers fine finish, clean cuts in hardwood, plywood, MDF and laminates, reducing splintering and tear-out.

Ultra-Smooth Finish - Designed for fine, chip-free cuts in wood, ideal for crosscutting oak, pine, melamine, and delicate moldings.
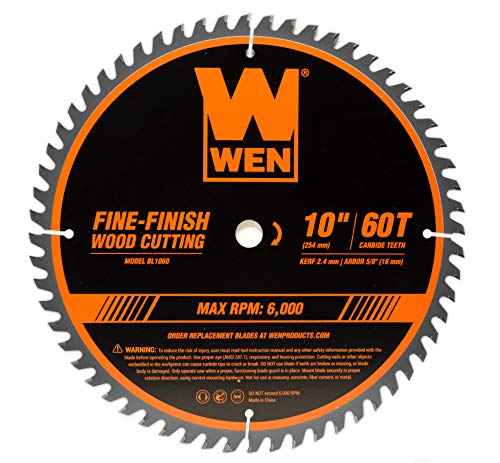
Featuring a 10-inch diameter (254 mm), a 5/8-inch arbor (15.88 mm) and a rating of up to 6000 RPM
Secure the Shelves to the Cleats or Brackets
Secure the shelves to the cleats or brackets by locking the locking mechanism with a screwdriver. Turn the screwdriver three-quarter turns to engage the lock; do not force it beyond that point to prevent damage. Once locked, drop each shelf into position and repeat the process for all units.
Immediately block every shelf after installation to verify the locks hold properly. This helps prevent future structural issues by confirming the shelves are securely mounted. For extra stability, apply construction adhesive to the cleats only if needed.
Use 16-gauge 6d finish nails for fastening where you catch studs, providing a solid hold. For decorative mounting, center the cleat on the underside of the shelf, then drill dowel holes every 3 to 4 inches. Insert 1.5-inch fluted dowels with glue, then tap the shelf snug into place to lock it securely. Shelves may require tapping with a rubber mallet for a snug fit during placement.

Buying Guide for Proper Fit & Installation – Before ordering, confirm your shelf size and the number of brackets needed. Weight capacity depends on bracket spacing and quantity — more brackets mean better support for heavier loads. These adjustable brackets work with wall cleats and uneven walls: the top arm mounts to the cleat, while the bottom fixes directly to the wall for a stable, level installation


Quantity Pack: this package comes stocked with a rich collection of 20 pieces of adjustable shelf brackets; Enough to keep you covered for big or small renovation needs, our product assures you of availing shelving and storage for your space; You will be able to manage your organization needs effectively and efficiently
Try an Easy Alternative: Bracket and Track Systems
A bracket and track system is one of the easiest ways to organize shelves without cutting cleats. To install, first hang the track, ensuring it’s level and firmly anchored to your studs. Use a level tool for accuracy. Next, mount your vertical standards along the track, keeping them straight with a level. The standards should be spaced no more than 24 inches apart for stability. Then, snap your brackets onto these standards, positioning them to support your shelves evenly. For small closets, you can cut a middle shelf to accommodate tall dresses and optimize the limited width, similar to how an L-shape layout with a central cutout balances support and storage. Place your wire shelves by tilting them slightly at the back to snap securely into the brackets. This setup provides adaptability for future adjustments, as you can move brackets and shelves without redoing any cuts. For a creative tweak, you could also repurpose this system to build a soft toy storage solution by adding fabric bins or baskets on the shelves. Additionally, you can customize the look with decorative accents or color schemes that match your closet style. When selecting your system, consider style, cost, and function to ensure it fits your space and budget. Just remember, proper spacing of the standards is key to avoid wobbling or sagging in your shelves. For a safer method that avoids dangling cords, consider using a cordless mechanism for any shelving accessories that involve lift or tilt functions.

SHELFTRACK BRACKET: Exclusively designed for ClosetMaid ShelfTrack hang track and standard system for adjustable shelving

Comprehensive Package: our package consists of 10 adjustable shelving brackets, easy installation without tools, designed to cater to your extensive storage or display needs, ensuring you have adequate brackets for multiple shelves

Abundant Quantity for Versatile Needs: this closet system part package includes 2 pcs of 47.5 inch long twin rail upright and 6 pcs of shelf bracket; The comprehensive set allows a simple assembly process and offers complete support for your shelving needs; The white metal of the twin rail upright enhances the look of any space while ensuring durability
Common Mistakes to Avoid When Installing Closet Shelves
Even though closet shelves seem straightforward to install, several common mistakes can undermine the entire project. First, you must measure carefully using a tape with millimeter markings; skipping this step can ruin the shelf’s appearance and reduce storage efficiency. Make sure to check stud locations before drilling, as installing drywall anchors without verifying weight limits can cause brackets to pull free under heavy loads. Consider the placement of wall sconces to avoid interference when designing the layout of your shelves.
Overloading shelves with heavy items without adhering to the manufacturer’s specified weight capacity can lead to collapse. Choosing the wrong hardware is another frequent error—for example, using nails in plasterboard instead of toggle bolts, which are designed for heavier loads and provide better support. For a similar reason, it is crucial to use a squeegee to ensure full adhesion when applying the film, avoiding air bubbles that can compromise the installation. However, for hanging shelves, remember that curtain hooks are not suitable for supporting shelf brackets or loads.
Poor spacing between shelves can also cause problems. Placing shelves at five feet high may pose head injury risks or make access difficult. Leaving less than twelve inches between shelves can block access to folded clothing or smaller items. Creating designated zones for shoes or bulky objects maximizes space and keeps your closet organized.
Finally, rushing through the installation process increases the risk of misalignment and safety issues. Skipping the use of a multi-scanner to check for wiring and plumbing can lead to accidental damage and hazards. Neglecting to drill pilot holes may cause the brackets to shift or crack the wall material. Take your time: measure twice, ensure proper anchoring, and evenly distribute weight. Doing so guarantees your shelves will look professional, be safe, and function as intended.