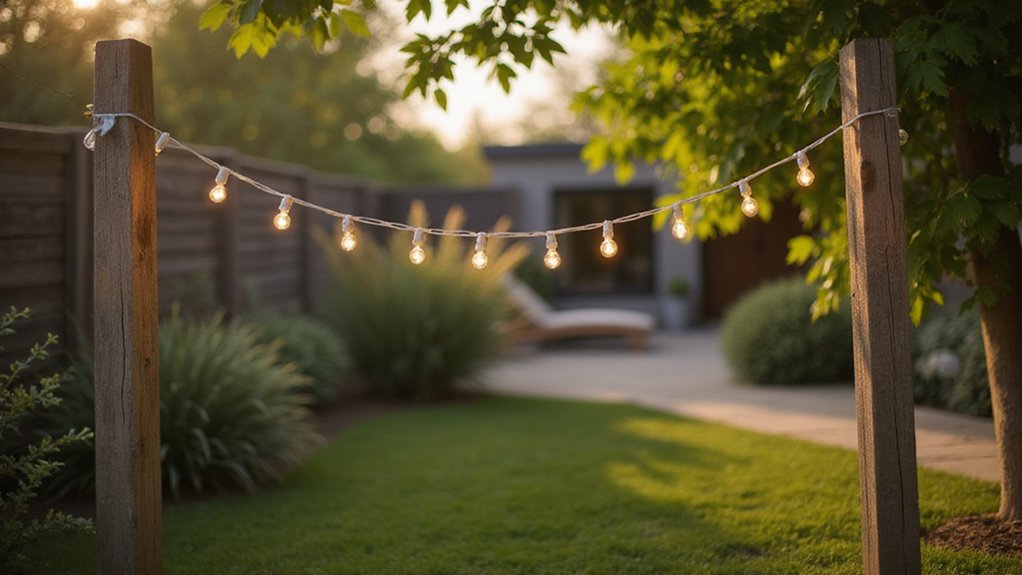
Wondering how to hang string lights outdoors without a mess of tangled wires or uneven drapes? The key is careful planning and the right tools, so your lights look cozy and inviting.
Once you measure your area and choose the right fixings, you’ll be able to create a charming glow that transforms your space.
The steps below will guide you through every part of the process.
Measure Your Space and Locate the Power Outlet First
Measuring your outdoor space and locating the power outlet are crucial steps before hanging your lights. Start by running a tape measure along every intended path, including zigzags or crisscrosses, to ensure the lengths match your plan. Add an extra 10–15% to each measurement to account for sag, slack, and movement of the strands. Sketch a simple diagram to mark anchor points and count the number of strands needed. When you begin hanging, connect the male plug of the first strand closest to the outdoor outlet. If your string lacks built-in end-to-end connectors, run an extension cord to connect secondary strands. Confirm power stability by switching outlets if necessary, especially when using incandescent bulbs, to prevent electrical disruptions. Taking these measurements upfront saves you from reworking your setup later and ensures your lighting fixtures can reach their power source comfortably. You can keep your light strands free of dust and grime by occasionally cleaning them with a dry cloth, similar to how you maintain a salt lamp. This careful planning mirrors the approach of evaluating style and function to achieve the perfect fit for your space. To simplify future adjustments, always consider using a cordless design to avoid tangled wires and cumbersome plug management.
Match Hooks to Your Surface: Wood, Brick, Trees, or Metal
The best hooks for your surface depend on the material you’re working with. For wood, screw-in hooks or outdoor-graded Q hooks provide a strong hold while protecting the surface from damage. Galvanized nails are suitable for temporary jobs, offering quick and easy installation. When working with brick or concrete, drilled-in anchors are essential for reliable support, and brick clips can be pushed into mortar gaps if you prefer a non-invasive option. For trees, screw hooks or Q hooks secure lights without harming the bark, while S-hooks easily wrap around branches, making setup simple. On metal surfaces, magnetic hooks can handle between 25 and 50 pounds without any drilling, and clamp hooks grip railings securely. For a well-lit indoor space, consider rechargeable LED options that eliminate the need for wiring. Always prioritize hook materials such as stainless steel, galvanized steel, or brass, as these resist corrosion and stand up to weather elements like wind, rain, and UV rays. This approach ensures your lights stay safe and your surfaces remain protected over time. While wood or metal surfaces are common, you can also apply budget-friendly ideas from a hat rack project, such as repurposing scrap lumber or leftover hooks, to lower costs for your string light setup. Choosing between a chest of drawers or dresser involves weighing similar factors of style, cost, and function to find the best fit for your room.

SUPER POWERFUL MAGNETIC HOOKS - Experience the strength of Neosmuk magnetic hooks, made from heavy-duty metal with a CNC machined steel base and the latest generation super Nd-Fe-B ‘magnetic king’ magnets. These hooks offer exceptional pulling force under steel, making them perfect for hanging items on the fridge, grill, or metal doors. A must-have for heavy-duty hanging needs.

HAUTE DECOR ATTRACT WREATH HANGERS: If you're searching for an easy way to hang wreaths or decorations from a metal door or window, then Haute Decor has just what you need! Our all-season decorative magnetic hooks are perfect for indoor or outdoor use. As an added benefit, the magnetic hangers have a padded backing that won't scratch or dent surfaces.

【BEARABLE TRACTION】 30 lbs tension of black magnetic hook is based on the direction of tension perpendicular to the contact surface -- reduced by 2/3 if used horizontally. Please note that the tension of the magnetic hook is also affected by the direction, the material of the contact surface and other factors.
Install a Guide Wire and Space Hooks Every 6–8 Feet
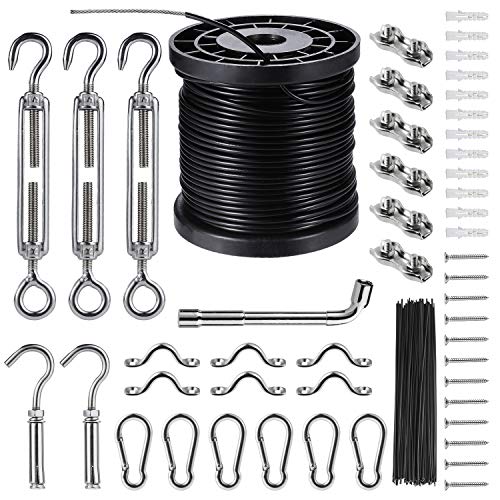
Install a guide wire and space hooks every 6–8 feet. To do this, first measure the total length you need to cover and add 12 inches per span to allow for looping at each connection point. Secure eye bolts into solid framing or trees at both ends of the run. Attach a snap hook on the cable guide wire to the starting eye bolt, then stretch the wire across to the opposite end. Loop it through a cable clip to keep it in place. Use a turnbuckle to tighten the wire until it is taut and lock it securely. Pre-soaking the lights in sunlight will expand the line and prevent sagging. This technique, similar to how a DIY window valance is stretched tight across its mounting board, ensures a clean and stable installation. Understanding how to calculate voltage drop for a long wire run helps maintain consistent brightness over the entire span. For best results, choose a high-quality guide wire that resists rust and corrosion, as recommended in reviews of top outdoor lighting hardware.
Next, install hooks at consistent intervals of 6–8 feet along the guide wire. Use S-hooks or zip ties for spacing, placing a zip tie on either side of each socket for maximum support. Before pulling the wire tight to the next mark, attach five bulbs to distribute the weight evenly. This ensures a straight, professional appearance and prevents sagging or uneven tension.

NON-SLIP & Premium Quality Material: our s hooks are made of thick metal steel with vinyl coated, which is rust-resistant, smooth and non-slip, you don't need to worry these hooks would scratch your finger or clothes,purse,scarf, jeans etc among using.
Applicable Occasions: Hanging string lights for a romantic party,also Hanging photo,clothes or any hanging needed ,perfect for outdoor garden and indoor
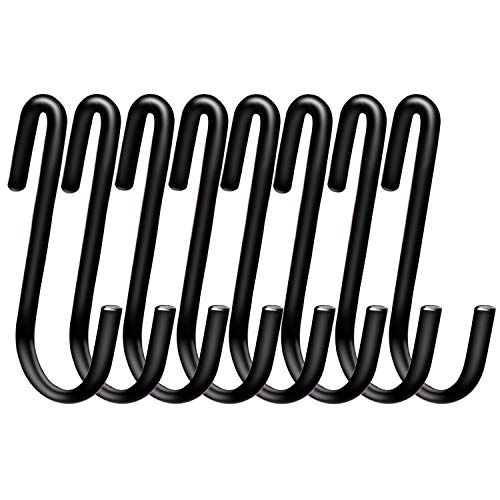
EFFICIENT STORAGE SOLUTION: These heavy duty s hooks are a simple and brilliant storage solution for hanging anything in your kitchen,closet, workshop or garage where space is limited,just simply hang them on pot rack,wall rails or shelves.With these S hooks you can easily organize your kitchenware,pans,pots,utensils,spoons like a professional chelf. Get everything within your arm reach,don't let clutter distract you and waste your precious time.
Hang Strings End-to-End and Connect to the Nearest Outlet
To hang strings end-to-end and connect them to the nearest outlet, start by measuring the total distance from the power source to where you want your final lights. Draw a simple sketch to help visualize the setup, making sure the male plug of your first string is closest to the outlet. Before connecting, check that your light strings have built-in end-to-end connectors designed for daisy-chaining. Avoid cutting or modifying the cord ends unless the lights are rated for such adjustments. Instead, connect the male end of the second string directly into the female end of the first. For safety, never exceed the circuit’s wattage limit; if needed, switch to another outlet to avoid overload. Keep the outlet weatherproof and position the plugs with slack below it so water can drip away, reducing tripping hazards. Using a plastic scraper can help remove any stubborn adhesive residue from fixtures if old film was present. Hang the first string completely before adding the next, and secure each connection to prevent movement or accidental unplugging. Use a turnbuckle to tighten the tension wire, ensuring proper tension and preventing sagging across the span. For optimal anchoring of the tension wire, consider using curtain ring hooks that can securely grip the wire and distribute the load evenly. Following the same principle as replacing a ceiling light, you should always turn off the power at the circuit breaker before working with any electrical connections to ensure safety.

【APPLICATIONS】Black coated stainless cable is easy to hide at night. Our light hanging kit can be used in multiple ways such as hanging string lights for a romantic party, photos or any hanging needed. And you can design different lighting suspension types to enhance the visual effect according to the layout of your yard. Our string light hanging kits is also suitable for Indoor: Hanging photo frames, dry clothes and facilities for sunbathe at day.
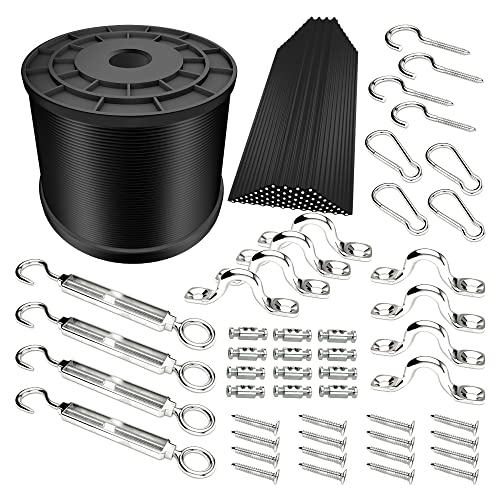
【HEAVY DUTY STAINLESS STEEL CABLE】 Crafted with premium 304 stainless steel cable (1/16" bare OD, 3/32" vinyl coated OD, 7x7 strand construction) offering 480 lbs breaking strength; features strong weather resistance, rustproofing, and waterproof insulation to reliably secure outdoor string lights through wind and storms.
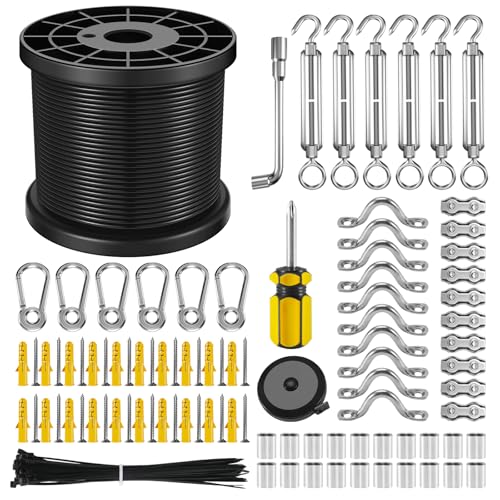
【Best Choice】-This string light suspension kit is selected by us for our customers. You have no need to spend more time to choose and don’t worry about mismatches. And you enjoy hanging string lights for a romantic party, also Hanging photo,clothes or any hanging needed, perfect for outdoor gardens and indoors
Test Every Bulb and Adjust Sag for the Perfect Glow
Testing each bulb before hanging is essential to prevent future issues. Start by laying the string flat and inspecting for cracked bulbs or frayed wires. Plug it in for 3 to 5 minutes to check for flickering or dark sections, which can indicate a faulty bulb or connection. Use a non-contact voltage tester to identify bad sockets, and verify bulb bases with a multimeter for high resistance. Be sure to tighten any loose bulbs since loose contacts can break the circuit and cause bulbs to burn out prematurely. To further verify the circuit, insert a multimeter probe into the female plug and touch it to the male plug to check for a beep indicating continuity. Flickering often stems from loose connections, which can be resolved by tightening bulbs and checking socket terminals. After hanging, adjust the sag by creating a gentle wave instead of pulling the string taut. Use stakes or clips at even intervals to maintain consistent slack. Re-test the string after adjusting for sag to ensure all bulbs stay lit and no connections have loosened. Proper testing and sag adjustment give you an even, professional-looking glow and prevent pesky troubleshooting later on.