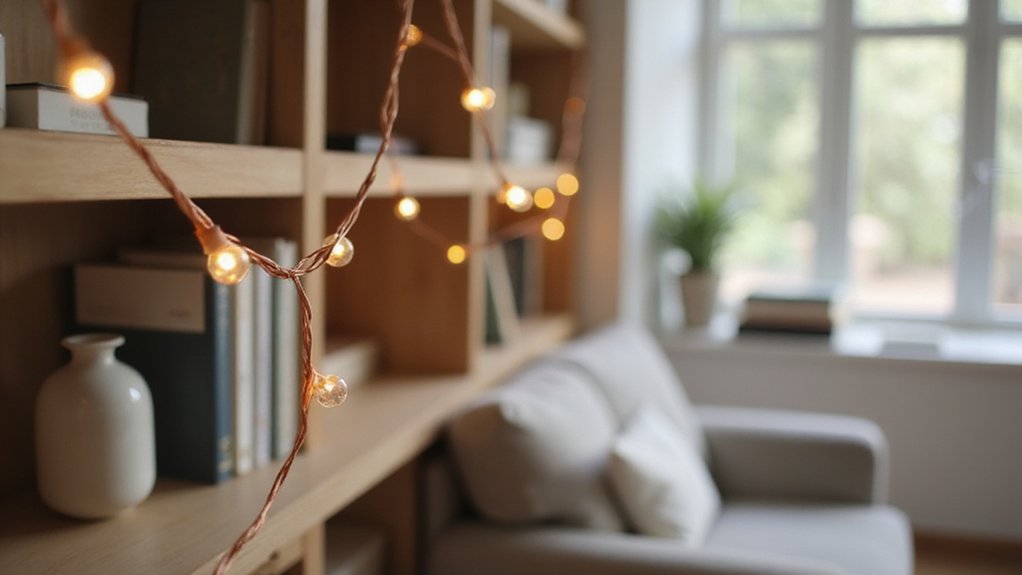
Hanging fairy lights can transform your space, but it can also be tricky to get it just right. If you want a professional-looking display, spacing, proper preparation, and safe installation matter.
By the end, you’ll know how to measure, plan, and hang your lights for a sleek, festive result that lasts. Keep reading to master the details.
Start by Measuring Your Installation Area
Start by accurately measuring your installation area. Use a standard measuring tape for shorter distances, such as gutters, eaves, and roof peaks. For longer runs along rooflines, a measuring wheel helps to capture precise distances along fascia. Ensuring measurement accuracy is crucial, as it directly influences the number of fairy light strings you need and the overall effect. If you are also considering a furniture piece for your space, understanding the difference between vanity and desk can help you choose the perfect fit. For projects using cuttable LED strips, always follow best practices to avoid damaging the circuitry at designated cut points. Using a spray bottle with soapy water can help loosen any adhesive residue if you are working near old film or tape.
Verify the spacing of fixing points by using a spirit level to keep lines straight. Lightly mark these points with a pencil to confirm your layout. If you’re planning a draped effect, multiply your total area by 1.3 to account for loops. For a curtain effect, calculate based on five strings per metre of length. Always add an extra 10 percent to your total estimate to cover corners, slack, and routing complexities. Overbuying by about 10 to 15 percent ensures you won’t run short and allows room for adjustments, making your installation look fuller and more professional. One extra string is recommended for safety and to confidently execute your design without concern about shortages. For instance, after measuring a roof length of about 10 meters and width of 2.5 meters, you can plan to place lights 50 cm apart to determine the total length needed.
Clean Walls to Help Fairy Light Hooks Stick
Cleaning the wall thoroughly is essential for ensuring your adhesive fairy light hooks stay put. Start by selecting rubbing alcohol as your cleaner—household detergents can leave residues that hinder adhesion. Dampen a soft cloth with the alcohol and apply it to the wall in circular motions, focusing on the area where each hook will be installed. This step removes dust, oil, and other residues that can prevent the adhesive from sticking properly. If your walls have gloss or semi-gloss paint, it’s a good idea to use a mild degreaser first to ensure optimal cleanliness. After cleaning, allow the wall to dry completely because moisture can weaken the adhesive’s grip. Once dry, press each hook firmly against the wall for at least 30 seconds. Wait at least one hour before hanging your fairy lights to give the adhesive time to set fully. If you’re unsure about the paint, test the alcohol on a hidden spot first to avoid dulling or damaging the finish. These hooks are also designed for versatile indoor and outdoor use on surfaces like windows, plastic, wood, and metal. Flickering in other lighting fixtures can often be traced to loose connections or incompatible dimmers. For precise placement, you can use a measuring tape to mark where each hook should go, ensuring an evenly spaced and professional-looking arrangement. For a cohesive bedroom setup, ensure the bedside table you choose has standard dimensions that complement the height of your bed and the placement of your lights.
Which Hooks Hold Fairy Lights Best?
Hooks with deep curves or locking mechanisms provide the best grip against wind and movement. These designs help the fairy lights stay secure, especially in outdoor or breezy areas. Deeply curved hooks grip wires firmly, preventing slippage, while locking hooks snap shut to hold lights in place. Choose these for settings where stability is a priority. Such hooks are ideal for outdoor string lights, especially when exposed to weather and gusts. Their reinforced design ensures your lights remain neat and safe, reducing the need for frequent readjustments or repairs. Similarly, a DIY lava lamp requires a sealed container and stable heat source to prevent spills and maintain consistent motion. For a chest of drawers, reinforced hardware prevents warping and keeps screws tight during seasonal changes. For windows, see-out, not-in film offers comparable stability by blocking outside visibility while preserving your view.
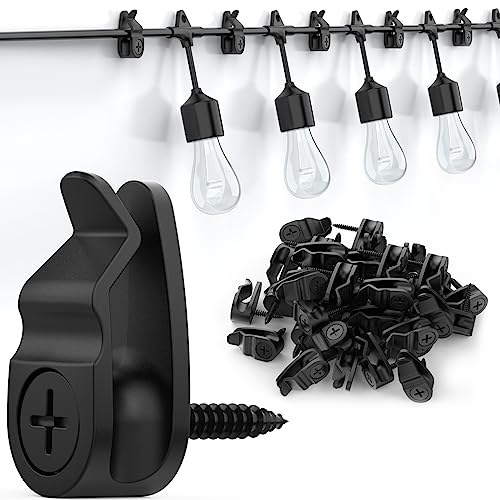
Secure and Stable: Our 50-pack Outdoor Light Hangers are designed with screw mounts for unparalleled stability, ensuring your string lights and decorations remain securely in place without swinging or falling.

Durable Design: Windproof and rustproof outdoor light hangers, the safety design can prevent items from falling off, the patio light hanger is convenient for organizing cords of string lights, rope lights or other hanging things to keep these stuff out of mess and in their perfect order.

Secure and Stable: Our 20-pack Outdoor Light Hangers are designed with screw mounts for unparalleled stability, ensuring your string lights and decorations remain securely in place without swinging or falling.
Attach Hooks First, Then String Your Lights
The most important step is installing all hooks before running a single string of fairy lights. To do this effectively, clean with rubbing alcohol to ensure adhesive adherence. Then, first map out your desired pattern on the floor. Then, mark anchor points with a pencil at intervals of about 2 to 3 feet. Place the hooks starting nearest the power outlet to minimize wire stretch and ensure a neat appearance. To create a woven effect, offset hooks on opposite sides by half the spacing distance, avoiding straight, rigid lines. For outdoor installations, choose steady joist hangers rated for heavy loads to support the wiring without sagging. Space ceiling hooks at least 2 feet apart to prevent overstretching the wires. Once all hooks are securely in place, begin stringing lights from the plug end, attaching each to the nearest hook before moving systematically across the room. Battery-operated lights offer the flexibility to place hooks in locations without nearby outlets without restriction. For a more permanent solution, consider attaching hooks to a wooden frame as commonly done in DIY shoe organizers. This approach guarantees a controlled, intentional light pattern free of clutter or haphazard placement.

60 PCS Light Hooks Clips Per Box: Length 16mm/0.63inch, Width 15mm/0.59inch, Height 8mm/0.31inch; Suitable for cables with a diameter (maximum) of 5 mm/0.2 inches, size fits most wires, small size and space saving.

Compatible Surfaces: Adheres securely to smooth, non-porous surfaces including painted walls gloss/satin finish, glass, metal, finished wood, and tile.NEVER use on Fabric, wallpaper, peeling paint,unpainted drywall, or other delicate surfaces.

DESIGNED FOR HANGING FAIRY AND CURTAIN LIGHTS: These mini indoor light clips make it easy to hang fairy lights and install curtain lights, from simple wall outlines to full fairy lights curtain displays
Use a Ladder and Partner to Hang Fairy Lights Safely
Use a ladder and partner to hang fairy lights safely. Using a ladder and a partner is the safest way to hang fairy lights at height. Ensure the ladder is placed on level ground that is free from cracks, holes, or wet patches. Your partner should hold the base of the ladder firmly to prevent shifting or slipping while you work. Never work alone on a ladder, and only one person should be on the ladder at a time. Your partner can assist by managing light strands, handing you tools, and clearing clutter below to keep your workspace safe. Maintain three points of contact—two hands and one foot or two feet and one hand—and keep your hips between the ladder rails. Move the ladder as needed rather than reaching or overextending. Before climbing, check for low-hanging branches or nearby power lines, and avoid working during rain or in darkness for added safety. If you are also hanging lights over window treatments, practical DIY tips can help you secure strands without damaging the blinds. When choosing fairy lights, consider whether LED bulbs are more cost-effective and energy-efficient than traditional incandescent options for your space. Working with a partner is proven to reduce injury risk by up to 90%. For a neatly arranged setup, applying step-by-step organization methods can help you keep spare light strands and clips tidy and accessible.

SECURES AND STABILIZES THE LADDER - Prevents the ladder from sliding or falling, creating a stable base to work from

【UPGRADE 】Aluminum ladder stabilizer for roof gutter guard with creamy white rubber mat,non-slip and protect your beautiful wall surface from pollution,no scratch.Fits to most little giant ladder accessories and other,Please see the picture for the dimensions.(Patent No:222101952U)

[Precise Compatibility with Werner Fiberglass Step Ladders] This fiberglass ladder safety label kit is specially designed for Werner fiberglass step ladders and fully compatible with all Type I 300 LB load capacity stepladders. These are aftermarket replacement decals that match original factory safety warnings and instruction stickers, compatible with OEM part numbers including PN 55763-04, PN 55763-02, P/N 58579-01, P/N 106457-01, P/N 51637-01, PN 51645-01, P/N 53496-01, P/N 55765-02, PN 58580-01, P/N 57998-01, P/N 57996-01, P/N 57995-01, P/N 55765-01 and more. Please confirm your ladder’s load rating before ordering.
Weatherproof Fairy Light Connections for Outdoor Use
To weatherproof your fairy light connections for outdoor use, follow these essential steps. First, choose lights with an IP rating of at least IP44, which indicates they are protected against splashing water. For more rainy conditions, IP65-rated lights provide better protection and are highly recommended. Additionally, always check for quality and performance reviews to ensure you are getting a reliable product. Next, keep all plugs and connections elevated above ground level using light stakes, and space them 1 to 2.5 feet apart to prevent water pooling. Position receptacles facing downward to allow water to drain off naturally. Then, seal all connection points with waterproof connectors, heat shrink tubing, or waterproof electrical tape. Cover unused female ends with baby-proof outlet connectors, and for additional security, enclose splices in a tightly sealed zip-lock bag secured with a zip tie. This method keeps water out to prevent circuit shorting from moisture exposure, even during adverse weather. These steps will help you prevent shorts and significantly extend the lifespan of your outdoor fairy lights.

【Attention】Only suitable for 30V 6W 0.2A string lights. Only suitable for the 2-pin connection shown in the photo. Supply up to 1000 LED fairy lights. No remote control. Warm Tips: If the voltage does not match, the LED lights will continue to flash, or the timer and mode function will not work.

Upgraded Fall and Thanksgiving Garland with Lights: Compared to other short sized fall garland maple leaves, usually their size is 5.83ft, we have achieved a length of 9ft, specially designed for US family's mantel or fireplace decorations. What's more, our plug in lighted fall garland with denser maple leaves provied an bright and warm lighting effect, very differnt from other sparse fall garland with no lights or battery operated maple leaves string lights which always dim brightness.

【Attention】Only suitable for 30V 6W 0.2A string lights. Only suitable for the 2-pin connection shown in the photo. Supply up to 1000 LED fairy lights. No remote control. Warm Tips: If the voltage does not match, the LED lights will continue to flash, or the timer and mode function will not work.
Add Mid-Point Clips to Support Fairy Light Drapes
To support fairy light drapes and prevent gravity-induced droop, you should add mid-point support clips approximately every 300 to 400 millimeters along the length of your light run. This spacing helps counteract sagging and keeps the lights looking neat. Before attaching the light fringe, install all the mid-point clips along your planned route, ensuring even spacing. Use nylon P/R clips with stainless steel screws for mounting onto building surfaces, and apply adhesive clips or Command strips in areas where drilling isn’t possible. When securing the lights, pull the fringe tight while fitting the clips but leave slight slack between each mid-point support to avoid putting stress on the wires. Working with a partner and a steady ladder makes it easier and safer to attach clips on high ceilings. Always check that anchor points can withstand wind movement and other stresses. For a more permanent and durable setup, consider using HID bulb vs. LED options for external fixtures to ensure consistent brightness. Step back periodically to verify that the spacing remains uniform and adjust clips immediately if you notice unevenness. For additional guidance, review top picture hangars for inspiration on hardware that provides reliable support.

Package Include: 50pcs clips, perfect for daily use and versatile decorations

DESIGNED FOR HANGING FAIRY AND CURTAIN LIGHTS: These mini indoor light clips make it easy to hang fairy lights and install curtain lights, from simple wall outlines to full fairy lights curtain displays
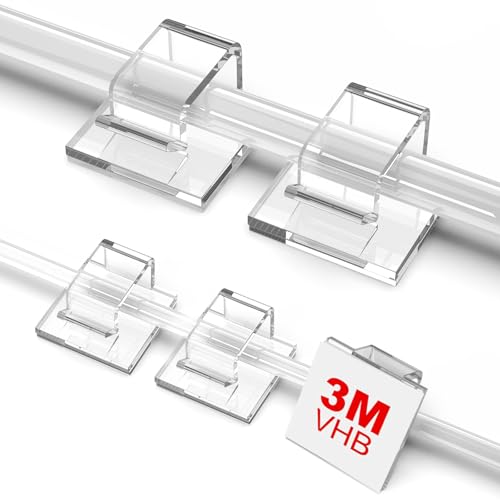
Assorted Sizes: Package include 55 pcs small adhesive cable clips and 50 pcs Large wire cord clips. Made of eco-friendly premium PA66 material, meet your needs for hanging outdoor string lights, perfect for christmas decorations, halloween decorations, holiday patio decor, porch decor and balcony decor.
Test and Straighten Your Fairy Light Display
You should test the entire fairy light strand before hanging it up to ensure all bulbs work. Plug in the strand and check each bulb individually. For any bulbs that don’t light up, use a multimeter to check for continuity or test the middle bulb to see if the issue lies in a broken section. If you determine a section is dead, you’ll need to locate the break point, which is the first unlit bulb between working and non-working areas. Sand the ends of the broken wire with an emery board, then twist the wires tightly with needle-nose pliers. Secure the repair with hot glue or heat shrink tubing to keep it stable. When testing bulbs, a multimeter set to resistance will show low resistance for a working bulb and high or infinite resistance for a failed bulb.
After confirming all bulbs are functioning, straighten the strand. During warm weather above 40°F, the plastic coating on the wires softens naturally. If it’s cold outside, use a hairdryer to warm the plastic enough to make it more flexible. Hang weights at the bottom of the strand to help it hang straight, then let the heat relax the wire shape. Keep the strand hanging for several hours for the best results. Consider the material of your weights carefully, just as you would evaluate faux wood for its moisture resistance and cost-effectiveness when choosing blinds. If kinks or bends remain, repeat the process until the wire is smooth and straight.
Store Your Lights Tangle-Free for Next Time
To store your lights tangle-free for next time, begin by wrapping them in a continuous line without doubling back. Use a cardboard rectangle notched at both ends to anchor the wire and prevent it from unraveling. Wrap your lights around this makeshift reel, then stack multiple reels inside a sturdy plastic tote for organized storage. Always wind in the same direction to maintain consistent wrapping direction and avoid tangling. For best results, position your wrapping reel at the same height as your bracket placement to mirror the even tension used when mounting curtain hardware. For a more compact solution, repurpose a Pringles can or cut a 2-liter bottle, securing the plug in the bottle’s neck with tape to keep everything contained. Protect the lights further by placing each bundle inside a zip-lock bag to shield against moisture. To stay organized, label each container based on its designated location and keep a small repair kit nearby for quick fixes. Store everything in a cool, dry space to extend the lifespan of your lights. Alternatively, you can wrap strands around plastic hangers with side dips and hang them in a closet—simple and effective.