Want to make sure your mini blinds fit just right? The key is knowing how to measure them accurately, whether you’re installing them inside or outside your window frame.
Getting the right measurements now means fewer surprises later and a perfect fit.
In the following steps, I’ll guide you through the process so your blinds look great and function perfectly.
Choose Your Mount First: Inside vs. Outside Differences
Measurement accuracy is more critical for inside mounts because the blind must fit precisely within the window opening without rubbing or gaps. Inside mounts require exact measurements to ensure a snug fit, as even a quarter-inch discrepancy can cause rubbing or light gaps. The clean appearance of an inside mount is often preferred for a minimalist look. Outside mounts are more forgiving; simply add about 2 inches to each side of the window width and height for full coverage. This approach helps hide unsightly frames and minimizes light gaps, providing a cleaner look and better light control. However, for outside mounts, you must also add 2–3 inches to the height for proper overlap above and below the frame. Unlike inside mounts, outside mounts allow you to choose solar shades that filter light while preserving your view. However, flickering in LED bulbs often stems from incompatible dimmer switches, which can be resolved by replacing the switch or bulb.
Choosing between inside and outside mounts depends on your needs for aesthetics versus practicality. Inside mounts offer a neat, streamlined appearance by fitting within the window frame, but they demand careful measurement. Outside mounts are easier to install and adjust, giving you more control over coverage and appearance. If your window frame is irregular or uneven, outside mounting is a better choice to ensure proper coverage and a smooth finish.
How to Measure Inside Mount Width (and Why the Smallest Wins)
To measure your inside mount width accurately, take horizontal measurements at three points: the top, middle, and bottom of the window frame. Because frames can be bowed or irregular, relying on just one measurement can lead to fit issues. Measure every window individually as each is unique. Use a steel tape for consistent readings, and record each measurement to the nearest ⅛-inch. Do not round up or guess; note all three numbers precisely. This same meticulous method is crucial when cutting LED strip lights to avoid waste and ensure proper installation. A cloudy appearance in lava lamps is often caused by disturbing the heated wax too soon, so patience is key. Always measure to the nearest ⅛-inch for precise results, as even small errors can affect the final fit.
Once you have the three measurements, round each down to the nearest ⅛-inch. Select the smallest of these three measurements as your final width. The reason is simple: choosing the narrowest measurement guarantees the blind will clear the sides without binding or getting stuck. Remember, the fabricator will subtract about ¼-inch for installation clearance, so submitting the smallest measurement helps prevent the blind from jamming due to variations in the frame. Always record your width first, then your height, for clarity.
How to Measure Inside Mount Height (and Why the Longest Wins)
To measure inside mount height accurately, you need to record the longest measurement at three vertical points: left, center, and right. Use a tape measure and round each measurement up to the nearest 1/8 inch. Never round down, as that can result in gaps that let in light or compromise privacy. This consistent measurement approach ensures proper fit despite frame irregularities, as noted in the consistent measurement approach from the measuring guidelines. For cordless blinds, this method also ensures the lifting mechanism operates smoothly without binding against an uneven frame. This technique mirrors the installation precision required for can light drop ceilings to avoid gaps and misalignment.
Choosing the longest measurement ensures full coverage of your window, especially since frame variations mean no window is perfectly square. One side is nearly always taller, so using the longest measurement guarantees the blind will reach the sill without gaps. Relying on the shortest or an average measurement risks leaving spaces open. This principle is consistent with the standard sizes used in closet rod specifications to guarantee a proper fit.
Select the highest of the three rounded numbers—that’s your official height. Record this measurement exactly, without subtracting anything. Submitting the longest measurement ensures your inside mount blinds will fit tightly and function properly, even with construction quirks or uneven frames.
Check Window Depth Before Committing to an Inside Mount
Check your window depth before committing to an inside mount. Not all window frames provide enough space for the hardware. Use a steel measuring tape and other measuring tools to ensure accuracy. Measure at three points: the left side, the center, and the right side of the opening. Extend the tape as far back into the window opening as possible and record each measurement to the nearest 1/8 inch. The shortest of these three measurements indicates your window’s usable depth. Be mindful of obstructions like cranks or handles; if present, measure from the obstruction to the edge of the window frame. Similarly, when replacing a ceiling light, checking for obstructions ensures a smooth installation process. For beveled frames, measure the flattest section. After collecting your measurements, compare the shortest depth to the product’s minimum requirement—often listed as 3/4 inch, but always check the product specifications. Do not round up or subtract from your measurements manually. If your window depth falls short of the minimum, you will not be able to mount the headrail fully inside the recess without protrusion. For a more thorough comparison of style, cost, and function, consider weighing other covering options for your space.

NO TOOLS, NO DRILL EZ GRIP INSTALLATION: Install inside your window frame without drilling, screws, or wall damage. The renter-friendly EZ Grip tension system is ideal for apartments, dorms, rental homes, and quick room updates.
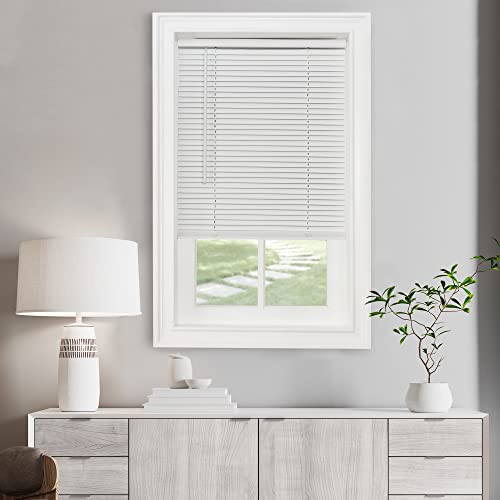
Cordless Blinds: Filter out light with the Achim Cordless Light Filtering Mini Blinds. These lightweight, vinyl blinds with no cords to get tangled are child and pet safe. Durable, high quality construction resists warping, fading, and sagging.

No Drill Blinds: No Tools-No Drill system allows it no need to drill any holes on your window frame and walls, great for Renter, Landlord, and Home Buyer. Easy to Install in 30 seconds without any screws or brackets. And it can afford maximum 30kg/66lbs. Fits All Kinds of Walls, like woodiness metope, tile marble, concrete wall and rough tile.
How to Measure Outside Mount Width for Full Light Coverage
To measure outside mount width for full light coverage, start by using a steel tape to measure the window frame at the top, middle, and bottom. Record the widest measurement and round down to the nearest 1/8 inch if necessary. Next, add at least 1.5 inches of overlap on each side—2 inches is standard for mini blinds—to ensure complete coverage. This extra overlap accounts for frame variations and irregularities in window squareness. Mounting brackets are essential for outside mount installation, as they support the brackets and ensure a secure fit. Unlike HID bulbs, which are a popular but less energy-efficient lighting option, LED blinds provide a cooler operation that won’t affect the blinds’ material over time. For proper installation, use a squeegee to smooth the film onto the window surface without bubbles.
To achieve the best results, distribute the overlap evenly on both sides, aiming for a total of 3 to 6 inches. Measuring diagonally across the window can confirm squareness; if the difference exceeds 1/4 inch, an outside mount helps compensate for any irregularities. Your final outside mount width equals the widest frame measurement plus your chosen overlap. This approach guarantees maximum light blockage, privacy, and a neat finish. For ongoing maintenance, gentle vacuuming with a soft brush attachment helps keep the blinds dust-free.

Cordless Blinds: Filter out light with the Achim Cordless Light Filtering Mini Blinds. These lightweight, vinyl blinds with no cords to get tangled are child and pet safe. Durable, high quality construction resists warping, fading, and sagging.

Note:Make sure it fits your blind – check size/shape in images and compare with your brackets.

Blinds width will 3/8" narrower for a snug internal installation. Actual blinds size is 22.625"W x 36"H. Choose the size SAME or CLOSEST to your window width for INSIDE mount. For Example, if your window width is 30 inch, order 30" or slightly less for internal installation. For OUTSIDE mount, we recommend order (2-4)inch wider than your window width for better coverage.
How to Measure Outside Mount Height (Plus Overlap Tips)
To measure outside mount height for mini blinds, start at least 3 inches above the window frame. This provides enough space for brackets and ensures compatibility with hardware. Use a steel tape to measure from that mark down to the top of the sill. If your window has no sill, extend your measurement to your desired length, adding an extra 3 to 4 inches for better light control and privacy. For roman shades, a similar outside mount approach ensures brackets have enough space and the fabric overlaps the window opening for a perfect fit. Similar to hanging fairy lights, using a steel tape measure ensures accuracy for consistent bracket placement. When using a steel tape, ensuring the brackets are level prevents the blinds from sagging, just as proper leveling is essential for hanging closet shelves.
Take three vertical measurements—left, middle, and right—keeping the tape level across all points. Round each measurement up to the nearest 1/8 inch to account for slight discrepancies. The longest measurement among these three becomes your final height to avoid light gaps and ensure full coverage.
Record your width and height as a W x H measurement exactly as measured, with no deductions. This guarantees an optimal fit and privacy, preventing light leaks and ensuring full coverage. Proper measurement and extra overlap give you a clean, professional look and secure installation.
Three Measuring Mistakes That Guarantee a Bad Fit
Measuring in three places for width and height is essential to ensure a proper fit. Measure the width at the top, middle, and bottom of the window opening. Use the smallest of these three measurements to prevent the blinds from scraping against the sides. For height, measure left, center, and right, then select the largest measurement to guarantee full coverage. Omitting these steps can result in blinds that are too wide or too short, compromising their appearance and function. While taking these measurements, it is useful to consider the principles of mud room bench design to ensure clearance for hardware and proper spatial planning. Understanding window valances as a related decor element can help you coordinate the overall look and hardware clearance.
Always use a steel tape measure instead of fabric or plastic ones. Keep the tape straight and unbent to avoid distorted measurements. Bent or warped tools can lead to inaccurate data, which affects both inside and outside mount installations. Read the measurements accurately to the nearest 1/8 inch, rounding down for width and up for height to ensure a precise fit.
Do not measure existing blinds. Instead, measure the window frame itself, accounting for construction variances and new installation requirements. Check the depth of the window opening and identify any obstructions like handles or molding. These factors are crucial because even the best material selection won’t prevent jamming if the measurements do not consider these additional features. Making these three measurement mistakes often results in blinds that do not fit properly or function smoothly.