Struggling to block out light completely with your current curtains? Building your own blackout curtains can give you a perfect, sleep-friendly dark room without the high price of store-bought options.
By measuring accurately, choosing the right fabric, and following a few simple sewing steps, you can create professional-looking blackout curtains that work just as well.
Keep reading to see how it’s done.
Measure Your Window for Blackout Curtains
To measure your window for blackout curtains accurately, you’ll need a steel tape measure at least 25 feet long, a step stool for high windows, and a level to ensure your rod sits straight. Use a pencil and paper to record all measurements immediately to avoid forgetting any details.
Start by measuring the window width at the top, middle, and bottom. Always record the largest of these measurements to account for irregular frames and ensure complete light blockage. If you’re mounting the curtains outside the window frame, extend the rod 8 to 10 inches beyond each side so the curtains fully cover the area when drawn open. Also, measure from the floor to the desired rod height, subtracting half an inch for grommet tops to prevent dragging on the floor. Remember to include consideration of fabric weight and support, as heavier fabrics need sturdier rods to avoid sagging. For a heavier look, consider the style and function differences between a chest of drawers and a dresser when planning adjacent furniture. For proper stacking space, take rough window measurements during floor plan and elevation design. If you later need to remove the curtain hardware, follow the same careful removal process used for taking down old window film to avoid damaging your wall or frame. Additionally, if you notice any flickering in nearby LED bulbs after installation, check for loose connections or incompatible dimmer switches that can cause that issue.
Choose the Right Fabric and Blackout Lining
Choosing the right fabric for blackout curtains involves prioritizing durability, appearance, and light-blocking capabilities. Opt for a material that blocks at least 99.5% of external light for effective blackout performance. Triple-weave polyester combines a soft feel with a hidden black layer, making it a good choice. Foam-backed fabrics offer superior insulation, helping to reduce heat transfer and noise. Velvet provides a luxurious look while being thick enough to block light effectively. For a budget-friendly option, high-density polyester blends deliver good durability and resist wrinkling without the higher cost associated with velvet. Aim for fabric weight between 300 and 500 gsm and a weave density of at least 180 threads per inch. Confirm that your fabric has a UPF of 50+ and is OEKO-TEX certified to ensure it is free from harmful chemicals. For nighttime comfort, choosing a quality night light with adjustable brightness can further enhance your sleep environment. Using quality fabric enhances energy efficiency, sound absorption, and long-term performance of your blackout curtains. For additional budget savings, consider repurposing common materials from a DIY hat rack for curtain rod components. If you’re also covering windows with film, you can apply window film yourself to complement the curtains for maximum light control.

EFFECTIVE BLACKOUT: 2 panels per package, W40 x L80 each. The thick triple weaved fabric can enhance your curtain blackout effect about 50%(black works better than white), block the light and UV rays, offer a real dark environment for the night shift worker who has to sleep during the day.

READY MADE - Blackout curtains sold as 2 panels, each mesure 42" width and total width is 84 inches. Both sides are same color. Curtains can cover windows to fully width. Pleated style should be 1.5-2.6 times to your windows.

✔ 100% Blackout Performance (3-Pass Technology) Triple-layer (3-pass) construction completely blocks sunlight and UV rays, making it perfect for bedrooms, nurseries, and home theaters.
Cut and Prepare Your Curtain Fabric Like a Pro
To cut your curtain fabric accurately, start by measuring from the intended curtain rod to one inch above the floor for the finished length. Add 4 inches for the top hem and 3 to 4 inches for the bottom hem, plus extra for side hems. This ensures your curtains will fit perfectly once finished. For a more informed decision, consider the cost and style of your fabric choices to balance your budget and decor. Choose heavier fabrics for better drape, wrinkle resistance, and insulation. Additionally, remember that grommet curtains require extra space at the top for the grommet holes to slide smoothly along the rod. Remember that a vanity serves a different purpose than a desk, so weigh your room’s primary function before cutting.
Begin with proper folding: lay the fabric flat with the right side down and align the grain line to keep the fabric straight and stable. Use an “L” square to check that the corners form a perfect 90-degree angle; this helps achieve straight, professional-looking edges. Next, draw a straight cut line perpendicular to the fold using a long ruler and chalk, marking 4 to 5 evenly spaced points across the width for added accuracy. Trim off the initial fold for a clean, even edge.
When cutting, always use sharp shears or a rotary cutter to avoid uneven edges. For blackout lining, cut it slightly smaller than your main fabric to prevent it from peeking out. Fold the hems over the lining before pinning the fabric together, ensuring the finished curtain looks neat and polished. Proper preparation and precise cutting are key to achieving a professional look in your custom curtains.
Sew Side Seams and Bottom Hems Correctly
Sew the side seams and bottom hems with precision for a professional finish. Begin by matching the main fabric edge with the blackout lining, ensuring the lining is 1 to 2 inches narrower to prevent side peeping. Secure the layers using wonder clips rather than pins to avoid permanent holes, then stitch a straight seam 1/2 inch from the edge at a stitch length of up to 6 per inch. Backstitch at both ends to secure the stitches. After sewing, press the edges flat with an iron to set the seams.
For the bottom hem, double-fold the fabric by folding it up 4 inches, then folding again another 4 inches, creating a sturdy, thick edge. Sew along the inner fold, maintaining a seam 1/8 inch from it. This double-fold hem helps the curtain hang straight and prevents sagging, while also enhancing light-blocking effectiveness. Using a presser foot leveling feature prevents skip stitches and uneven seams, especially on uneven edges.
Attach Blackout Lining Without the Bunching
To attach blackout lining without bunching, cut the lining 1 to 2 inches narrower than your curtain fabric and about two inches shorter. Pin the lining’s top edge to the wrong side of the curtain, then smooth it downward without stretching. Let it lie flat to prevent fabric bunching, rather than pulling or overstretching. Secure the sides and bottom with pins or clips every 8 to 10 centimeters, ensuring edges are aligned evenly. At the top, pin the layers in place carefully, maintaining even tension. When sewing or bonding, keep a steady tension and remove pins gradually to avoid distortions. Iron the lining lightly beforehand to remove creases and press along the seams, which helps prevent light bleed and keeps your drape looking smooth. Proper tension control during attachment ensures the lining stays flat, so you won’t face bunching or shifting later. Additionally, always backstitch at the beginning and end of seams to prevent unraveling.

Keeps unwanted light out

CURTAIN RINGS CLIPS PACKAGE INCLUDING: This set includes 40 PCS black curtain rings with clips. Very suitable for decorative window, hangings hangers thick drapery
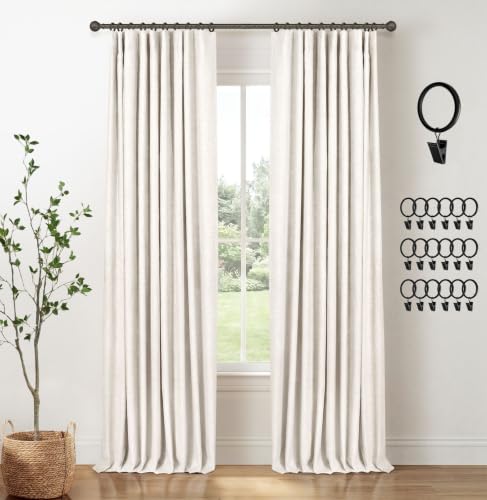
100% Total Blackout Curtains: They block out light completely from streaming into your home with a set of fully blackout curtains for living rooms and bedrooms. Designed to keep your bedroom and living room dark, cozy and peaceful, so you can sleep soundly until the morning.
Create a Rod Pocket or Install Grommet Holes
For a rod pocket, fold the fabric over about 3 inches and press. Fold again another 3 inches and press, then stitch along the bottom crease about 1/4 inch from the edge to form the pocket opening. Make sure the pocket’s width is at least twice your curtain rod’s diameter; this guarantees smooth movement and a tidy appearance. This method provides a traditional, gathered look and is simple to sew if you have basic sewing skills. For a more decorative look, you can sew an optional header by stitching 1 inch from the top edge to create a ruffle above the rod. To ensure consistent fabric preparation, use a sewing measuring tape to double-check all fold widths before pressing. For a similar effect to premium styles, consider adding a light-filtering liner to your fabric for enhanced privacy.
Alternatively, choose grommet installation for a modern, sleek look. Mark evenly spaced spots along the top edge at intervals of 4 to 6 inches. Use a grommet kit to cut clean holes about 1 to 2 inches from the top edge. Insert the grommet top through the hole, then attach the base and secure it with a hammer. Grommets allow for easy sliding along the rod and create an even, intentional gather without visible stitching. This method is ideal if you prefer a contemporary style and want a professional finish. This technique also works well for other DIY projects, such as building a cowboy hat rack, where precise hole placement is required.
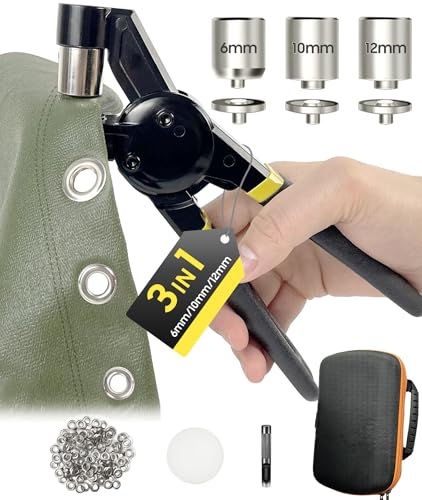
HAPDEN 3 Hole Punch Tool for Grommet: Heavy duty eyelet tool kit supports 6mm 10mm 12mm grommet sizes with 200 silver grommets in each size.3 sizes of grommet pliers kit for most DIY grommet needs!

MATERIAL COMPATIBILITY & WARNINGS: Ideal for thickness of 1-3 mm materials like leather, paper, cardstock, and thin tarps. Designed for decorative, light-duty use. CRITICAL WARNING: NOT SUITABLE FOR FOAM BOARD, FABRIC, OR CLOTH. These soft, thick materials cannot provide the necessary support for the tool, preventing the jaws from closing properly and risking damage to the pliers' handle

MATERIAL COMPATIBILITY & WARNINGS: Ideal for 1-3 mm thick materials like leather, paper, cardstock, and thin tarps. Designed for decorative, light-duty use. CRITICAL WARNING: NOT SUITABLE FOR FOAM BOARD, FABRIC, OR CLOTH. These soft, thick materials cannot provide the necessary support for the tool, preventing the jaws from closing properly and risking damage to the pliers' handle
Iron, Pin, and Set Up Your Hardware
After creating your rod pocket or installing grommets, you should iron, pin, and set up your hardware to ensure a crisp, professional finish. First, set your iron to a low heat—use the cool iron setting for safety. Place a pressing cloth over the front of the curtain to prevent shiny marks. Work in small sections, gliding the iron smoothly to smooth out wrinkles. Focus on visible creases but avoid leaving the iron stationary on the fabric to prevent damage. For sharp seams, use proper seam pressing techniques such as pressing rather than iron-squishing to maintain their shape. Before sewing, adjust your machine’s thread tension to prevent puckering, which can distort the fabric. If using a rod pocket, pin the hem evenly before heading to the ironing board to keep everything aligned. Once ironed, hang about two-thirds of the curtain immediately. Gravity helps smooth the fabric, making the final installation cleaner and more polished. Set up your hardware, like the rod brackets, to ensure a snug and secure fit. Correct bracket placement minimizes light gaps and ensures smooth operation. Proper preparation with ironing, pinning, and hardware setup streamlines the installation process and results in a clean, crisp appearance. Consider using closet organizer principles to keep your curtain accessories neatly sorted for future use. Cutting LED strip lights requires precise measurements and a clean cut along designated lines to avoid damaging the circuit.

Easier Ironing: This cotton pressing cloth for ironing is made of comfortable, durable cotton fabric, making ironing easier and more convenient, and improving daily garment care efficiency

【Professional Protection】This ironing cloth to protect clothes acts as a barrier between your iron and delicate fabrics, preventing scorch marks, shine, and heat damage. The fine mesh design ensures even heat distribution for safe ironing on silk, wool, polyester, and more.

Package Includes: You will receive 2 pcs pressing cloth, measuring 24" x 24" and 20" x 27" respectively, suitable for long-term ironing or sewing. The large size of the ironing cloth easily covers garments, curtains, and a variety of fabrics
How to Sew Blackout Lining Into Store-Bought Curtains
To sew blackout lining into store-bought curtains, start by measuring your curtain’s height and width. Cut the lining 1 to 2 inches narrower than your measurements to prevent side peeping. Leave a 1-inch hem allowance on all edges. For smooth sewing, set your machine to the longest stitch length, around six stitches per inch, and use a Teflon needle to handle the slippery lining fabric. Backstitch at the beginning and end of each seam for reinforcement. Instead of pins, use wonder clips to secure the lining during sewing, as holes from pins can be visible on the finished product. To ensure a tidy result, incorporate closet organizer tips from expert guidance for your home. Sew only the top and side edges, aligning with the curtain’s original stitch marks, and match your thread color precisely. Do not sew the bottom edge—leave it unstitched. Instead, fold the header over the lining and sew 1/8 inch from the fold to create a clean finish. This approach keeps the process simple, quick, and effective.
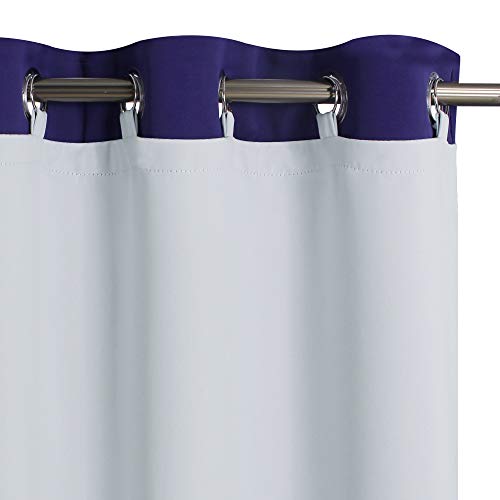
EFFECTIVE BLACKOUT: 2 panels per package, W50 x L80 each. The thick triple weaved fabric can enhance your curtain blackout effect about 50%, block the light and UV rays, offer a real dark environment for the night shift worker who has to sleep during the day.

Pre-Cut 2-Yard Convenience (72" x 110") – Each order includes a ready-to-use 2-yard pre-cut piece, giving you more fabric for larger projects without measuring or cutting from a roll. Ideal for curtain panels, liners, and DIY home décor with clean, precise edges

Premium Blackout Fabric: This 58-inch wide drapery lining is crafted from a blend of 70% polyester and 30% cotton, providing superior light-blocking capabilities for complete privacy and reduced energy costs.
Common Mistakes When Sewing DIY Blackout Curtains
When cutting your fabric and lining, make sure to cut both layers to the same size using a long straight edge and tailor’s chalk to draw clean, square lines. Mount your curtain rod wide and high before cutting to prevent light from sneaking through. If you cut the lining the same length as the face fabric, it will peek out of the hem—so trim the lining a little shorter for a neat finish.
During sewing, always use a Teflon needle and set a longer stitch length to prevent puckering. Do not pull the fabric through the machine; guide it gently and steadily. Remember to backstitch at the beginning and end of seams to keep everything securely in place.
Fix Errors and Troubleshoot Your Finished Panels
To fix errors and troubleshoot your finished panels, start by verifying your curtain rod placement. Mount it 6 to 10 inches above the window frame and extend it 8 to 12 inches beyond each side. This prevents light from leaking around the edges and ensures enough coverage. To seal gaps at the edges, add adhesive Velcro strips or magnetic side seals, which create a snug fit and block light leaks effectively. Ensure that your curtain rods are fitted with supports mid-rod to prevent buckling under the weight of heavy blackout fabric. For can light ceiling installations, professional electricians recommend dedicated dimmer switches to prevent flickering and extend bulb life. When choosing your final setup, consider a shoe rack as an alternative storage solution that prioritizes compact organization over window coverage. For a more energy-efficient lighting approach, consider the longevity and brightness of LED options compared to HID bulbs.
For center light leaks, increase the overlap of your panels by installing a center overlap bracket or adding a third panel. Make sure your two-panel setup overlaps fully when closed to prevent light from seeping through the middle. Measure each panel with an extra 15 percent of slack to prevent gaps that let light filter through.
Use wraparound or curved rods to block side and top light more effectively. Double-check the blackout rating of your fabric to confirm it blocks out light as needed. Regular maintenance, such as spot cleaning or gentle machine washing, helps your panels stay in good condition and maintain their light-blocking properties.