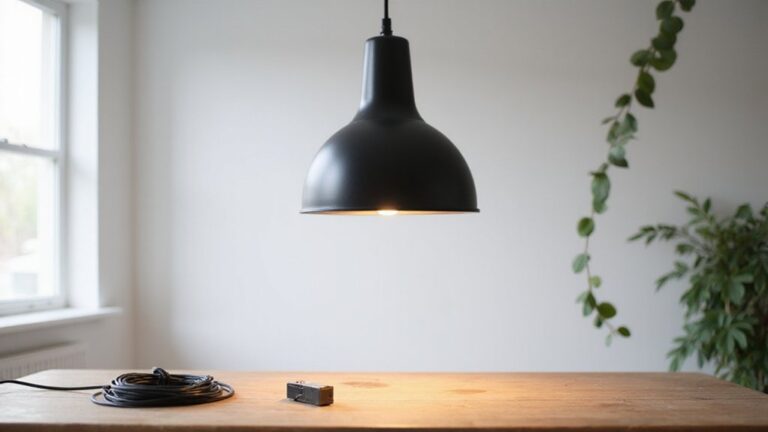
Thinking about installing a pendant light can feel a bit overwhelming, especially if you’re new to DIY home projects. The good news is, with some basic tools and a little patience, you can do it yourself and give your space a fresh look.
By following step-by-step instructions, you’ll learn how to safely remove your old fixture, connect your new pendant light, and secure it at just the right height.
Keep reading for a straightforward guide to installing your pendant light with confidence.
Gather Tools and Shut Off the Breaker First
First, gather the necessary tools and shut off the breaker to ensure electrical safety. You will need a voltage tester, wire strippers, wire cutters, a screwdriver, and ceiling anchors or screws appropriate for your ceiling fixture. Start by turning off the power at the breaker box; never rely solely on a wall switch. Use the voltage tester to confirm the wires are not live — touch it to the hot and neutral wires and ensure the indicator stays unlit. This step prevents electric shocks before you handle any wiring. A similar project like a budget-friendly DIY organizer can help you plan your workspace efficiently. A common cause of post-installation issues like flickering is a loose neutral wire connection in the junction box. For your space, consider whether a vanity or desk better suits your daily needs for lighting and work.
Next, strip about ½ to ¾ inch of insulation from the conductors using your wire strippers. Trim the fixture cord to the desired hanging length with wire cutters, and loosen the set screws on the fixture to adjust later. Prepare the mounting plate by ensuring it is level before tightening, which helps with a straight and secure installation. Carefully read and follow all manufacturer instructions to avoid mistakes, as this ensures proper alignment and safety. Following these steps sets a safe foundation for wiring and makes the hanging process smoother.

NON-CONTACT DETECTION of AC voltage in cables, cords, circuit breakers, lighting fixtures, switches, non-tamper-resistant outlets, and wires

Be aware of voltage easily - the tip glows red and a beeper sounds when voltage is detected
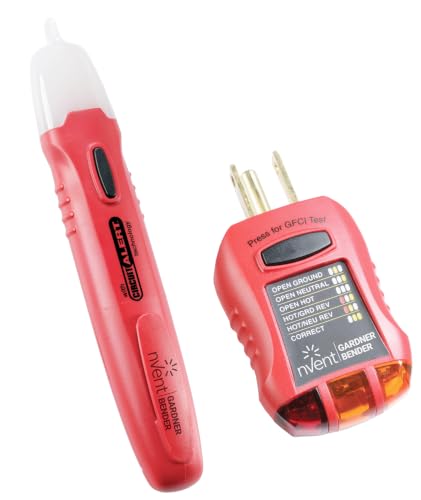
Non-Contact Voltage Tester senses AC voltage from 50-600V
Kill the Power and Remove the Old Light
Kill the power and remove the old light. First, turn off the circuit breaker controlling the fixture and verify the power is off with a voltage tester. Test both the hot black and neutral white wires at the junction box, holding the probe close to all exposed conductors to check for residual current. If you’re unsure which breaker controls the room, shut off the main breaker for complete safety. Always use a voltage tester with a non-contact feature to confirm no live current remains before touching any wires. For a similar hands-on project, you can experiment with household liquids and oil to create a DIY lava lamp.
Next, remove the bulb by turning it counterclockwise and wait for it to cool if it was on recently. Set the bulb and shade aside. Support the fixture with one hand and unscrew the canopy screws. Gently lower the canopy to access the wiring, then disconnect the wires by loosening the wire nuts, starting with the hot wire, then the neutral, and finally the ground. Unscrew the old mounting plate from the ceiling fixture. Inspect the ceiling wires for damage; if any are frayed, cut them back and strip about ½ to ¾ inch of insulation before proceeding. Consider whether you want to replace this old fixture with an LED lighting option instead of a traditional HID bulb to save energy and improve longevity.
Connect White-to-White, Black-to-Black, and Ground Wires
Connect the wires as follows: attach the fixture’s white wire to the ceiling’s white wire using a twist-on wire nut, then connect the black wires together the same way. Follow the standard color coding—white for neutral, black for hot—to prevent short circuits. Twist the bare copper ends together before adding the wire nut to ensure a solid mechanical bond. If your fixture uses blue and brown wires instead of white and black, note that blue corresponds to white and brown to black. Understanding how dimmer switches work can help you later control the light level of this pendant fixture. When choosing this fixture, consider the style and cost compared to a table lamp for your space.
Next, make the ground connection. Attach the fixture’s green or bare copper wire to the ceiling’s ground wire using a wire nut. If the junction box has a green screw, wrap the ground wire around it and tighten. For multiple ground wires, use a pigtail—twisting all ground wires together with a short bare copper wire before connecting to the fixture’s ground wire. Secure all connections tightly and ensure no exposed wire remains. Insulate each wire nut with electrical tape to prevent loosening. Finally, tuck the wires neatly into the junction box, leaving room for the fixture to be mounted safely.

Premium Quality: 4 pack circle universal light crossbar are made of high quality zinc plated steel, ensuring sturdy, durable and anti-rust for ensuring your safe use and reliability for a longer service life. The heavy-duty bracket is rated to support up to 22 pounds (10KG)
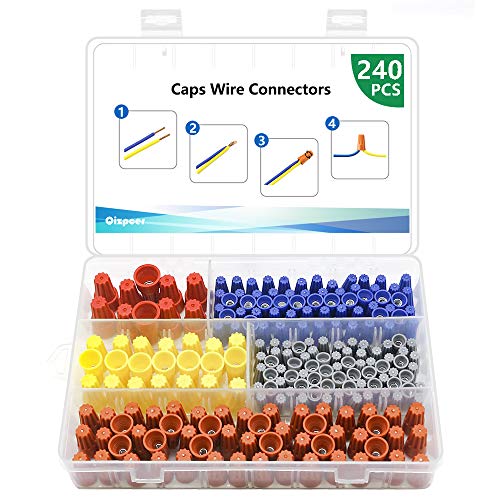
Easy Practical: Great for connecting wires without soldering; push the stripped conductors into the connector and screw on

Package Including: You will receive 50 Pairs Light Socket Grip Strain Relief. These Cable Glands Are Standard M10 Cable Glands That Can Be Screwed into the Base of Any Standard Lamp Socket, Not Easily Loosened or Rotated After Tightening.
Secure the Fixture and Dial in the Perfect Height
Secure the fixture and dial in the perfect height by following these steps. Once the wiring is safely tucked inside the junction box, attach the mounting bracket to the ceiling box with screws that match the box holes. Make sure the bracket is level and straight before tightening all screws firmly with a screwdriver and wrench. Preferably, use the same screws from the old fixture to ensure compatibility. This ensures the fixture will stay stable and the bracket won’t wobble before attaching the canopy.
Next, lift the canopy over the bracket and align it with the screw holes. Secure the canopy tightly with the provided retaining screws. Lock the cable locking screw to secure the fixture against the ceiling with no gaps.
For cord adjustment, loosen the set screw on the cord grip. Pull the cord up or down to your desired height, typically between 1.6 and 1.8 feet above a table or floor. Re-tighten the set screw firmly to lock the cord in place and prevent slippage. Double-check the final height to ensure it is consistent and level.

PACKAGE CONTENTS- 2 packs of steel universal light stand plates with all mounting hardware including grounding screws: 2 fixture crossbars, 4 crossbar mounting screws, 4 grounding screws, 6 wiring nuts, 4 black acorn cap nuts, 4 silver acorn cap nuts.

【180° Adjustable Angle】The flexible design allows you to customize the position and alignment of the lighting fixture for perfect illumination.

【Pendant Canopy Kit】 Included 1pcs gold 4.7" diameter, 1" deep canopy kit, 0.28"D&0.79"H thread pipe, 1pcs US standard universal crossbar, 1pcs UL ground wire and other mounting necessary hardware.
Plan Your Pendant Height and Spacing
To ensure proper pendant height and spacing, start by hanging pendants 28–38 inches above countertops or tables. This range balances good lighting with unobstructed sightlines and creates a welcoming room ambiance. For an eight-foot ceiling, position the pendants approximately 30–32 inches above a kitchen island. If your ceiling is higher, add about 3 inches for each additional foot of height to maintain proportion.
When installing multiple pendants, aim to space them about 30 inches apart on an island, with at least 6 inches of clearance from each end. For a dining table, select pendants with diameters that are half to two-thirds of the table’s width. Ensure the bottom of the fixture is placed at minimum 30 inches above the tabletop to prevent glare and create an even lighting effect. Properly balancing pendant height and spacing elevates your room’s style and function.
Test Your Pendant Light Installation After Restoring Power
After restoring power, test your pendant light installation by first confirming voltage at the fixture with a multimeter. Set your multimeter to AC voltage and carefully probe the hot and neutral wires. You should see roughly 120V in the US or 230V in AU/CA. If there is no reading, trace the voltage back toward the switch or breaker to find where the connection may be faulty.
Next, install a known-working bulb that does not exceed the fixture’s wattage limit. Flip the wall switch to see if the bulb lights up. If it doesn’t, check the socket for discoloration, rust, or corrosion. Address flickering or dimness immediately, as these often indicate loose wiring connections that could compromise fixture stability. For those choosing a fixture, reviewing best night light features can help inform which designs offer consistent performance and durability. Remember that a toy box might offer simple storage, but for safely organizing wiring tools and supplies, a dedicated organizer with compartments can prevent clutter and accidents.
Be attentive to any unusual heat or buzzing sounds coming from the fixture. These signs suggest wiring problems and should be inspected by a professional. Finally, perform a gentle tug test on each wire nut to ensure they are secure, preventing long-term issues and ensuring safe operation.