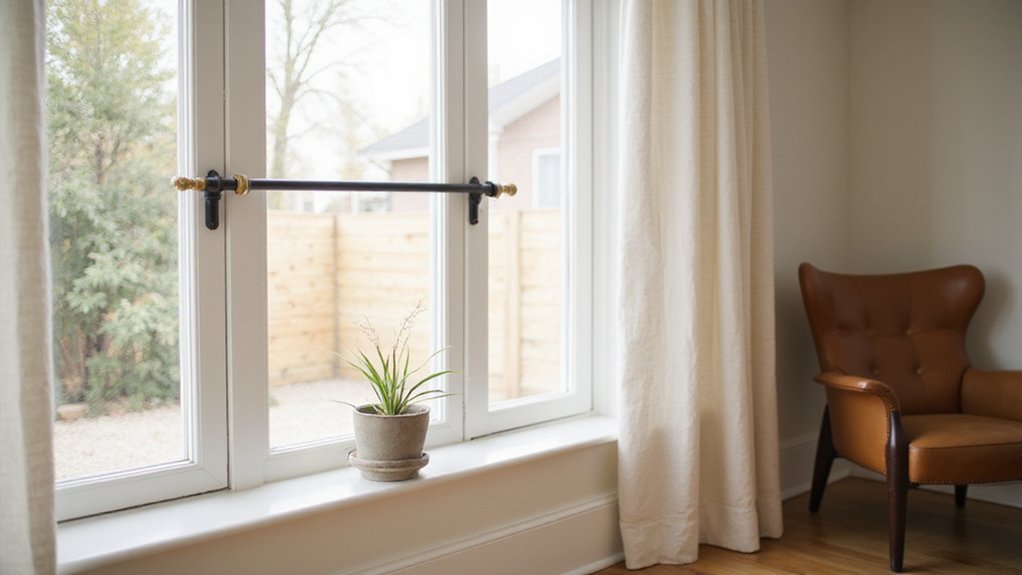
Thinking of customizing your own curtain rod? Getting the right size and placement makes a big difference in how your window looks and functions.
When you learn the easy steps to measure, choose materials, and install brackets, you’ll be able to create a stylish, personal touch for your space.
The full guide below will walk you through each step.
Measure and Plan Your DIY Curtain Rod Placement
To accurately measure and plan your curtain rod placement, start by determining the height. Mount the rod 4 to 6 inches above the window frame for a taller-looking window. For a more dramatic ceiling lift, position it 6 to 12 inches above the frame.
Next, decide on the width. Extend the rod 12 inches beyond each side of the window frame for a balanced, standard appearance. For a luxurious, custom look, extend it between 10 to 12 inches beyond each side. This creates the illusion of larger windows and adds visual interest.
Choose your fabric carefully—heavier materials need more support. Remember to multiply the window width by two for fullness and coverage when planning your fabric amount. For those weighing style against function, a vanity or desk serves a similar balancing act for your room’s layout. Space brackets about 4 to 6 inches from each end of the rod, especially when using substantial fabrics, to evenly distribute weight and prevent sagging. Use a metal tape measure, record your measurements to the nearest 1/16th inch for precision, and verify that all brackets are level before drilling. To ensure the rod is securely anchored, you may need to locate ceiling joists for extra support if mounting near the top of the window frame. Paying attention to color coordination ensures your rod’s finish complements your fabric and room palette for a cohesive look. For ongoing maintenance, gently dust fabric blinds regularly to prevent buildup.
Choose the Right Materials for Your DIY Curtain Rod
When selecting materials for your DIY curtain rod, wood dowels and metal conduit are the top choices based on your style and durability needs. For a natural, warm look, opt for wood dowels that are slightly longer than your window width to allow for proper mounting and curtain coverage. Sand them with super fine grain paper to ensure smooth sliding of your curtains, and consider applying a clear protective coat for added durability. For optimal visual balance, the rod should be mounted 4 to 6 inches above the window frame.
If you prefer an industrial or modern aesthetic, metal conduit from the electrical aisle is an excellent option. It’s lightweight, easy to cut with a hacksaw, and comes in 10-foot sections, making it suitable for large windows. Always check the conduit for straightness before installation to avoid crooked curtains. For a truly professional finish, consider integrating can light ceiling techniques to ensure the bracket placement is perfectly aligned.
Finials and brackets should match the diameter of your rod for proper support and security. Decorative finials like cabinet knobs can add a custom touch without extra cost. Once assembled, paint your rod with thin, even layers, and finish with a clear coat to prevent paint from rubbing off onto your curtains over time.

Beautiful Decor: This PU leather curtain rod holder adopts the boho style design. Its elegant appearance will definitely make a great addition to your home

Modern Design: 5/8 Curtain rod in rustic finish,simple yet modern look fits effortlessly with your place.Ideal as your kitchen curtain rods,bedroom curtain rods,sliding glass door curtain rods,outdoor patio curtain rods
Install Hardware for Your DIY Curtain Rod
To install your hardware, start by determining the ideal bracket placement. Place brackets 4 to 6 inches from each end of the rod to ensure stability. For partial coverage, mount the brackets 3 to 5 inches beyond the window casing. For full outside coverage, extend the mounts 8 to 15 inches past the window. Use a stud finder to locate support studs for maximum strength. When no studs are available, select suitable anchors—plastic or screw anchors rated for your curtains’ weight. If a stud is close to the window, shift curtain rod placement to avoid drilling into drywall alone, as this uses a stud finder to locate secure mounting points. Drill pilot holes that are slightly smaller than your screws to prevent splitting, then insert the anchors without tightening fully. Position the brackets, making sure they are level, and then secure them tightly. For wider spans, add extra support brackets to prevent bowing or sagging. After hanging the rod, check that all brackets are snug and secure. It is also important to turn off the power at the circuit breaker before beginning any electrical work near the fixture. For proper lighting nearby, ensure that any LED bulbs in the room do not dim due to faulty wiring connections that can cause flickering. You can also consider using a ceiling medallion as a decorative way to bridge the old fixture box with your new pendant conversion.

Heavy-Duty Metal Structure Design: These curtain rod brackets are crafted from premium thickened iron metal with enhanced hardness and sturdiness. Solid integrated metal construction delivers excellent load-bearing capacity, not easy to bend or break, ensuring long-lasting durability for indoor and outdoor use.
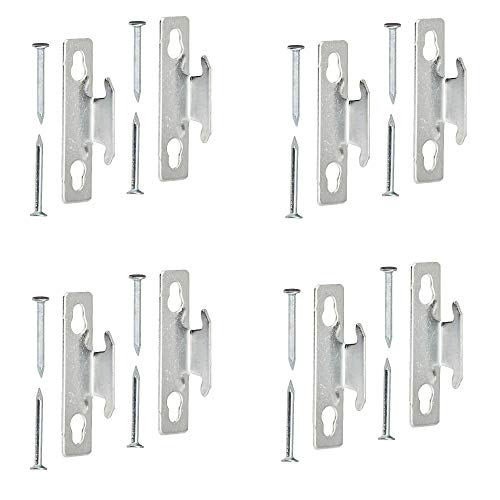
1 case of 4 Packs, 4 Count Total

NO DRILL, NO MEASURE INSTALLATION FOR QUICK SETUP Fast Fit design installs easily without drilling or measuring, helping save time and reduce wall damage during setup.
Level and Adjust Your DIY Curtain Rod
Start by creating a cardboard template to ensure symmetrical bracket placement. Mark the desired height for your curtain rod and trace the screw holes for each bracket on the template. Drill pilot holes through these marks. Flip the template to the opposite side to verify that both brackets are mirror images, ensuring accurate positioning. Use a level on the rod and brackets to confirm they are perfectly horizontal before attaching them permanently. Additionally, utilize the original curtain panel container cardboard as a durable material for your template. For more guidance on attaching hardware, consider different curtain ring styles to match your rod setup.
To maintain even height, measure from the ceiling or window frame on both sides. Drawing a chalk line across the full width of the installation area provides a visual guide for precise alignment. When securing the brackets, tighten only one screw initially per bracket to allow minor adjustments. Alternate tightening screws on both sides of each bracket to fine-tune the rod’s position. Use set screws to correct slight slants and ensure a level appearance. For a similar upgrade in precision, consider repurposing a can light conversion kit to provide adjustable hardware for custom bracket alignment.
If your window is especially wide or lacks sturdy wall studs for support, installing a center bracket can prevent sagging. This additional support keeps the curtain rod straight and helps handle the weight of your curtains comfortably. Following a detailed wiring schematic ensures precise layout, just as a template does for bracket placement. To test the grip of each bracket, tug firmly but avoid over-tightening, which can compromise holding power and damage the wall or bracket.
Hang Curtains and Add Finials for a Finished Look
To hang your curtains and add finials for a polished look, start by ensuring the brackets are level and securely fastened. For optimal placement, mount brackets directly above the window frame to create the illusion of height. Weave your curtain fabric onto the rod from the front, making sure the outermost eyelet is positioned outside the bracket. For good coverage, choose a curtain panel width that is two to two and a half times your window’s width. Verify that your rod’s diameter matches the size of your curtain rings or eyelets to ensure smooth movement. Insert pin hooks into each pleat near the top of the curtain for even stacking. For secure mounting, always align brackets directly with wall studs when possible, or use wall anchors for drywall. Next, place the last ring between the finial and the bracket to hold your curtain in place. For a similar custom approach, you can follow a step-by-step guide to connect lighting components. For smoother operation, choose pin hooks with a nylon coating to reduce friction on the rod.
Before attaching the finials, temporarily remove them to slide the curtains onto the rod comfortably. Once the curtains are in place, screw the finials back onto the rod ends for a finished appearance. Tighten the brackets to ensure stability and prevent sagging. Manually smooth out the folds of the curtains and check that the inner edges overlap sufficiently to prevent gaps. Test the setup by opening and closing the curtains several times. Finally, step back to view your window from different angles—your curtains should just brush the floor for an ideal, refined finish.

【How to Choose a Right Curtain Rod】Please measure your window size(Don't only measure the glass but the entire window frame.) before purchasing to help you choose a right curtain Rod.Curtain Rod Size = Overlap + Window Size + Overlap(The recommended overlap is at least 2-6 inches for panels to stack on each side,it depeans on the panels thickness),so a right curtain rod should be 4-12 inches longer than your window size.If your window is 36 inches, your curtain rod should be 16-60 inches.

Adjustable Length: 32-144" curtain rod fits windows 24 to 136 inches wide. The telescoping rod featuring a flexible 1 to 9 feet extension range for precise customization, while the adjustable heavy-duty brackets offer a 2.5" to 3.5" wall clearance to prevent curtains from rubbing against the wall and improve light blocking. ( Important Note: To ensure safe shipping, this rod consists of 9 segments that require assembly. It is not a single or 2-piece pole.)

Adjustable length: 32-144" curtain rod fits windows 24 to 136 inches wide. Its telescoping rod extends up to 9", and the adjustable thickened brackets allow the gap between the rod and wall to be adjusted from 2.5“ to 3.5", preventing friction and enhancing light-blocking performance.