Removing window film might seem tricky, but with the right approach, you can do it yourself.
Whether your film is dyed, metallic, or ceramic, the methods differ slightly, but the goal is the same: to get a clean, scratch-free glass surface.
By the end, you’ll know how to soften the adhesive, peel away the film, and remove any leftover glue with ease.
Identify Your Window Film Type for Proper Removal
Identify your window film type before peeling to prevent glass damage or stubborn residue. Check if the film offers UV protection, common in carbon and ceramic films that block 95–99% of harmful rays. Examine the reflectivity: metallized films contain metallic deposits that reflect heat, while dyed films absorb solar energy and lack a shiny finish. Feel the material’s thickness; safety films range from 1 to 14 mils, with thicker options providing more reinforcement. Also, note the construction: ceramic films use nano-ceramic particles for high heat rejection without darkening, whereas dyed films tend to fade after 3–8 years. Unlike fluorescent bulbs, LEDs provide a more efficient and longer-lasting alternative for lighting your space. Choosing an LED bulb with a similar color temperature to your old film’s tint can help maintain consistent room ambiance. Recognizing these traits ensures you choose the right removal method and avoids scratching the glass or fighting stubborn adhesive residue. For films that mimic thicker, protective layers, you may need to detach vertical blinds first to access the glass fully.

HYDROVIEW CERAMIC CAR GLASS CLEANER (CLD30116) – Cleans and protects automotive and household glass, windows, and mirrors with SiO₂ ceramic technology for improved clarity, water beading, and visibility in wet weather

EFFECTIVE CAR GLASS CLEANER CLAY: This glass clay bar effectively removes overspray, baked-on grime like tar, oil, residue, and water spots without scratching or damaging the glass

2-Step Windshield Cleaner Kit - Includes 3.5 oz glass emulsion paste and 3.4 fl oz rain repellent spray to clean exterior auto glass first, then add a hydrophobic water-beading layer.
Choose Between Heat or Chemical Softeners
Heat softeners are effective on standard window films. Use a heat gun set between 150°F and 180°F or steam at 212°F, holding it 2 to 4 inches from the glass. Apply steady, overlapping passes for 30 to 60 seconds until the adhesive turns into a pliable gel. For optimal results, ensure the tool is moved consistently to avoid concentrated heat damage, as recommended in mastering picture hanging techniques for steady hand application. This method is ideal for removing UV resistance or Solar tint films. However, avoid heat on Low-E glass, as it can cause permanent damage to the coating. When selecting for a room that also prioritizes aesthetics and storage, consider the vanity vs desk decision to optimize your space. Chemical softeners are safer for Low-E glass. Apply an ammonia solution generously, cover with black plastic, and wait 5 to 10 minutes. This approach reduces thermal stress and is suitable for defroster grids, where dry heat might create hot spots that could damage the heating elements. Understanding how solar shades function can help you choose the right window treatment for your home decor needs.

Professional Window Tinting Tool Kit : Car Automotive Window Vinyl Wrap Tool Kit Vehicle Tinting Application Tools Set included Vinyl wrap heat gun,felt squeegee with fabric felt, vinyl wrap stick squeegee, vinyl film craft cutter,rubber cleaning squeegee, small rubber squeegee,go corner squeegee, vinyl wrap anti-static application gloves,4pcs vinyl wrap magnet holder,window film cutter.

⏩【Warm Tips】When using the heat gun for the first time, there will be smoke and burning odour, which is normal. This is because there is an anti-rust coating on the heating core. When the heat gun is activated, the coating will start to melt and smoke due to the high temperature

16FT Cord Heat Gun for Vinyl Wrap: with Large LCD Display & Precise Temperature Control & Overheat Protection &Air Intake Guards Design, use to install car sticker vinyls or easy remove old films or paints from car body/window without residue.
Gather the Required Tools and Solvents
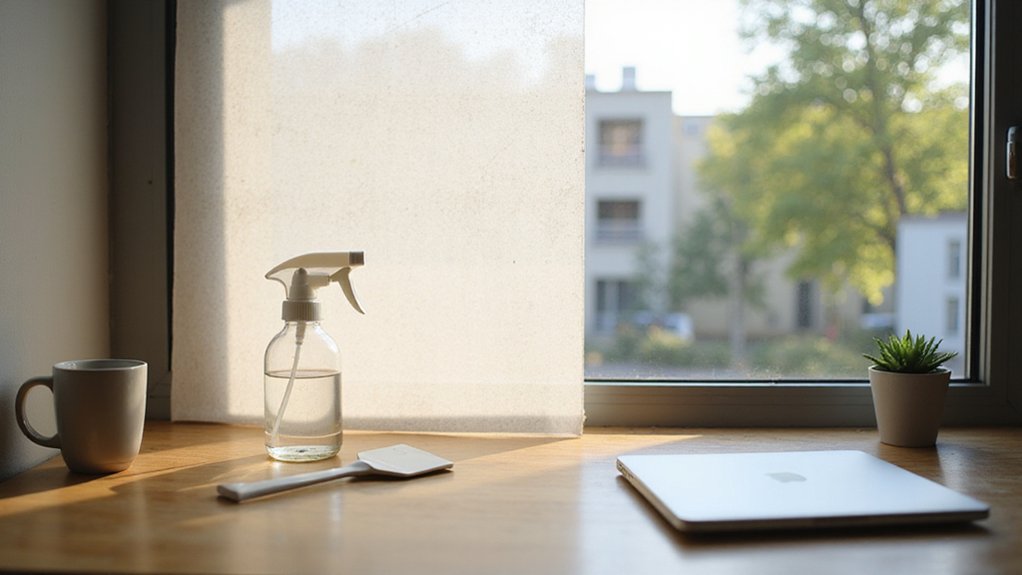
To work efficiently and safely, gather your tools and solvents before starting. You’ll need a sharp plastic scraper and a 1-inch razor blade for initial lifting of the material. Protect your eyes and skin by wearing safety glasses and gloves when handling ammonia solution or Rapid Remover. Fill a spray bottle with appropriate cleaning solutions such as soapy water, degreaser, or Sinol for spot cleaning. Use a blue sponge to prevent scratching during cleaning, and keep microfiber cloths nearby for final wiping. For blade maintenance, have replacement blades ready—dull edges can cause glass damage. Cover your work area with a drop cloth to catch residue or drips. To extend the chemical soak, prepare Saran wrap and newspaper for covering areas. An inexpensive blue scrub pad can be used safely on glass to avoid scratches during initial cleaning. Issues like LED bulb flickering can also arise from poor electrical connections, similar to how improper lighting can indicate a problem. With these tools and solvents prepared, you’ll work more effectively, reducing the risk of accidents or damage.
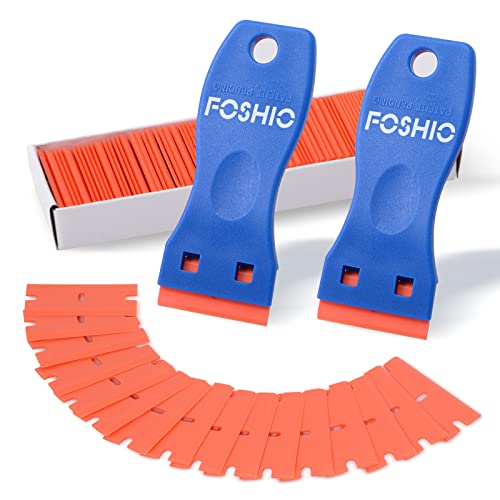
Plastic scraper set include 2pcs plastic scraper and 100pcs double edge plastic razor blades

1 Razor Scraper with 10 Double Edged Plastic Blades

Multi-Functional Plastic Razor Blade Scraper: Perfect for scraping labels, stickers, window film, decals, and other adhesives from car windows and windshields.
Loosen the Adhesive With Controlled Heat
To loosen the adhesive, use controlled heat to soften the film’s bond without damaging the glass. A hair dryer works well for standard windows, while a heat gun speeds up the process—just keep it 6 to 12 inches away from the surface. A fabric steamer can also be effective, holding the nozzle 2 to 3 centimeters from auto glass. Begin at a lifted corner and move the heat tool back and forth in sweeping passes, working gradually in small sections. This prevents the adhesive from re-hardening and makes removal easier. Listen for popping sounds, which indicate the adhesive is softening; if you hear them, stop and let the glass cool. Check the temperature with your hand before peeling, feeling for warmth. If any areas remain stubborn, reheat them before proceeding. Never force the film off, as additional heat generally helps release the adhesive more cleanly. For a freshly cleaned home look, the same principles of gentle heat application can be applied to loosen dirt on mini blinds before wiping them down. This method works similarly to how cutting LED strip lights requires careful, controlled application of heat to avoid damaging the circuit board. Understanding the internal lift cord mechanisms of blinds can help you avoid interference when cleaning around them.

Designed for interior use on windows

TOTAL BLACKOUT & SLEEP AID: Delivers maximum light-blocking performance to create a dark, restful sleeping environment. This heavy-duty darkening shield completely eliminates piercing streetlights and harsh early morning sun. It is an ideal, targeted solution for night shift workers requiring daylight sleep, baby nurseries, and home theater setups looking for complete room darkening.

this decorative self-adhesive film transforms the look of any flat clean surface and is safe to apply to walls, kitchen cupboards, furniture, shelves and more creating a unique, personalized look high quality - made in germany application instructions can be found in the product description below
Peel the Window Film Off in Large Strips
Start peeling the window film off in large strips once the adhesive has softened. This approach prevents the tint from breaking apart prematurely due to adhesive failure. Aim to remove the tint in as big a piece as possible, ideally peeling off the entire laminate layer at once. Avoid cutting into narrow strips unless absolutely necessary; only split the film down the middle if a single strip becomes unmanageable. For best results, work in a warm environment to keep the adhesive pliable and easier to manage.
Begin at a corner where the film naturally lifts. Use your fingernail or a razor blade angled at about 30 degrees to get started. Pull steadily and slowly at a 180-degree angle, bringing the film back on itself. Maintain a pace of roughly one inch per second for a smooth process. Keep lubricating the window with soapy water throughout to help the film slide off without snagging. Also, steam just ahead of the peeling point to keep the sheet continuous. Choosing a DIY approach can significantly reduce the overall cost of the project. Following these steps will help you strip the window cleanly and efficiently. Storing your workspace tools in a smart closet shelf can keep supplies organized and accessible during the project.
Remove Stubborn Glue Without Scratching Glass
To remove stubborn glue residue from glass without scratching, start by applying steady heat from a hair dryer or heat gun for 30 to 60 seconds. Heat softens the glue’s bonds and makes it easier to remove. Focus on stubborn corners first until the residue becomes pliable. Immediately after heating, saturate a cotton pad with 90% isopropyl alcohol or acetone and hold it against the glue for 1 to 3 minutes. This allows the solvent to break down the surface contamination. Carburetor cleaners are effective because they contain solvent-based solutions that dissolve adhesive efficiently. When choosing a workspace, using a floating bedside table keeps supplies organized and at a comfortable height. If you prefer a custom workstation, building a DIY bedside table can provide the perfect surface for this task.
Next, hold a razor blade at a 30 to 45 degree shallow angle and gently scrape the residue off. Never dig the blade into the glass—use light, controlled pressure. For gentler removal, opt for a plastic scraper. Reheat and reapply solvent as needed, working in short intervals to prevent the glass from warming too much. Keep the surface cool and wet at all times to avoid micro-scratches. Flip to a clean microfiber cloth frequently to prevent rubbing glue back onto the glass surface.

Dual temp: Use the right hot glue temperature for the job; Low Heat for delicate materials like floral, fabric, foam, jewelry, and more; High Heat for strong bonding on wood, plastic, metal, glass, and more

【Dual Temperature Mode】SEEKONE HG350 mini heat gun has been upgraded to a new dual temperature mode: 500°F (260°C) and 842°F (450°C), which can meet different process needs, whether you are performing delicate tasks or various DIY projects, this heat gun provides the perfect temperature range for every application

LOW TEMPERATURE - Ideal for bonding delicate materials such as paper, fabric, foam, or flowers that could be damaged by higher temps. Glue melted by this glue gun can only reach a maximum temperature of 170°F.
Clean the Glass With Two Different Washes
After scraping the glass, the next step involves two separate washes to ensure thorough cleaning. Begin with an initial wash using soapy water: mix warm water with a few drops of mild dish soap. Spray this solution generously on the glass to lubricate the surface and soften adhesive bonds. Keep the glass wet while working to prevent scratches and maintain safety. Let the solution sit for 10 to 15 minutes, allowing it to penetrate stubborn residues. During this time, avoid wiping or drying the surface to preserve lubrication. For best results, prepare a clean spray bottle specifically for the soapy mixture to avoid contamination.
For the second wash, switch to an ammonia-based cleaner or a commercial solvent such as 409. Apply this with a clean microfiber cloth, moving in horizontal and vertical strokes to cover the entire surface evenly. Allow the solvent to sit for around 10 minutes to help break down any remaining adhesive. During the wiping process, frequently rotate the cloth to check for adhesive transfer and ensure a clean finish. Using 409 and a razor together is an effective combination for removing leftover residue after the initial wash. This two-step method guarantees thorough surface preparation while minimizing the risk of scratching. Once complete, your glass will be clean, smooth, and ready for new film application.
Prevent Thermal Shock and Water Spots Safely
To prevent thermal shock and water spots during film removal, follow these safety precautions. Keep the heat source six to eight inches away from the glass and move it constantly in small circular motions. Never allow the heat to linger in one spot; if you hear popping or ticking sounds, stop immediately. These noises indicate that the glass is overheating and could crack. Allow the glass to cool completely before resuming heat application. This careful heat management also ensures the old, deteriorated tint peels off in larger pieces with reduced residue transfer. For a more energy-efficient alternative, consider LED lighting options after the window film is removed. To ensure safe removal, evenly distribute heat application across the entire window surface before peeling. Always use the recommended tools required for scraping to avoid scratching the glass.
During adhesive removal, keep the glass wet at all times. Spray a soapy slip solution generously over the surface as you scrape to prevent it from drying out. Never let the surface dry in the middle of scraping, as this can cause water spots and uneven removal. After removing all residue, dry the window thoroughly with a clean, lint-free cloth. This step prevents streaks and water spots from forming. Use a squeegee to work from top to bottom, maintaining a consistent blade angle of 30 to 45 degrees to protect the glass and achieve a smooth finish.