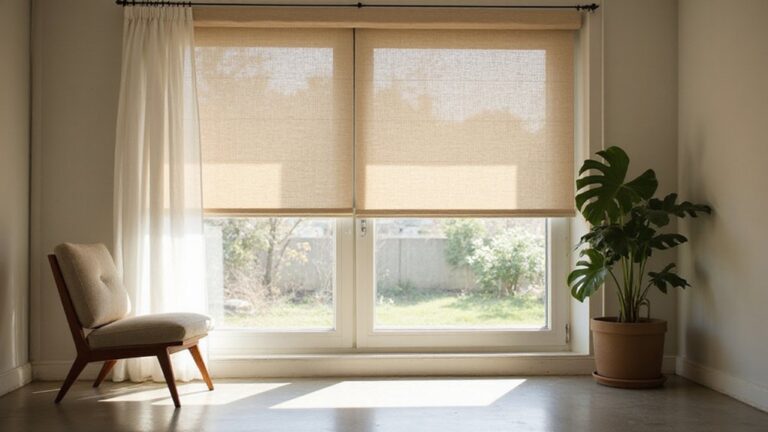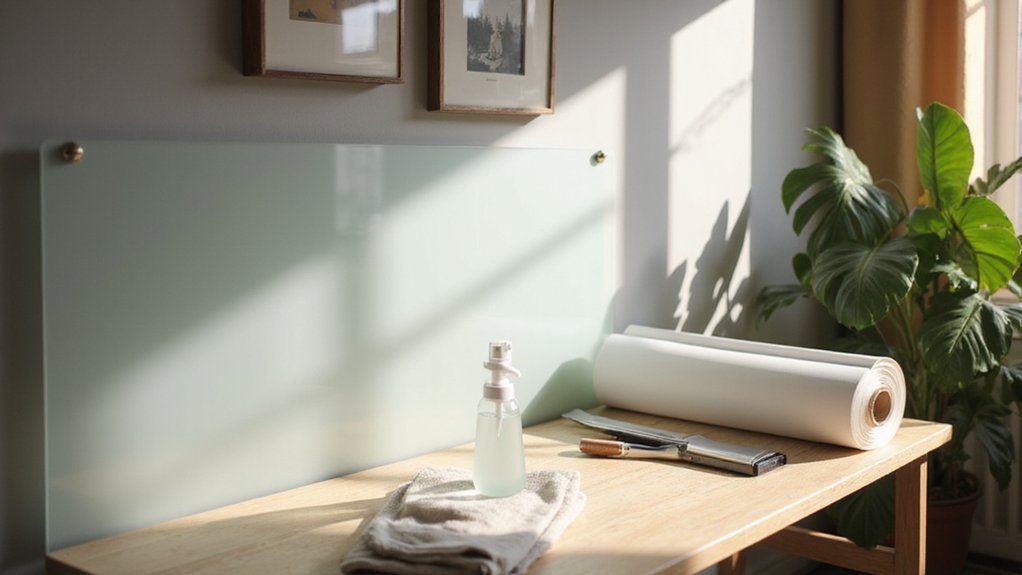
Are you wondering how to get privacy on your windows without expensive curtains or blinds? DIY window privacy film is a simple, affordable solution that you can install yourself. It transforms your space while letting in light and avoiding the hassle of permanent changes.
With just a few supplies and some basic steps, you can achieve a clean, professional look.
Stay with me for the full process to help you avoid common rookie mistakes and get the best results.
How to Install Privacy Film on Any Window
Begin by thoroughly cleaning the window with an application solution or a mixture of baby shampoo and water. This step removes paint, grime, dirt, dust, and any pet fur or debris that could become trapped under the film. Ensuring a spotless surface helps achieve a flawless finish without imperfections beneath the film. Measure the window carefully, and cut your privacy film with at least 1 inch of extra overlap on each side for precise fitting. For historical window designs with irregular pane shapes, pay special attention to measurements to ensure a snug fit. When working with challenging frames, consider alternative mounting methods like static cling or temporary adhesive, especially if you plan to remove the film later. Generously spray the glass and the adhesive side of the film with soapy water to facilitate smooth application. Peel back the liner on the film and position it at the top of the window, then work downward, pressing the film into place. Use a squeegee to remove air bubbles and excess water from the center outward. Finally, trim any excess with a sharp blade to create a clean, professional seal. At night, the film creates total privacy but figures may be visible if lights are on inside the home, similar to how a loose connection in electrical circuits can cause inconsistent performance. If you are also selecting furniture for your window area, a vanity versus desk comparison can guide you on which piece best balances style and function. For those seeking a dedicated grooming station, a makeup vanity with lighting provides both task illumination and a polished surface for daily routines.
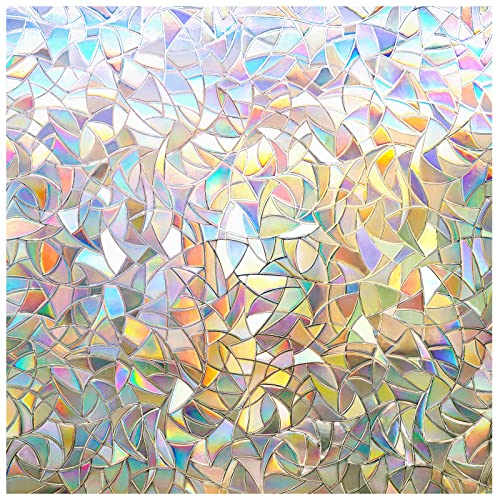
Striking Pattern, Stylish Decoration: With over 10 years of experience in window film innovation, rabbitgoo static film features unique irregular patterns that cast rainbow glows in sunlight, adding a stylish touch to your decor. A cost-effective alternative to bulky curtains, blending durability with everyday elegance

NO ADHESIVES WINDOW PRIVACY FILM: Glue Free Design Cuts down Chemical Release Drastically, Applies in Minutes and Firmly Sticks to Windows
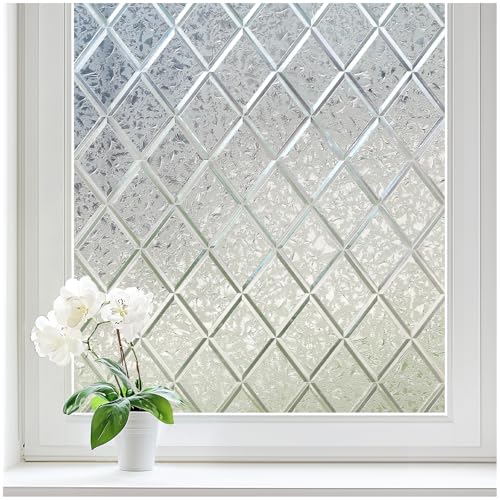
Elegant Glass Decor: Features delicate lattice patterns combined with irregular floral designs, recreating the look of luxurious decorative leaded glass. Ditch ordinary window films and effortlessly transform your space. Ideal for both homes and rentals
Tools and Materials You’ll Need
To install DIY window privacy film effectively, you’ll need a specific set of tools and materials. Start with a measuring tape to determine the exact dimensions of your window, ensuring a precise fit. A utility knife and a straight edge are essential for clean, straight cuts of the film. Use a spray bottle filled with water and six drops of dish soap per liter to lightly spray the surface; this allows for repositioning the film during installation. A plastic squeegee helps to smooth out air bubbles and water, creating a seamless finish. Keep a microfiber towel nearby to wipe dust and moisture off the glass, preventing imperfections under the film. For thorough surface preparation, use a razor scraper to remove any adhesive sealant or silicone from corners to ensure a smooth, flat surface. Considering the brightness of your room, you might evaluate whether HID bulb vs. LED lighting better complements the film’s light-diffusing properties. For a truly organized workspace, treat your supplies like a closet organizer to keep tools accessible and prevent clutter. For stubborn adhesive residue left behind after removing old film, a heat gun or hairdryer can soften the glue for easier scraping.
Choose your privacy film based on your desired look and adhesive type. Options range from static-cling varieties, which are reusable and easy to remove, to permanent adhesives for a more secure hold. Select from a range of colors and patterns to match your decor. Painter’s tape can be useful for holding the film in place or creating patterns during measuring and cutting. For tailored designs, a craft knife allows for detailed cutting. A fine needle helps pop stubborn bubbles, and an oil-based paint pen can add decorative elements or outlines. These tools work together to ensure your installation is smooth, accurate, and results in a professional appearance.

Complete Window Privacy Film Kit: 3-piece tool set includes a suede squeegee, a lockable utility knife and a 120ml spray bottle, everything needed to install window film with no extra tools to buy

Ready for a perfect window film installation: The HTVRONT window film kit includes 1* 5.5 inches Felt Squeegee, 1* 7 inches Detachable Ergonomic Knife,1* Replacement Blade and 1* 100ML Spray Bottle. The window privacy film installation tools are designed for making window film applications like a breeze

A basic but versatile tool wallpaper peel and stick tool kit help you on wallpaper application,trimming ceiling,woodwork or baseboard projects,vinyl wrap,window tint or glass film
How to Clean and Scrape Your Window for Film Adhesion
To prepare your glass surface for film adhesion, start with a razor blade scraper held at a shallow angle to remove any old paint, glue, or caulk. Pay special attention to the edges and corners, since these areas need to seal tightly for the film to adhere properly. Always wear safety gloves and eye protection to prevent injury from the sharp blade.
Next, mix 1 teaspoon of baby shampoo with a gallon of distilled water. This solution helps prevent mineral deposits from hard water that can interfere with adhesion. Spray the mixture generously onto the entire glass surface. Use lint-free paper towels or a microfiber cloth to scrub the glass in circular motions, ensuring you lift away dirt, grease, and other residues. After scrubbing, wipe the surface from multiple angles to check for any remaining spots. This thorough cleaning prevents bubbles, streaks, and debris from compromising the final result. Working in a clean space is easier when you mount the headrail securely first, as recommended in vertical blind installation guides. The cordless mechanisms inside blinds also require a clean workspace to avoid dust interfering with smooth operation. Following this guidance also helps you achieve a professional-looking finish during application.
Reapply the cleaning solution and use a squeegee to remove excess water, moving downward and stopping about 1.5 inches from the frame to avoid pulling dirt under the film. Dry the window thoroughly, including the frame, to prevent any moisture from causing bubbles or peeling later. Finally, wipe the glass with isopropyl alcohol to eliminate any lingering oils or grease. Feel the surface with your hand; it should be smooth and free of streaks or residue to ensure optimal film adhesion.
Measuring and Cutting Privacy Film Like a Pro
Transfer these final dimensions to the shiny side of your film. Use the grid lines on the backing paper to make straight cuts, measuring twice before you cut once to avoid mistakes. Always use the larger measurement when transferring dimensions to ensure a perfect fit. Before cutting, master your angles by slicing a 45-degree bevel away from each upper corner. This prevents creasing and makes handling easier. Downloading a lighting guide can help you choose consistent brightness for the room. Use a short blade tip and stop about six inches from the bottom edge of the film. After the film is applied to the glass, you can trim any excess along the edges for a clean, flat finish. Before cutting, ensure your workspace has adequate ambient lighting to avoid shadows that could lead to measurement errors.

DECORATIVE DESIGN: These window films feature a beautiful green leaf pattern that adds a natural freshness to any room and creates a rainbow visual effect when the sun shines.

【5 in 1 Window Tint Tools】: Package included 5 pcs of window tint tools, a blue squeegee with a soft cloth, a big red squeegee, a safe membrane cutter, a 500ml spray bottle, carving knife.
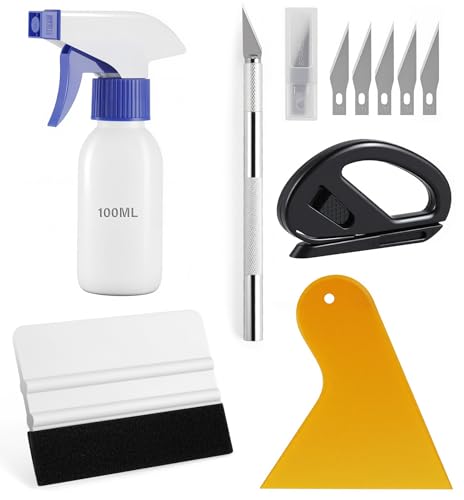
Window Tint Kit: Package included 5 pcs of window tint tools, a squeegee with a soft cloth, a yellow vinyl squeegee, a safe membrane cutter, a 100ml spray bottle, a craft knife and 5 spare sharp blades for replacement.
Application Techniques for Privacy Film Without Bubbles
Using the wet application method is your best option for a bubble-free privacy film installation. Start by fully saturating the glass with a soapy water solution until beads of water run down the surface. This lubrication makes repositioning the film easier and prevents it from sticking immediately. Lightly mist the top side of the film to help your squeegee glide smoothly. Position the film at the top of the window and then slide it downward onto the wet surface. Any uneven areas from insufficient prep can trap air, so ensure that all surface imperfections have been sanded smooth beforehand. Turn off any fans to reduce airborne dust that can get trapped under the film. Avoid circular rubbing motions early in the process, as they tend to trap air sideways. Instead, push large bubbles toward the edges with your hand first. Maintain a clean and well-lit work area to easily spot dust or debris before it gets trapped under the film. Properly saturating the window with water-based solution facilitates easy film placement and prevents immediate adhesion.

Easy Installation Toolkit Included: Our static cling window film requires no glue or adhesives. Just use the squeegee, soapy water and cutter for a bubble-free, professional finish on glass windows in minutes. No hiring experts needed

Top Privacy, Soft Light: Enjoy complete seclusion without sacrificing sunlight. Our film creates a frosted white wall effect, instantly blurring outdoor views for bathrooms and bedrooms. It bathes your room in a soft, natural glow, eliminating the need for gloomy curtains

Frosted Elegance, A Touch of Art: This glass film features frost etching and staggered textures, adding soft, refined touch to any glass surface. It transforms plain glass into elegant privacy partition, enhancing your home or office window decor
Squeegee Techniques for a Bubble-Free Finish
To achieve a bubble-free finish, hold your squeegee at a 30 to 45-degree angle and apply steady, even pressure. Start from the center of the surface and work outward, overlapping each stroke by about 25% to efficiently push the liquid towards the edges. Keep the surface wet during the process so the tool glides smoothly and draws out air with water. For edges, consider using alternative squeegee types such as a hard card wrapped in microfiber or a felt-edged squeegee for the final passes. Similar to how curtain rings slide along a rod with minimal resistance, your squeegee should glide without sticking to create a flawless application. Use firm, consistent strokes—first horizontal, then vertical—to direct moisture toward the borders and prevent bubbles from forming. Use a scraping tool first during the two-stage cleaning process to remove dirt and dust before final squeegee passes. Be careful not to press too hard on any bubbles, as that can fold them permanently. For best results, consistent pressure ensures the film adheres evenly and avoids defects. If needed, re-squeegee the area while the film is still warm from a heat gun to create a perfect, sealed finish. Additionally, applying a soapy solution to both the glass and the adhesive side of the film makes positioning and sliding much easier before final squeegeeing.

Main Function: This plastic squeegee can help you easily clean water from car windshield, windows, mirrors, tiles without leaving scratches on the surface. Besides, the felt scraper can effectively squeeze out the air bubbles generated when applying the film, so that the surface of your car stays flat and smooth
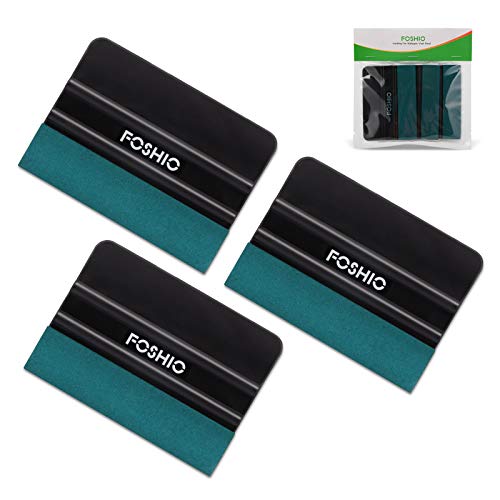
Vinyl squeegee set include 3pcs 4 inch squeegee with micro fiber sude felt edge. Small size and lightweight makes it easy to use and carry.

UPGRADE MAGNETIC VINYL SQUEEGEE:With two magnets on end of each squeegee. If you need your another hand in vinyl tinting and don't want to Soil the squeegee, you can simply paste your squeegee on the car.
Dealing With Stubborn Bubbles and Tiny Wrinkles
When stubborn bubbles or tiny wrinkles resist basic smoothing, heat activation becomes your primary tool for softening the film and making the adhesive more pliable. Use a hairdryer or heat gun set to 120–130°F, holding it 6–8 inches away from the surface for 30–45 seconds. Applying heat increases the film’s flexibility, making it easier to push trapped air toward the nearest edge. For persistent bubbles, gently prick the center with a pin, then squeegee from the center outward to release the air. However, avoid piercing old or damaged films as they may crack or wrinkle irreparably. If bubbles remain after pricking, you can carefully cut the film with a sharp blade, similar to cutting LED strip lights at designated points to avoid damaging the material. This technique mirrors the precision required when connecting LED strips to ensure a clean finish without tears.
To combine multiple small bubbles, work them into one larger one before pushing the air out. If heat and pressure do not resolve the issue, lift a corner with a plastic wedge, apply a slip solution to reduce friction, and then reset the film in place. Proper prevention starts with ample lubrication during application and slow, deliberate squeegee strokes. Avoid overheating beyond three seconds to prevent blistering or damaging the film.
How to Trim Excess Film With a Utility Knife
To trim excess film with a utility knife, you should first ensure the film is fully adhered to the glass to prevent shifting during cutting. Safety precautions are essential: extend the blade only 1/4 to 1/2 inch past the housing to avoid damaging the glass or hitting obstructions. Use a fresh, sharp blade for clean cuts because dull blades tend to tear the film rather than cut smoothly. Angle the knife away from the window frame to protect it from accidental scratches or cuts. Start your cut about an inch down from the top corner, rather than directly at the edge, to maintain control. Pull the knife slowly downward along a straight edge to guide your cut. When approaching corners, stop a few inches before them and then trim outward to navigate curved or angled edges safely. Avoid fully extending the blade to reduce the risk of skipping or uneven cuts. Snapping the blade to restore sharpness is a quick way to maintain optimal blade performance for these cuts. After completing all edges, gently pull away the trimmed strips and then run a squeegee along each edge to press the film firmly against the glass, ensuring a smooth, sealed finish.
Privacy Film Curing Time: What to Expect
After applying your privacy film, expect it to take time to fully cure. The process can vary from 30 days for standard films to up to 90 days for thicker security films. During this period, it’s normal to see bubbles, haze, or streaks as the adhesive settles. Temperature and sunlight play a significant role: direct sunlight and warmth accelerate curing, while cold weather slows it down. You should avoid cleaning the windows during the first 30 days to prevent any solution from seeping out. Also, check local regulations because some reflective films might impact compliance. For instance, large pieces of tall bedroom dressers can cast shadows that reduce sunlight exposure and extend curing time. Using a squeegee tool to remove excess moisture during installation can help minimize later bubbles and streaks. Patience is key to ensuring your film adheres properly and remains clear over time. For a similar DIY approach, you might find budget-friendly ideas for shelving projects useful.
Common Mistakes to Avoid on Your First Try
First, ensure a thorough cleaning of the glass surface. Dust, grease, or paint flecks can ruin adhesion, so use a glass scraper for stubborn dirt. Avoid abrasive cleaners or non-microfiber cloths—they leave micro-residue that can trap bubbles under the film. Make sure the glass is completely dry before applying the static-cling film; any moisture will weaken the bond and cause the film to peel or bubble. Before applying the film, assess the window for any cracks or chips that could worsen under the film. Proper preparation is critical for a smooth, lasting application.