If you’re wondering how to hang a pendant light safely and neatly, you’re in the right place.
Getting the wiring right is a crucial first step, but it’s just as important to measure and cut the cord to your desired height for a polished look.
Follow along to learn how to connect your pendant securely and correctly from start to finish.
Kill the Power Before Installing Your Pendant Light
Kill the power at the main circuit panel before installing your pendant light. Never rely solely on the light switch to cut power, as electricity can still flow through the fixture base. Locate the specific breaker controlling your work area by inspecting your circuit panel. Flip this breaker to the “off” position to ensure no current is running. The breaker box is typically located in a garage or closet, identified by room number.
To be certain, verify there is no electricity present. Use a non-contact voltage tester, a vital safety tool, to check the ceiling cables and switch box. Test all wires carefully, and do not assume the switch has turned off the power. Confirm the tester indicates a dead circuit before proceeding. Consider how the primary function of your space, such as a dressing area versus a home office, affects where you mount the fixture.
Photograph the existing wiring to keep a record of color coding for future wiring steps. Wear appropriate safety gear like insulated gloves and eye protection. Keep the work area clear to prevent accidents. Never touch wires with your bare hands or tools until the tester confirms they are de-energized. Document your connections and inspect inside the junction box thoroughly, but always prioritize safety above all.

NON-CONTACT DETECTION of AC voltage in cables, cords, circuit breakers, lighting fixtures, switches, non-tamper-resistant outlets, and wires

SAFETY FIRST: It will send out multiple alarms through sound and light. When the voltage is detected, the tip will send out red light and beep. When the higher the sensed voltage is, or the closer it is to the voltage source, it beeps at a higher frequency and the percentage value will be larger. At the same time, the screen will be red or green, red means high voltage and live wire are detected, green means low voltage and null wire are detected

Integrated Voltage tester & Screwdriver - The VTS1000H includes a high-strength steel screwdriver at the tail. This Two-in-One tool is practical for wire checking and everyday electrical projects. It can differentiate between the live and neutral wires in cables and at the outlet, switch, and junction box. Easy to use for breakpoint tests. Safety rating: CAT IV 600V, CAT III 1000V
Measure Pendant Light Height, Then Cut the Cord
Measure your desired pendant light height and then cut the cord accordingly. First, turn off the power and verify the circuit is dead. Next, determine the appropriate height based on your room’s function. For dining tables, hang the pendant bottom 30 to 36 inches above the surface for standard 8-foot ceilings. In kitchens, aim for 12 to 18 inches of clearance from the island top. For walkable areas, keep the bottom of the pendant at least 78 inches from the floor. If your ceiling is higher than 8 feet, add about 3 inches for each additional foot of ceiling height to maintain consistent proportions. When choosing your fixture, consider whether single or double cell shades best suit your style, cost, and functional needs. Test your chosen height by temporarily hanging the pendant and sitting or standing as usual to gauge comfort and visual appeal. Once satisfied, measure the cord length so you can cut it slightly longer than your final measurement. This extra length allows for small adjustments during installation. Always double-check your measurements before snipping the cord to ensure the pendant hangs exactly where you want it. For reference, a 27 gallon storage bin typically measures about 24 inches long, 18 inches wide, and 14 inches tall, offering a standard volume for organizing household items. Similar to how a cordless blind mechanism uses tension to raise and lower the shade without exposed cords, your pendant light wiring must remain securely connected after cutting.
Which Wire Is Hot, Neutral, and Ground?
To identify which wire is hot, neutral, and ground in your pendant light, start by noting the color code. Typically, black or brown wires are hot, white or grey are neutral, and green, green/yellow, or bare copper wires are ground. This color coding makes the process straightforward. However, textured wires can add confusion; on clear cords, the ridged or ribbed wire is neutral, while the smooth wire is hot. If you see silver and copper strands inside a translucent fixture, silver indicates neutral and copper indicates hot. For extra certainty, use an ohmmeter: test from the socket’s center pin to each wire; continuity confirms the hot wire. Touch the meter to the threaded collar to verify neutral. Always shut off the breaker before handling wires. When wires are identical and uncolored, testing with an ohm meter or continuity tester is necessary. Once identified, mark the hot wire clearly by wrapping black tape around it. Flickering in LED bulbs is often caused by incompatible dimmer switches, so check your dimmer model if issues arise after wiring. For a reliable setup, ensure you use only a dimmer switch rated for LED loads. For additional guidance, a step-by-step approach similar to removing window film can help you avoid damaging delicate wiring.

Dimmer on off Switch -Choose your own brightness. Come with an on off dimmer switch in the light cord, you can adjust the brightness for your old fashion bulb with our cord kit.
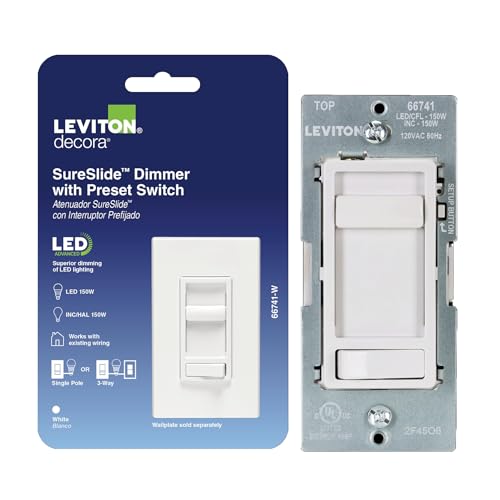
SET THE VIBE – SureSlide Dimmer Switch delivers smooth, reliable lighting control to adjust overhead lights—from bright task lighting to a soft ambient glow to create the perfect atmosphere

WIRELESS REMOTE CONTROL: Notice: NEUTRAL WIRE IS REQUIRED! The signals of switch can transmit through walls and obstacles without line of sight. Detachable remote provides more flexibility for mounting location. With our wireless light switch and receiver kit, you can move or add a light switch — all without rewiring.
Mount the Pendant Light Canopy and Secure It
To secure the pendant light canopy, start by concentrating on wiring concealment. Carefully fold the wires into the junction box using smooth accordion bends. This technique prevents pinching or damaging the wires against the metal edges of the box. Keep the wire nuts oriented upward, positioned above the canopy line, to avoid trapping insulation or causing strain on the connections. Tuck all excess wire neatly into the electrical box, ensuring a tidy and safe setup. During this process, ensure the mounting bracket from the fixture is already installed to the junction box for secure canopy attachment. For optimal wire management, you may need to cut the LED strip to achieve a custom length for the fixture. Always check that the junction box is level before proceeding, as a level base ensures the canopy hangs straight.
Don’t rush the final fastening steps. Tighten the canopy screws evenly, using the provided cap nuts and star washers. This ensures the fixture is secured firmly without putting stress on the wiring or connections. Before fully locking everything in place, adjust the mounting studs to match your canopy’s size. Double-check that no insulation or wire nuts are trapped under the canopy edge. For a clean final look, consider using durable woven baskets to store leftover parts and tools nearby. When everything is snug, level, and tidy, the pendant installation is ready for the next phase.

【Pendant Canopy Kit】 Included 1pcs black 4.7" diameter, 1" deep canopy kit, 0.28"D&0.79"H thread pipe, 1pcs US standard universal crossbar, 1pcs UL ground wire and other mounting necessary hardware.

【EASY INSTALLATION】 - Our Ceiling Canopy Kits include all necessary mounting hardware and installation instructions you need for hardwiring pendant lights or chandeliers to your ceiling electrical box. Very easy to assemble.

【EASY INSTALLATION】 - This kit comes with all necessary mounting hardware and installation instructions. Very easy to assemble.
Power On Your Pendant Light and Test It
To confirm your pendant light is ready for use, start by ensuring the bulb is installed correctly. Match its voltage rating and size to the fixture to prevent electrical issues or damage. Do not overtighten the bulb, as this can cause breakage or poor contact. For a warm, natural glow that complements your decor, consider using a bulb that mimics the soft amber light of a salt lamp. When selecting hardware, choose curtain rings made of brass for durability and a cohesive metallic look.
Next, head to your circuit breaker—do not rely solely on the wall switch. Stand clear of the light as you flip the breaker back on. Immediately check if the light illuminates. If it doesn’t turn on, turn off the power again and inspect your wiring connections. Verify that the black wire is connected to the black terminal, the white wire to the white terminal, and the ground wire is secure. Loose connections increase the risk of electrical fires. Always verify with a voltage tester before inspecting connections to ensure no power is present.
Once the light turns on successfully, consider adjusting its height for aesthetic balance. Aim for about 75 centimeters from your surface and make sure both sides hang evenly. If your fixture includes a wireless switch, press its button for three seconds until the light flashes. This step confirms the switch is paired correctly and helps prevent energy wastage from faulty wiring or surges. For a similar layering effect in home lighting, consider pairing a pendant light with custom roman shades to control ambient brightness and complement your fixture’s style.