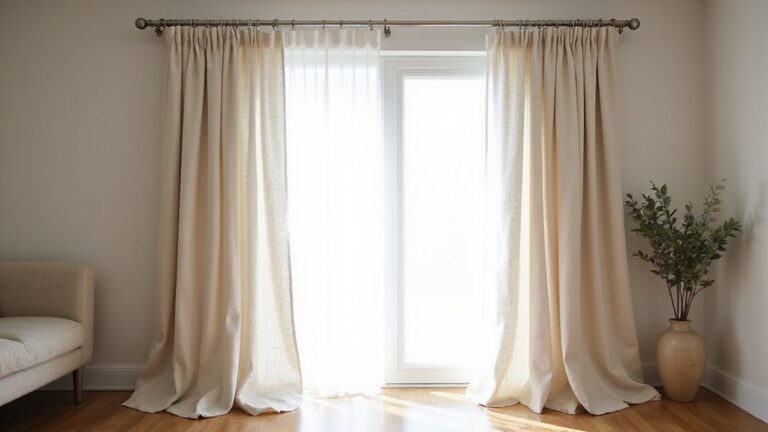
Wondering where to place your curtain rod brackets for the best support and appearance? Getting the height and spacing right can make a big difference in how your curtains look and function.
Generally, brackets are mounted 4 to 6 inches above the window frame and extend 6 to 10 inches past each side.
Brackets should be spaced every 30 to 36 inches to avoid sagging.
The full details on placement are right below.
How High Should You Place Curtain Rod Brackets?
To determine how high to place your curtain rod brackets, mount them 4 to 6 inches above the window frame. This height provides a balanced proportion for most rooms and helps maximize light entry. It also offers flexibility in hanging different curtain styles, allowing you to switch between floor-length drapes and lighter panels without re-drilling. For this reason, many standard installations use a pencil to mark the bracket placement on the wall. When choosing between a chest of drawers and a dresser, consider the storage style and function that best suits your room layout. Recording the measurement from the floor ensures accurate placement no matter your bracket height. For a similar decision-making process, consider how style, cost, and function guide the choice between a vanity or a desk for your space.
For a more dramatic look, push the brackets 8 to 12 inches higher, creating the illusion of higher ceilings and a more spacious feel. In low-ceiling spaces, mounting the rod just 1 to 2 inches below the ceiling can help draw the eye upward, making the room appear taller.
Always measure from the floor to the top of the window frame and then add the desired height—typically between 4 and 6 inches—to find your mounting point. If your curtain rod exceeds 60 inches, consider using a center support bracket to prevent sagging and ensure stability. Use a level to check alignment before fastening brackets in place for a clean, professional look.

FITS ROD DIAMETERS — These over blinds curtain rod brackets designed for 1 inch rods. Does not fit 1-1/4" rods. These extra long curtain rod holders are ideal for large windows, heavy curtains, and extended rod setups.

FITS ROD DIAMETERS — These over blinds curtain rod brackets designed for 1 inch rods. Does not fit 1-1/4" rods. These extra long curtain rod holders are ideal for large windows, heavy curtains, and extended rod setups.

How Far Should Brackets Extend Past the Window?
For a balanced look, extend your curtain brackets 6 to 10 inches beyond each side of the window. This amounts to a total rod length that’s your window width plus 12 to 20 inches. If you want your curtains to reveal more of the window when open, or if your wall space allows, pushing brackets out up to 12 inches per side works well, especially with heavy fabrics for a dramatic effect. Avoid mounting brackets less than 3 inches past the window frame, as this will cause the curtains to block your view and make the room feel darker. This placement supports layered arrangements of sheer and blackout curtains for flexible light control. However, a faulty electrical connection in the wall can also cause flickering issues with nearby light fixtures. When choosing bulbs for those fixtures, consider the energy efficiency and cost of incandescent versus LED options. For reference, a 27 gallon storage bin typically measures about 30 inches long, offering a similar scale to a standard curtain rod.
How Do You Anchor Brackets to Studs (or Without Studs)?
To anchor brackets securely, start by locating your wall studs using a stud finder or by knocking on the wall to identify solid wood, which is usually within 3 inches of the window casing. For these locations, drill a pilot hole and insert screws directly into the stud—no anchors are necessary. Ensure each screw penetrates at least 1 inch into the stud to provide adequate support for your curtain rod. Use a level to establish a straight line across your marked points before drilling, confirming alignment with the 3-inch measurements from the ceiling and window edge.
If you encounter hollow drywall instead of studable areas, use wall anchors. Drill a ¼-inch hole, insert a plastic anchor flush with the wall surface, and partially drive the screw before mounting the bracket. Continue tightening until the anchor expands behind the drywall, securing the bracket firmly. Always test the stability by gently tugging on the bracket before hanging your curtain rod, and use a level to ensure everything stays aligned. Check that your anchors and screws can support the weight of your curtains to prevent potential accidents.

MULTIPLE SIZE OPTIONS – This heavy duty toggle bolt assortment includes 3 sizes (1/8 in, 3/16 in, 1/4 in) to help you choose the appropriate size for drywall anchor applications based on wall type and intended use. Suitable for selected hanging projects such as hanging pictures, curtain rods, and plants when used correctly. Please refer to the size chart and installation guidance before use.

PREMIUM NYLON WITH GLASS FIBER STRENGTH – Crafted from tough, high-grade nylon combined with robust glass fibers, these self-tapping wall anchors are built to last. Designed to hold up to 75 lbs, they offer a firm grip in the wall, perfect for hanging art, photo frames, paintings, shelf brackets, or curtain rods. The set includes 70 galvanized Phillips screws to ensure a strong, secure installation and reliable mounting.

Anchor and screw Kit Includes: 25 Pcs Zinc Metal Drywall Anchors, 25 pcs #8 x 1-1/4'' Phillips Screws
How Far Apart Should Brackets Be to Prevent Rod Sagging?
For most standard curtain rods, brackets should be spaced every 30 to 36 inches to prevent rod sagging and keep your curtains hanging straight. The exact distance depends on the weight of your fabric and the material of the rod. Light curtains under 8 kg/m typically require brackets spaced 24 to 31 inches apart, while medium-weight fabrics between 8 and 15 kg/m need brackets every 20 inches. Heavy fabrics like velvet should have brackets spaced every 12 to 14 inches for better support. If your rod is hollow or lightweight, place brackets closer together even if your fabric is light. For rods longer than 60 inches, adding a center bracket is essential to support the middle and prevent sagging. Maintaining consistent intervals ensures the weight is evenly distributed, avoiding weak points that cause your curtain rod to sag or bend over time. When selecting a rod, consider quality and performance to ensure it can handle the weight without bending. Proper installation using curtain rings can also help distribute fabric weight evenly across the rod. For those also organizing a small space, a three-drawer dresser provides stylish storage that helps keep your room tidy and clutter-free.

KENNEY MANUFACTURING: Celebrating more than 100 years, Kenney Manufacturing is defined by its strength, integrity, and consumer-first mindset—crafting window hardware, bath accessories, and storage products built to last.
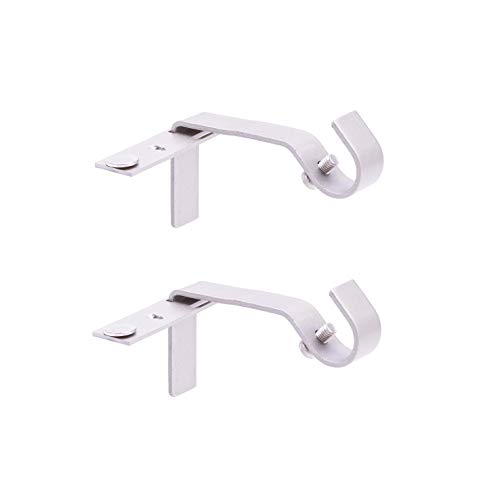
NO DRILL, NO MEASURE INSTALLATION FOR QUICK SETUP Fast Fit design installs easily without drilling or measuring, helping save time and reduce wall damage during setup.

Heavy-Duty Metal Structure Design: These curtain rod brackets are crafted from premium thickened iron metal with enhanced hardness and sturdiness. Solid integrated metal construction delivers excellent load-bearing capacity, not easy to bend or break, ensuring long-lasting durability for indoor and outdoor use.
When Do You Need a Center Support Bracket for Long Rods?
A center support bracket is necessary for rods longer than 60 inches. Standard rods typically can handle spans up to this length before drooping occurs. Heavier fabrics make this need more urgent; for every 5-pound increase in curtain weight, reduce the maximum span by 15 inches. For example, a dense drapery on a 48-inch rod will require a center support to prevent sagging. The material and diameter of the rod also influence support requirements: ¾-inch diameter rods may need center supports beyond 80 inches, while 1¼-inch diameter rods can extend to 105 inches without additional brackets. Never omit the middle support for rods exceeding 105 inches regardless of the material. For windows measuring 61 to 120 inches in width, install one center support at the midpoint. If the window exceeds 121 inches, place two evenly spaced supports to ensure stability. Proper placement of the support at the center prevents sagging and keeps curtains operating smoothly.

ADJUSTABLE CURTAIN ROD BRACKET: Our curtain brackets can slide forward and backward with a screw lock, so you can adjust how far from the wall you want the actual curtain rod holding portion

Packaging: you will receive 2 hanging clothing rod brackets, 1 bracket comes with 2 mounting screws, a total of 4 mounting screws, 2 sets are suitable for reinforcing longer rods or multiple closet projects at once; Note: before installation, please check the dimensions of the wardrobe rods, especially the diameters at both ends

Anndason Heavy Duty Adjustable Curtain Rod Brackets,add a dash of Style and Elegance to your – home, office or anywhere else you decide to use then.
How to Level Brackets for a Straight, Even Rod
To level brackets for a straight, even rod, start by marking the bracket positions on your wall. Use a carpenter’s level or a laser level to ensure each mark is perfectly horizontal before you drill. This prevents your rod from being crooked, which can disrupt the room’s visual balance. For larger windows, a laser level provides a precise straight reference line across both spots, making it easier to keep everything aligned. Use the original curtain panel container cardboard as a template to mark measurements for consistent placement across multiple brackets. The same materials used for a DIY clothing rack can be repurposed to test bracket spacing on a wall before drilling. For an even more polished result, consider the lighting and alignment features found in top vanity mirrors to ensure your bracket placement mirrors the same precision.
After installing the first bracket, hold a 24-inch level from it to set the second bracket at the same height. This ensures consistent height across both brackets. Pre-drill pilot holes for each mark, then attach the brackets snugly without overtightening, which could distort their shape or alignment. Place the rod loosely in both brackets and check if it’s level. If you notice any minor slants, adjust the set screws on the brackets accordingly. This step guarantees that the rod and finials will sit evenly and look polished. Finally, tug gently on each bracket to confirm they are secure and perfectly level.
Bracket Placement for Corner and Bay Windows
For corner and bay windows, proper bracket placement ensures your curtains hang neatly and function well. For corner windows, mount brackets at the same horizontal level on both walls, using a spirit level to transfer the height from the window frame. Position the rod 8 to 12 inches above the frame to allow for easy movement and a clean look. Extend the outer brackets 4 to 6 inches beyond the frame edge to keep the curtains from blocking light and to provide full coverage. For bay windows, add support brackets every 10 to 12 inches, especially on longer rods over 60 inches. If your curtains are heavy, consider installing two center supports to prevent sagging. To ensure the curtain clears the floor, position the bracket slightly below the ring opening for proper support. Generally, brackets should be placed 4 to 6 inches above the window frame for a standard appearance. For a more dramatic effect with floor-length drapes, position brackets 8 to 12 inches above the frame. Before securing the brackets, ensure they are aligned in the same horizontal plane using a level for a tidy, professional finish. When making your own drapes, remember that pinch pleat curtains are an excellent choice for a professional finish and require careful bracket alignment to hang correctly. If you prefer a more modern lighting look over the window, consider using a can light conversion kit to replace old recessed fixtures. To maintain a consistent cleaning routine for these fabric treatments, gently vacuuming the blinds with a brush attachment helps prevent dust buildup and extends their lifespan.
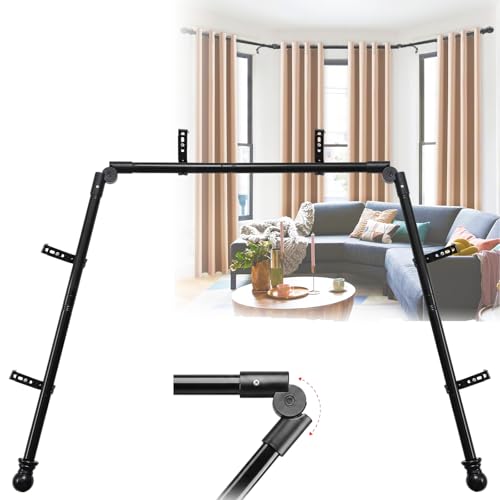
Flexible Angle Adjustment: The bay window curtain rod features a 0-180° rotatable elbow connector, perfect for handling tricky angles and uniquely shaped windows. Ideal for use in bedrooms, kitchens, bathrooms, and living rooms

Package: The package includes 1pcs corner curtain rod connector with 2pcs screw drivers.The curtain rod corner connector is suitable for curtain rods with up to 1 inch (2.54 cm) in diameter
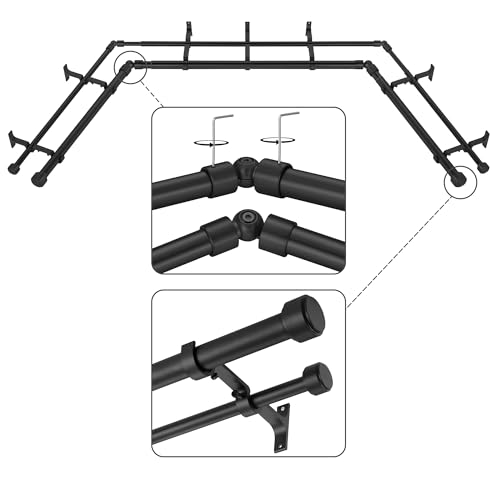
Double Curtain Rod for Bay Windows 3 Sided - Double curtain rods can be used to match two colors or two different styles of curtains to increase the visual interest and appeal of the window area.1-Inches front rod in is perfect for hanging room darkening or blackout curtain panels and 5/8 Inches back rod is ideal for hanging sheer panels.
Low Ceiling and Cafe-Style Bracket Installation Guide
For low ceilings, mount curtain rod brackets 1 to 2 inches below the ceiling line to draw the eye upward and make the room feel taller. Alternatively, position them 3 to 5 inches below an 8-foot ceiling or crown molding. This placement strategy helps maximize the perception of room height. To allow more light into the space, extend the brackets 3 to 6 inches beyond each side of the window. Before securing hardware, ensure the bracket placement marks align with the desired curtain height and width by double-checking all measurements. For rooms prioritizing light control, cellular shades offer a functional alternative to curtains. Always use a steel measuring tape to confirm the distance from the ceiling to the bracket marks for consistent accuracy.