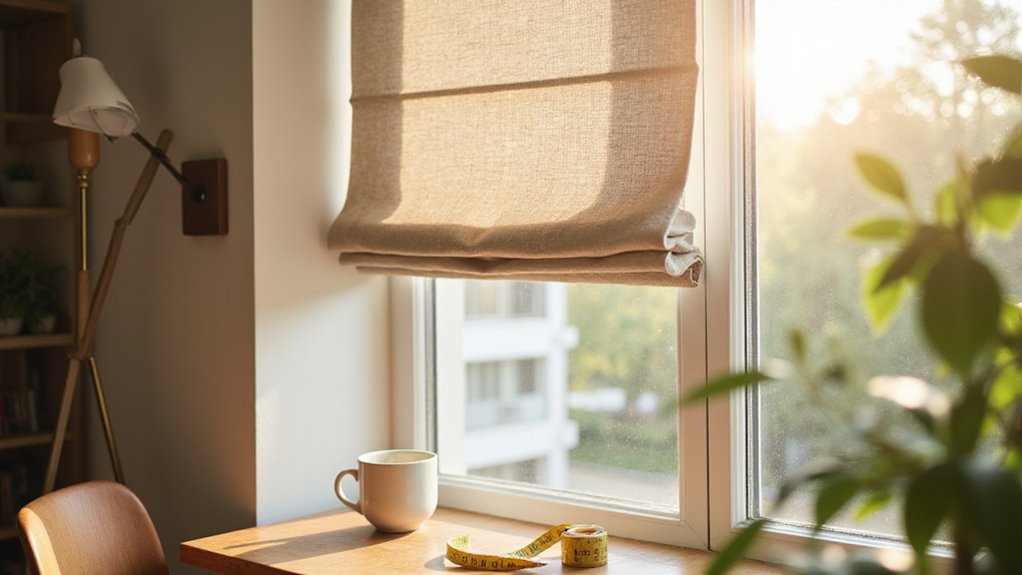
Wondering how to get your roman shades just right? Measuring properly is key to ensuring they fit and look great.
Whether you’re installing them inside or outside the window frame, the right measurements can make all the difference. Keep reading for simple tips to help you measure accurately and get perfect shades every time.
How to Measure Roman Shades: Inside Mount vs. Outside Mount
The minimum flat recess depth needed for an inside mount Roman shade is 1.5 inches. This measurement ensures there is enough space for standard board mounting and for the shade to sit flush inside the window frame. The depth requirement varies depending on the fabric thickness; thicker fabrics need more space to prevent bunching and ensure smooth operation. When installing Roman shades, familiarizing yourself with different curtain hook types can enhance the overall look and functionality. Beginning with a clean work area is an important first step for any DIY window project.
If you’re using a Continuous Cord Loop Clutch System, a 1.5-inch-deep board is necessary, whereas a standard cordlock mechanism can work with a ¾-inch board for narrower recesses. Confirm your mounting hardware compatibility based on these depth requirements before proceeding. When choosing between a vanity or desk for your space, consider whether an inside or outside mount better suits your room’s style and function. For the shade to sit completely flush with the window frame, at least 3 inches of depth is ideal.
If your window’s diagonal measurements differ by more than ½ inch, an outside mount is a better option. Outside mounts don’t depend on depth and allow you to extend the width by about 1.5 inches per side, helping to block light seepage effectively.
How to Measure Width for an Inside Mount Roman Shade
To get an accurate width for an inside mount Roman shade, measure the inside width of your window opening at three points: the top, middle, and bottom. Use a steel tape measure, keeping it tight and level against the window casing. Record each measurement separately. Choose the narrowest of the three measurements, and round down to the nearest 1/8 inch; do not round up. The factory applies a standard deduction, usually between 3/8 inch and 1/2 inch, so you should not add extra inches. Ensure your window depth is at least 1.5 inches for proper mounting hardware; if the shade exceeds 60 inches wide, a depth of at least 2.5 inches is recommended. For hanging lights nearby, you can follow step-by-step instructions to ensure a clean installation. Outside Mount may be necessary if the window depth is insufficient. If the light in the room causes LED bulb flickering, check that your dimmer switch is compatible. Input the narrowest measurement into your order. Remember, your fabric choice doesn’t affect this measurement, but an accurate width ensures a clean, flush fit. Using a steel tape measure prevents stretching errors common with cloth tapes.

Size: 1-1/2"x1-3/4"(38x45mm) for the bracket and the wingnut screw length is 1-1/2"(38mm)

【The Size You Will Get】 The length of the wingnut screw is 1.31" / 33.38mm, the length of the Roman Shade L Bracket is 1.89" / 48.08mm. It is very suitable to match some wooden blinds, Roman blinds and other similar style curtains
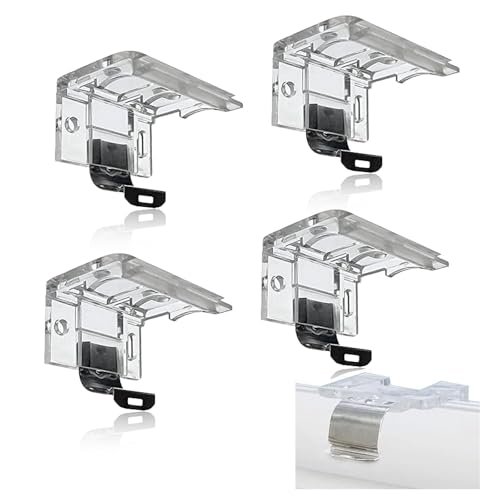
Accurate Sizing and Compatibility: Designed specifically to fit the blind top headrail with a height of 1" (25mm), ensuring a ieal fit for your 1/16" x 1-19/32" x 1-11/16" blinds
How to Measure Height for an Inside Mount Roman Shade
To measure height for an inside mount Roman shade, take three precise measurements inside the window casing: at the left side, center, and right side. Use a steel tape and record each measurement to the nearest ⅛ inch. Always choose the longest of these measurements to ensure the shade will fit properly and not be too short. This decision mirrors the trade-offs seen when weighing style, cost, and function for closets versus wardrobes, where the best fit for your space depends on your priorities.
Be aware that fitting window trim can reduce your usable height. Check for any protruding molding or thick trim that might interfere with your measurement. For unusual window shapes, rely on the tallest point to prevent the shade from catching or being too short. Blindsgalore recommends consulting their guide and worksheet for additional assistance. Unlike corded blinds, cordless blinds operate using a spring or tension mechanism inside the roller, eliminating dangling cords.
Rather than rounding down, always round up to the nearest ¼ inch according to industry standards. Start measuring from the bracket mount depth, ensuring your frame meets the minimum inside mount requirement. If it does not, consider switching to an outside mount for proper coverage. For preventing dust buildup, avoid using abrasive cleaning tools that can damage the fabric surface.

Practical function: The curtain kit can ensure that the curtain will not fall down, provide the extra support required for the window, easy to use, fast, is a practical good thing for the curtain kit.

Size: 1-1/2"x1-3/4"(38x45mm) for the bracket and the wingnut screw length is 1-1/2"(38mm)
How to Measure Width for an Outside Mount Roman Shade
To measure the width for an outside mount Roman shade, start by deciding how much coverage you want the shade to have over your window. Measure from the far left edge of the window trim to the far right edge if trim exists. If not, measure the inside width of the window opening. Add 1.5 inches to each side of the measurement for overlap, totaling 3 inches. This extra width ensures the shade adequately blocks light and provides privacy. Always measure at the top, middle, and bottom of the window, then record the widest measurement. Use a steel measuring tape and round your measurement to the nearest 1/8 inch. Confirm that the total width includes enough clearance for your mounting hardware and that your chosen mounting location allows the overlap. Be sure you are measuring where the headrail will sit—either on or above the molding—before adding the overlap. When cutting LED strip lights for similar projects, it is important to know that they can only be cut at designated cut lines to avoid damage. The final ordered width should match your measurement, with no deductions for hardware or mounting considerations. The product details page specifies the required flat space for mounting the shade on the adjacent surface. For a secure installation, ensure the wire connections are properly tightened to prevent electrical hazards. For a similar approach to light control, consider window film options that allow see out, not in for enhanced privacy without sacrificing visibility.

Natural Bamboo Material: Our bamboo roman shades made from 100% pure natural bamboo. No chemicals added, safe and environmentally friendly. The seams between the bamboo pieces are tight and the woven fabric lines are extremely neat. Kokorona cordless bamboo shades are durable and do not fade or break easily

NATURAL BAMBOO BLINDS: Cordless bamboo shades are made of natural bamboo, which is breathable, sunscreen and environmentally friendly. Even when exposed to direct sunlight for a long period of time, window roman blinds are not prone to fading or damages.
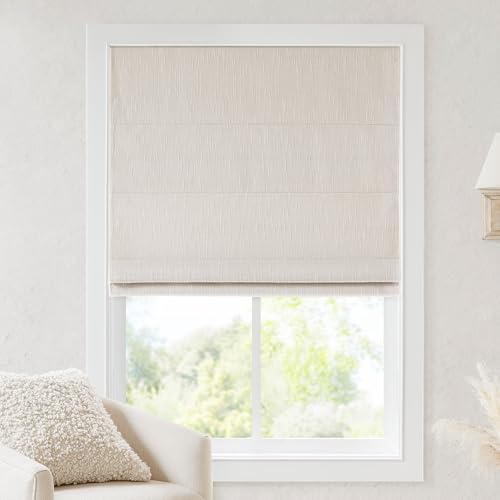
True to size - Refer to our sizing guide image for your perfect fit. SIZE: 29"W x 64"H. Inside mount requires shade 0.5" shorter in width, while outside mount requires shade 4" wider than your window size
How to Measure Height for an Outside Mount Roman Shade
To measure the height for an outside mount Roman shade, you need to decide where to position the headrail first. If the window sill doesn’t protrude, measure 2 to 3 inches below it; if it does, measure 3 inches above the window opening. Mark this point as your mounting line. Then, measure from this line down to your desired bottom stop, whether it’s at the sill or a lower point for extra coverage. For a cost-effective upgrade, consider that DIY window film installation can offer similar savings to installing your own Roman shades. When replacing your shade, make sure the ceiling light is turned off at the circuit breaker before mounting any brackets overhead.
Take three vertical measurements: one at the left, one at the middle, and one at the right side of the window. Use the largest of these measurements to account for any wall unevenness. Round all measurements to the nearest eighth of an inch to ensure accuracy. If you want more coverage, measure down to the sill or even below, but subtract a quarter inch if you prefer less overlap to allow for easier operation. When installing, add one inch to the length to prevent the shade from interfering with the window casing. Keep in mind that your fabric choice will influence how much overlap you need to achieve proper light control and privacy. Similar to attaching LED strip lights, ensure the mounting surface is clean and free of debris.

Sufficient for replacement: you will get totally 4 pieces (2 sets) roman shade wall l brackets in one package, enough quantity for meeting your daily demands; They can surprisingly work well

Package Including: You will receive 2pcs silver L bracket with wingnut and 16pcs screws, Product size: length: 48mm/1.89inch. The metal L bracket opening accommodates various shade rail sizes, making them suitable replacements for existing Roman shade hardware.

Heavy-Duty Iron Construction: Crafted from robust iron material, these blind brackets provide exceptional durability and long-lasting support for heavy roman blinds and shades, ensuring reliable performance in high-traffic areas like living rooms where window treatment hardware must withstand daily use without bending or breaking
Tools for Measuring Roman Shades: Precision Tips
Before measuring your Roman shades, gather your supplies—a steel tape measure and a level are essential for accuracy. A steel tape resists bending and provides precise readings down to 1/8 inch. Use a notepad to record every measurement; relying on memory can lead to mistakes. The level ensures your frame is perfectly horizontal, which is crucial before installing mounting brackets. Confirm that your tape measure can fit into tight corners when taking depth readings.
Measure the width at the top, middle, and bottom of the window opening, then record the narrowest measurement. For height, measure from the top, center, and bottom at each side, then use the tallest measurement. Always round the width down and the height up to the nearest 1/8 inch to account for fitting and allowances. Check the frame’s inside depth against your shade’s minimum inside mount requirement. If the frame is too shallow, plan for an outside mount instead. Use a sketch pad to document your chosen mount type and all measurements.
Before taking any measurements, clean the window frame thoroughly—debris can interfere with accurate depth readings. Always verify that your level indicates a completely horizontal surface before marking mounting points. Proper preparation and precise measuring are key to fitting Roman shades perfectly.

Detailed Size: 20m/21.87 Yards in length and 20mm/0.79 Inch in width, comes with Roman rings, suitable for most curtain hooks.

OUTSIDE DIAMETER TAPE MEASURE - Pocket-sized, flexible, and retractable steel tape measure with both diameter (OD measurement) and standard integer measurements.

Precise Hole Placement: This curtain punching machine plate is designed to help position roman ring round holes accurately, so you can create even spacing across curtain tapes and fabric panels for a cleaner finished look in home or office projects
How to Add Overlap for Light Control and Privacy
Adding overlap is your primary method for controlling light seepage and ensuring privacy. For outside mounts, add about 3 inches per side—making a total of 6 inches—for professional results, though 1.5 to 2 inches per side can also work well. This amount of overlap helps minimize light leaks without creating bulk. When mounting inside the frame, avoid adding extra width; instead, rely on the frame’s narrowest measurement to ensure a flush fit. Consistent overlap is easier to achieve when you have properly installed curtain rings that support even fabric distribution.
Vertically, extend the shade approximately 1 to 1.5 inches above and below the window. To create a polished look and block top and bottom light seepage, aim for at least 3 inches of total vertical overlap—1.5 inches at the top and bottom. Increasing width overlap improves privacy; less than 1 inch can leave gaps that allow light and visibility. To block light below the sill, add 1 to 2 inches of overlap underneath. Consistent overlap along all edges guarantees a clean, functional appearance and better light control. For additional guidance, reviewing comparisons of top picks on quality and performance can help ensure your shade choices match your light-blocking goals.