If you’re wondering how to safely remove a flush mount ceiling light, you’re in the right place.
Taking down a ceiling fixture involves a few key steps to ensure your safety and make way for a new installation.
By the end, you’ll know exactly how to turn off the power, disconnect the wires, and remove the fixture confidently.
Keep reading for simple, straightforward instructions to help you get the job done right.
Turn Off Power and Verify It Is Dead
To ensure the power is completely off, start by turning off the correct circuit breaker in your main electrical panel and verifying it is dead. Locate the panel, often found in a basement or closet, and open its door. Find the breaker that controls your ceiling light, which may be labeled or identified through testing. If there are no labels, flip each breaker one at a time until the light turns off. Once you identify the correct breaker, switch it firmly to the off position. Before proceeding, consider your future use of the space, such as whether it will serve as a vanity or desk, to ensure appropriate lighting. If the light still flickers after flipping the breaker, the issue may be caused by incompatible dimmer switches that require proper matching to prevent erratic behavior.
Next, test the wall switch to see if the fixture still lights up. If it does, the switch or wiring may be faulty or still energized. Do not rely solely on switch position or panel indication. To be certain, tape the switch off and inform your family not to touch it. Use a non-contact voltage tester to double-check. First, test it on a known live circuit to confirm it works properly. Then, hold it near the fixture’s wires. If the tester shows no voltage, the circuit is dead and safe to work on. This extra step prevents risk of electric shock and ensures your safety before removal.
Gather Your Tools and Set Up the Ladder
Once you’ve confirmed the power is off, gather your tools and set up the ladder. Use a ladder tall enough so you can stand with your arms extended comfortably to reach the fixture without leaning or stretching. Position it directly beneath the light’s center on a flat, non-slip surface for stability. Wear safety glasses to shield your eyes from debris and have a screwdriver—either Phillips or flathead—within reach. A non-contact voltage tester is essential for ensuring the power remains off before handling wires. Keep electrical tape handy for insulating wires later. If you’re working with decorative lighting, a magnetic-tip screwdriver can prevent dropped screws. Clear the floor beneath the work area, lay down a drop cloth, and store small parts in a container to prevent loss. Preparing everything in advance helps you carry out the removal smoothly and efficiently. Consider applying similar preparation techniques from chest of drawers makeover projects to other home improvements. Just as with lighting, choosing window treatments like solar shades can enhance both style and energy efficiency in your home. For a perfect installation afterward, selecting the right curtain hooks is crucial to ensure your drapes hang securely and evenly.

Expanded Coverage – Wide-frame design with extended temples and wraparound lenses delivers greater side and frontal protection, shielding against flying debris and impact hazards in demanding environments

COMPLETE PROTECTION: Offering 99% protection against UV-A, B, and C rays as well as 100% resistance against glares and scratches, our Safety Intruder Eyewear is the only pair of safety glasses you'll need for construction, metalworking, and/or woodworking.
Unscrew or Unclip the Glass Cover
To remove the glass cover, first determine how it’s attached—look for screws, clips, springs, or a twist-lock mechanism. Additionally, some fixtures have small nipples on the glass that you can grip to aid removal. Check for flat-head screws on the metal collar or decorative finials at the bottom. Turn finials counter-clockwise to loosen them completely, supporting the glass with your other hand to prevent dropping. If metal clips secure the cover, slide the clips outward on opposite sides. Apply gentle pressure to the edges and push down while pulling the cover away to release it. For a twist-lock mechanism, rotate the glass cover counter-clockwise about a quarter turn. Keep one hand under the glass to support it during removal. When selecting a replacement, consider top picks for quality and performance. Loosen screws without fully removing them, so the shade can slide off easily. Handle the glass carefully to avoid breakage. Adopting a DIY approach can lead to substantial savings on home improvement projects. For routine cleaning, use a soft brush attachment to gently remove dust, a method also recommended for fabric roller blinds.

Unique Design: Tired of the common ceiling light? this is the one you need to own! This semi flush mount ceiling light fixture can cast a beautiful shadow on the ceiling when it's on
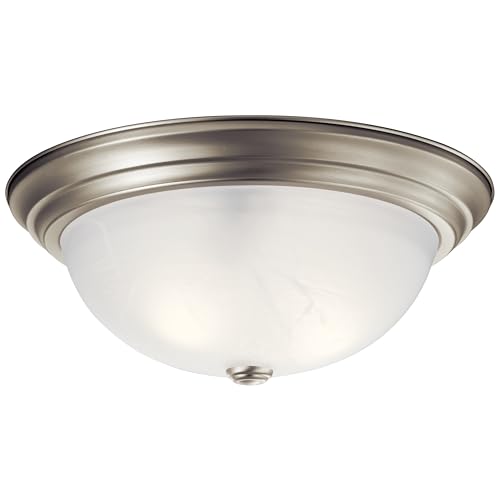
Design: Luxurious flush mount ceiling light fixture featuring clear satin etched glass and brushed nickel finish, perfect for bedroom ceiling light, kitchen ceiling light, or living room ceiling light applications to transform spaces

Package Included: 20 X Ceiling light card foot buckle (8mm*10+10mm*10)
Unthread Bulbs and Unbolt the Base Plate
After removing the glass cover, the next step is to unthread the bulbs and then unbolt the base plate. To do this, turn each bulb counterclockwise while supporting the base with one hand to prevent dropping. Allow the bulbs to cool if the fixture was recently on. Remove bulbs one at a time to keep track of them for future replacements. Before proceeding, inspect the sockets for corrosion or damage.
Next, locate the screws holding the base plate in place. Use a screwdriver to gradually unscrew each screw, supporting the plate with one hand to prevent it from falling. Keep the screws nearby so they don’t get lost. Once all screws are removed, you can detach the base plate, making it easier to clean the fixture and replace bulbs in the future. Proper removal ensures a safe and effective cleaning process. For a more organized workspace, consider applying effective DIY tips from a closet organizer guide to manage your tools and hardware.

UNIVERSAL BRACKT: Our flexible installation bracket with fastener and decorative nuts to mount light fixture on a canopy or electrical junction box. It is designed for anyone who is having trouble aligning the bracket holes of their light fixture with their junction box or for those who have lost their mounting plate or screws.

PACKAGE CONTENTS- 2 packs of steel universal light stand plates with all mounting hardware including grounding screws: 2 fixture crossbars, 4 crossbar mounting screws, 4 grounding screws, 6 wiring nuts, 4 black acorn cap nuts, 4 silver acorn cap nuts.

All purpose crossbar: this crossbar is suitable for a variety of lamp plate, but please confirm whether your lamp plate size and hole spacing are suitable
Disconnect Wires and Unmount the Bracket
Before disconnecting any wires, ensure the power is off by flipping the appropriate circuit breaker at your home’s electric panel. Use a voltage tester on the exposed wires to confirm there is no live current—never rely solely on the wall switch. Safety is critical, so wear safety glasses throughout the process. Twist wire nuts counterclockwise to disconnect the black, white, and ground wires, and immediately wrap exposed house wires with electrical tape to prevent accidental shocks. When working with connectors, note that push-in connectors twist off easily if they are not screw-in types. To unmount the bracket, loosen the mounting screws one at a time while holding the bracket steady. Remove all screws completely, then gently pull the bracket away from the ceiling. Carefully lower the fixture with both hands to avoid damaging wires or the ceiling surface. After disconnecting all wires, inspect the existing wiring condition to ensure it is in good shape before connecting to the new fixture. If you plan to replace the fixture with a different type, consider how HID bulbs compare to LED options in terms of style and function. For a future upgrade, you can also install a dimmer switch to control brightness with the new light.
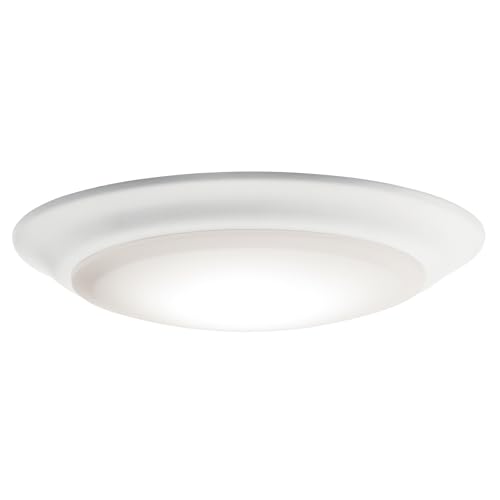
A flush mount ceiling light that offers a modern design that works well with contemporary and transitional décor

High Brightness Output: 36W power provides up to 4320 lumens of bright light, making it suitable for various indoor scenes, such as living rooms, bedrooms, etc

Easy to Install: With the built-in magnets it can be directly attached to the metal base tightly, and easily connect the wire with our connector, no tool needed.