If you’re wondering how to build a sturdy and organized closet from scratch, you’re in the right place. With a clear plan, you can create a custom space using basic tools and durable materials, ensuring it fits your needs perfectly.
By the end of this guide, you’ll know each step to measure, cut, assemble, and secure your organizer, transforming your closet into a tidy, functional space.
Keep reading to learn all the details.
Measure Your Closet for a Custom Organizer
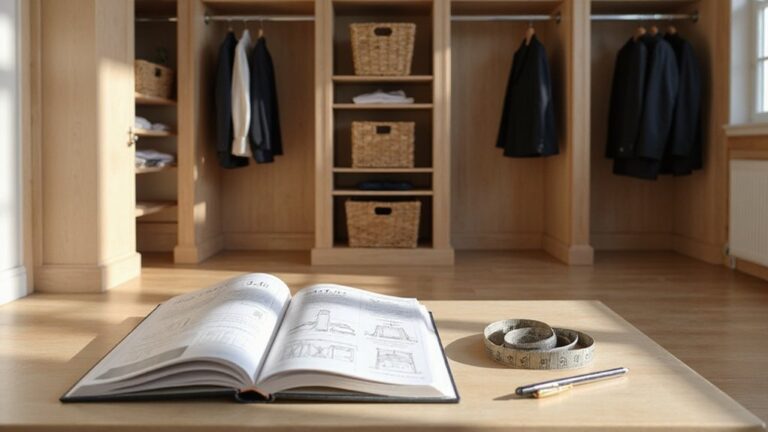
Grab a sturdy tape measure—avoid flimsy ones—and prepare to record every dimension carefully. Measure each area at least twice to ensure accuracy. For the width, take readings at three different heights and use the smallest measurement. Do the same for height in the center and at the corners. Check the depth on both sides, making sure it is at least 24 inches so clothes can clear the back wall comfortably. Use a laser measure for precise, reliable ceiling height readings to complement your tape measure. Remember to verify that the closet depth is at least 24 inches to accommodate standard hangers and clothing.
Remember to note any obstacles. Mark the exact locations of windows, doors, and how they swing. Record all outlets, HVAC vents, and light fixtures. This information will guide your lighting placement and ventilation setup. Also, measure the depth of the baseboard molding and the header space above doors separately. If you plan to include a workspace, consider whether a vanity or desk best suits your closet layout. Use a pencil and a notepad for easy adjustments, then transfer all measurements onto a graph paper sketch. Precise dimensions are essential to ensure your custom organizer fits perfectly. For the lighting fixtures you plan to install, check that they are compatible with dimmer switches to avoid LED bulb flickering during use.
Choose Durable Wood and Essential Tools
To ensure a strong and precise build, choosing the right durable wood and essential tools is crucial. Opt for hardwoods like oak, maple, or birch for their stability and long-lasting strength. These woods resist warping and damage over time, making them ideal for sturdy shelving and furniture.
Equip yourself with key tools: a circular saw for clean, straight cuts and a power drill for securing pieces. Always prioritize tool safety—wear safety goggles to protect your eyes from wood chips and a respirator mask to prevent inhaling dust. Use a level to keep your shelves perfectly horizontal and employ a clamping system to hold pieces firmly during assembly. Consider that LED lighting offers better energy efficiency and longer life than traditional bulbs, saving you money over time. Selecting quality wood and the appropriate tools ensures your project is both precise and durable. Adding a quality night light can help illuminate your workspace for better visibility during evening projects.

[Heavy-duty Wood Organizer] This lumber storage rack features a 3cm (1⅙ inch) thickened steel tubing construction with an orange powder coating for rust resistance and durability; Each shelf can support up to 400 pounds. Suitable for home or commercial settings, this sturdy rack easily stores a variety of heavy and large items.

Wall-Mounted Lumber Storage Rack:Lumber Rack is suitable for all kinds of walls, such as concrete walls, wood plank walls, red brick walls, etc. Orange arms are 16 inches long and the middle stand moves up and down 4 inches depending on the storage size. The lumber rack storage space sizes are (7 inches) and (11 inches) The recommended mounting distance between the rails is 3.8 to 6 feet, which can be adjusted to suit your needs.

【Perfect for Storage】 Ideal for shed, workshop, garage, outdoor workspace or any area where long items need to be stored neatly; This is a very strong storage solution for lumber, firewood, sheet metal, PVC, pipes, ladders, skis, snowboards, golf clubs and more!
Build the Central Storage Unit Frame
To build a sturdy and square central storage unit frame, start by cutting three 24-inch 2x4s for your vertical supports and four 21-inch pieces for reinforcement beams. Use 2x4s for the main frame because they offer superior strength and stability, especially when supporting weight. For additional internal backing, 1×3 boards are effective due to their thinner profile, which helps keep the structure lightweight. When considering your overall design, remember that choosing between a lamp and a table involves weighing style, cost, and function for your specific space.
Assemble the frame by drilling pilot holes, applying wood glue, and securing joints with 2 1/2-inch construction screws. Before the glue sets, check all angles for squareness by measuring the diagonals; if both measurements are equal, your frame is square. To prevent sagging over time, include center supports every 24 to 30 inches along the span. This design philosophy of central storage allows saving resources centrally for quick access and reduces unnecessary trips for item retrieval.
Do not focus on decorative details at this stage. Instead, ensure that the frame’s structure is solid and accurately aligned, as it forms the foundation for the entire storage system. Once the frame is verified square and level, cut your OSB base to size, notching the corners as necessary to fit tightly against the frame. Use composite shims to level the bottom on uneven floors, guaranteeing that your storage unit remains stable and truly square over time.

By Crafters, For Crafters: Crafting and building with wood is our number one priority. Bringing you more of the wood craft supplies you love is our job. Please dont hesitate to get in touch
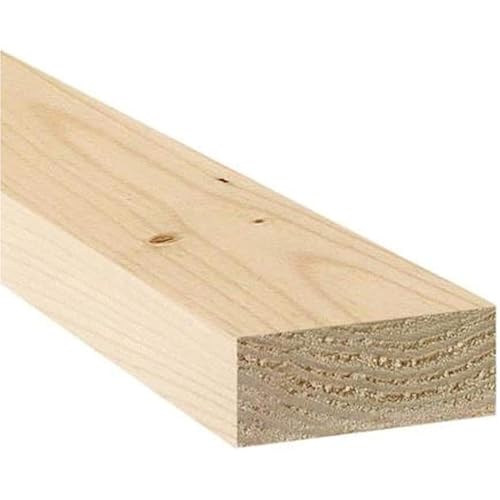
By Crafters, For Crafters: Crafting and building with wood is our number one priority. Bringing you more of the wood craft supplies you love is our job
By Crafters, For Crafters: Crafting and building with wood is our number one priority. Bringing you more of the wood craft supplies you love is our job
Mount the Organizer Securely to Wall Studs
Mount the organizer securely to wall studs using the following steps. First, locate each stud’s center with a stud finder, marking the spots with painter’s tape. Standard spacing is 16 or 24 inches apart, so check your wall to identify all relevant studs. Drill a pilot hole at each marked location to confirm you’re hitting solid wood, which provides the strongest support. For gypsum wallboard, use expansion fasteners instead of screws to ensure a secure hold. Use the stud finder to also detect metal studs if your wall construction includes them. Always cut power to the area at the circuit breaker before drilling near any potential wiring, just as you would when changing a ceiling fixture. If your organizer is placed near a lava lamp, avoid overheating the lamp’s cloudy wax by ensuring adequate ventilation.
Next, align a level across the top mounting area and mark a level line. Hold your track or upright panel against the wall, then loosely drive the top screw into the stud. Loosening the screw initially allows for easy adjustments to ensure the track is perfectly plumb. Use a level to verify vertical alignment before tightening all remaining screws. Avoid fully tightening any screw until all are started to prevent misalignment.
For spots over hollow drywall, replace screws with appropriate wall anchors. Secure each back wall clip with the correct fasteners to prevent shelves from pulling away when loaded. Before proceeding, wiggle the mounted frame to confirm it feels solid and secure. This ensures the organizer is properly attached and can handle the weight of stored items.
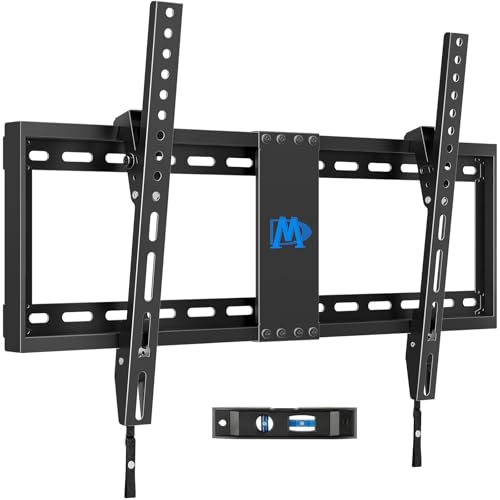
[TV Wall Mount and Suitability] This tilting TV mount is suitable for 37-90 inch TVs, holding a weight of 132lbs with Max VESA 600x400mm, supporting up to 24 inches wood stud spacing. For better feel, you can check the weight of TV, VESA, wood studs spacing and blocked input. Kindly note that TV is just for reference. Patent no. 29/639, 502

[TV Mount Compatibility] Extended bracket for 16” or less than 16" wall plate, fitting 16” - 24” wood studs. NOTE: The MD5233 extended bracket do not fit for TV Mount MD2617 MD2296

Universal TV Wall Mount: TV bracket fits most 32-70" TVs up to 110 lbs, with max VESA of 400mm x 400mm / 16" x 16" mounting hole spacing, designed for standard 16" studs. If your wood stud spacing exceeds 16 inches, please refer to the 16", 18", 24" wood stud full motion TV mount MD2380-24K
Set Shelf Support Heights for Your Items
Before setting shelf support heights, measure your items and add clearance to ensure they fit comfortably without cramming. For folded shirts, set shelf spacing at 10 to 12 inches to accommodate their thickness. Towels require more space, around 12 to 16 inches, to allow for their fluffiness. Shoes need tighter clearance measurements of 8 to 10 inches to fit snugly. Position shelves 12 to 18 inches above hanging rods, but leave at least 2 inches of space between the rod and shelf to allow hangers to move freely. The top shelf should be placed at about 84 inches from the floor for easy access, while the lowest shelf can start at 12 inches from the floor to maximize floor space. Space intermediary shelves 12 to 16 inches apart, adjusting for tall bins, sweaters, or other bulky items. For everyday accessibility, keep shelves between 48 and 52 inches high to prevent strain when reaching or bending. For planning lighting in the closet, you can follow fairy light hanging techniques to illuminate shelves and rods. If you need to apply or remove any adhesive brackets for lighting, first soften the residue using a heat gun or steamer for easier cleanup. Consider applying a window film to the closet door glass so you can see out into the room but maintain privacy from the inside.

Buying Guide for Proper Fit & Installation – Before ordering, confirm your shelf size and the number of brackets needed. Weight capacity depends on bracket spacing and quantity — more brackets mean better support for heavier loads. These adjustable brackets work with wall cleats and uneven walls: the top arm mounts to the cleat, while the bottom fixes directly to the wall for a stable, level installation


Quantity Pack: this package comes stocked with a rich collection of 20 pieces of adjustable shelf brackets; Enough to keep you covered for big or small renovation needs, our product assures you of availing shelving and storage for your space; You will be able to manage your organization needs effectively and efficiently
Secure Shelves With Pocket Holes or Finish Nails
Pocket holes are the stronger option when securing shelves, providing superior joint reinforcement compared to finish nails. A single pocket hole screw can withstand up to 707 pounds of shear force, making it suitable for shelves holding up to 200 pounds with just four holes. To hide the hardware and ensure a clean look, drill pocket holes on the top and bottom sections of the shelves and then plug them flush. Finish nails create weaker joints and should only be used as temporary fasteners while glue dries, especially in visible side areas. For maximum security, combine both methods by applying wood glue before nailing or screwing, and restrict nails to non-structural spots. This approach offers a balance between strength and a polished appearance. For a clean, professional finish, consider using plugged pocket holes to hide the hardware entirely.

Premium Home Improvement: This pocket-hole jig is a portable carpentry tool that makes strong joints

Easy Woodworking Tools: Kreg pocket-hole joinery is the fast, strong, easy way to join wood-drill, drive, and done

【11 Holes Template】Shelf pin jig provide stable and efficient drilling performance, capable of creating 11 perfect straight holes at once, eliminating the tedious process of drilling one hole at a time. For large projects such as wardrobes or cabinets, it is the ultimate time-saving tool that can quickly and accurately drill holes without any trouble!
Install Rods in Your Closet Organizer
To install rods in your closet organizer, start by determining the correct length. The total rod length should be the wall width minus 1/2 inch. Cut the rod accordingly using a hacksaw, then subtract an additional 1/4 inch from the wall width to allow for clearance. Add another 1/8 inch to this measurement for easy socket removal. For a precise fit, always measure from the back cleat to the lip of the bracket and subtract 1/16 inch for clearance. After cutting, use sandpaper to smooth any rough edges on the rod ends. When smoothing edges, it helps to apply a window film technique for a clean finish. Consider using a budget-friendly PVC pipe as an alternative to metal rods for cost savings.
Locate wall studs to secure the brackets. If no studs are available, install wood cleats first. Hold a socket against the wall in the desired position, tape it in place, and mark the screw holes. Drill 1/4-inch pilot holes at these marks, then screw in the brackets with the cups facing down. Using a level tool ensures the brackets are aligned horizontally before tightening.
Insert one end of the rod into the solid bracket first, then slide the other end into the open bracket. Ensure the rod drops snugly into the center of both brackets for stability. Use a level to check proper alignment, and gently pull down on the rod to confirm it feels secure before loading clothes.
Organize Your New Closet System With Smart Hacks
After installing your closet rods, you can significantly increase storage capacity and improve accessibility with simple hacks. For shoe storage, place one shoe with its tip pointing inward and the other outward; this arrangement doubles the number of shoes you can fit on a single shelf. To keep purses upright and prevent tipping, cut a pool noodle to the appropriate length and insert it inside each bag. Loop scarf ends through shower rings attached to a single hanger to keep multiple scarves organized and prevent drawer clutter. Use S-hooks to hang handbags, belts, or even jeans by their belt loops, saving space and making items easy to grab. Additionally, hook hangers together using soda can tabs to double hanging capacity, which is especially useful in tight spaces. When choosing window treatments for the room, consider how roller shades provide a clean, minimalist look that pairs well with a streamlined closet system. Adopting uniform, velvet-covered hangers improves the closet’s visual appeal and prevents clothes from slipping. For a similar effect, consider using curtain hooks to hang lightweight accessories from your closet rod with ease. For a budget-friendly approach, using standard melamine shelving can keep costs low while still providing durable storage. These smart hacks require minimal tools and can be done quickly, transforming your closet without heavy construction or significant expense.
Caulk, Paint, and Label for a Polished Look
Before caulking, priming, and painting, start by filling all nail holes with spackling. Then, caulk every gap between the wall and shelves using a white paintable caulk like DAP to ensure the paint adheres properly and won’t peel over time. Keep baby wipes nearby to immediately clean any excess caulk or paint for a neat finish. Prime all surfaces to create a smooth foundation, then apply two coats of satin paint—Behr’s White is a good choice—for a polished, built-in appearance. To achieve a true seamless look, remove caulking lines after application for a cleaner finish. For inspiration, consider whether a freestanding armoire might better suit your space if you lack built-in shelving.
Remember to pay attention to ventilation: open windows or set up a fan to disperse fumes and improve air quality. Once the paint is dry, make your labels durable by typing enlarged text in Word or Pages, then laminating with self-sealing sheets for easy cleaning. Attach labels with brass fasteners or curling ribbon to add functional decorative accents. Lightly sand between coats, tape off areas you want to protect, and remove hardware first. Proper preparation and finishing steps ensure your project maintains a clean, professional look that lasts.