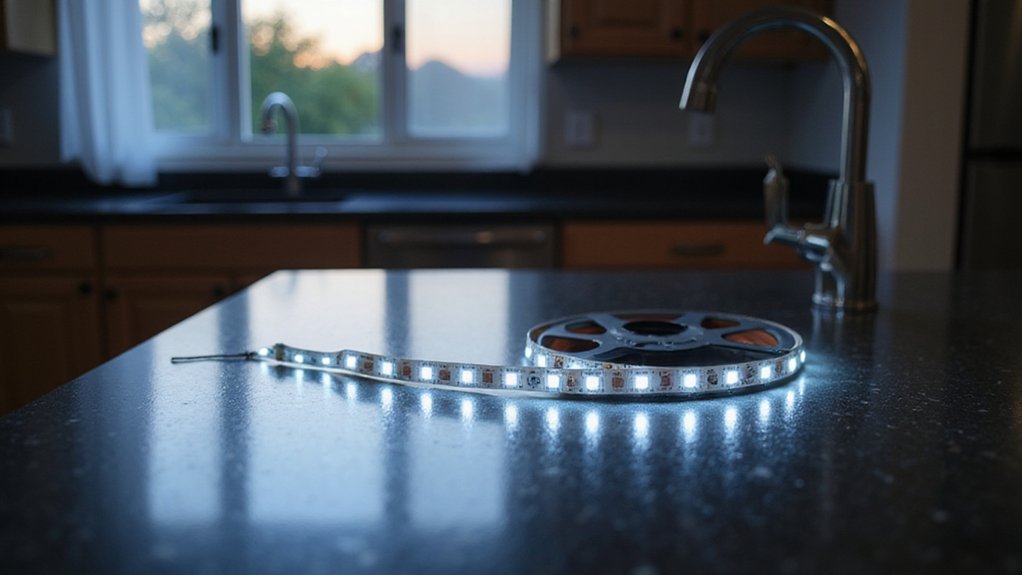
Wondering if you can cut LED strip lights to fit your space? The good news is yes, but only at certain points. Knowing where to cut and how to do it correctly can save you from waste and help you customize your setup.
Keep reading for simple tips to cut and reuse your LED strips safely and effectively.
Can You Cut LED Strip Lights Without Ruining Them?
Yes, you can cut LED strip lights without ruining them if you follow the proper guidelines. Always cut along the designated cut lines marked by copper pads or scissors icons. Use sharp scissors to slice through the center of these copper pads to preserve the circuit’s integrity. Cutting outside these marks will break the circuit permanently and cause the segment to stop working. Make sure to disconnect the power supply before cutting to avoid short circuits or electric shocks. Additionally, confirming the cut is at the intended point prevents damage to the remaining functional strip. Check your project layout and measure the required length before cutting to ensure an accurate fit. Cutting at the wrong point can also introduce LED bulb flickering due to a broken circuit that disrupts the power flow. For best results, ensure you measure bracket placement to align the strip precisely before cutting.
You can safely trim color-changing and waterproof LED strips at the marked cut points every few inches. Accurate cutting at these points ensures the remaining section retains full functionality, including weather resistance, connectivity, and color-changing features. Properly cut strips maintain the connection to the power driver and keep your project bright and fully responsive. Follow the indicated cut lines precisely for a clean cut that preserves the strip’s features and performance.

Used as a backlight to create a romantic environment and a very relaxing atmosphere for you. In a room with insufficient light or at night, the led strip lights battery powered can make the eyes more comfortable. It is also bright and great for TV, compute, kitchen, cupboards, cabinet, shelves bedroom decoration.

echosari New Strip Lights: 150 pieces high brightness 2835 LEDs, the light strip with a length of 16.5ft can meet most decoration requirements, 2700K warm white can create the best comfortable atmosphere
Is Your LED Strip Actually Cuttable? (Spotting Copper Pads & Scissor Icons)
Most LED strips are designed to be cuttable at specific points marked by copper pads, scissor icons, or dashed lines. To confirm if your strip can be safely cut, look for exposed copper pads—these are usually round or rectangular and spaced every few LEDs. These pads serve as connection points for power and control signals. The presence of a printed scissor icon on the PCB indicates the exact spot where cutting won’t damage internal circuitry. Dashed lines often reinforce these designated cut points, making it clearer where to trim. If you don’t see these marks, the strip likely isn’t meant to be cut, as is common with RGBIC or other integrated circuit types. Cutting where it’s not allowed can ruin the color pattern and break the electrical connection permanently. Always verify with the manufacturer’s specifications before cutting to avoid damage. For a successful installation, you will need to gather the proper tools such as a ruler, wire connectors, and a power supply. For a similar project that requires precise mounting points, you can look at how DIY curtain rod brackets are installed. Cutting at the edges of the strip rather than at copper contact points results in some unusable parts. Understanding these copper pads is similar to knowing the standard closet rod sizes used for brackets in shelving projects.
Where to Cut LED Strip Lights Safely
To cut LED strip lights safely, always locate the manufacturer’s cut marks first. These are usually indicated by a scissor icon, dashed line, or perforation between copper pads. Cutting outside these designated points will break the circuit permanently, causing the entire strip to stop working. Making your cuts at the correct points ensures that each segment maintains consistent color, LED density, and voltage flow. For 12V strips, cut every 3 LEDs; for 24V strips, every 6 LEDs. Always cut between copper pad sets to preserve electrical pathways. Using designated cut lines prevents accidental damage to interior components and maintains the strip’s warranty eligibility. Choosing between a vanity or desk involves weighing style, cost, and function to fit your specific space.
Before cutting, measure your installation area precisely to avoid trimming too much. Removing adhesive backing makes the strip thinner, which helps it fit into connectors more easily later. Use sharp scissors to cut straight across the marked line—never bend or twist the strip as this can damage the circuitry. Larger pad area on cut ends makes soldering and extension work more reliable. If you need to reconnect a section later, leave a copper pad at the end of your cut. This makes attaching connectors or extension pieces simpler and ensures reliable electrical contact. Similarly, when cleaning your window coverings, following manufacturer instructions for fabric roller blinds prevents damage to the material and mechanisms.

Working condition: our LED light strip connectors are able to stand up to 4 ampere current and 0 - 24V (5V, 12V, 24V) voltage, the heat resistance level is -20℃ - 100℃, so they are suitable for most non-waterproof 4 pin SMD 5050 RGB lights in 0.39 inch/ 10 mm width, and you should pay attention to use them correctly for ensuring safety and extending service life

COMPLETE SET: 24-piece connector kit includes 12pcs straight and 12pcs L-shaped connectors for 2-pin 10mm COB and SMD LED strips, perfect for creating custom lighting configurations

Mounting Clips: Includes 3 mounting clips for 1 channel and 2 corner connectors for 10 channels
Tools You Need to Cut LED Strip Lights
To cut LED strip lights accurately and safely, you’ll need the right tools. Use sharp scissors for clean, straight cuts on basic LED strips. For thicker or more complex strips, a hobby knife works better. A ruler and marker help ensure your cut lines up exactly at the copper pads designated for this purpose.
Always unplug the power source before cutting to avoid electrical shocks. A protective mat provides a safe surface for cutting, and safety glasses protect your eyes from debris. When working with waterproof strips, apply a silicone sealant to maintain their integrity after cutting. For color customization or extending your setup, LED connectors enable solder-free connections, while a soldering iron is necessary for permanent joints. If you plan to integrate your cut strips into a larger furniture setup, consider queen bed under-storage options for efficient cable management. A well-lit vanity setup often requires consistent brightness levels from your lighting to match professional results.
Wire cutters and strippers prepare extension cables efficiently. After cutting, cover exposed connections with heat shrink tubing or electrical tape. Be careful with adhesive-backed strips; avoid damaging the backing during measurement and cutting. You can also use a power delivery checker**** to verify that your setup matches the safety guidelines for hanging fairy lights indoors and out. Lastly, use a power delivery checker to ensure your setup is safe and functioning correctly before installation.

5V Low Voltage Operation,Safe and energy-efficient 5V DC power supply, compatible with USB ports/power banks (adapter not included), perfect for DIY projects and indoor decorations.

Pre-Drilled Countersunk Hole (4 Hole/3.3FT) , Tight Fit and Flush Mounted ,Protect The Profile From Scratch By The Mounting Clips ,Easy Installation, Clean Outlook and Professional Extension<br>

Pre Drilled Countersunk Hole (4 Hole/3.3FT) , Tight Fit and Flush Mounted ,protect the profile from scratch by the mounting clips ,Easy Installation, Clean Outlook and Professional extension<br>
Step-by-Step: How to Cut LED Strip Lights Correctly
To cut LED strip lights correctly, follow these steps precisely. First, locate the designated cut zone on your strip, marked by a scissor icon or dashed line near the copper pads. Make sure your strip is flat on a stable surface, peel back the adhesive backing, and remove any rubber covering from the cutting area.
Using sharp scissors, cut straight down through the copper pads along the marked line. It is crucial to cut accurately, as uneven cuts can affect electrical continuity. After cutting, peel away any remaining tape at the end to expose the copper terminals clearly. Use a box cutter to carefully remove any plastic covering over the metal pads, ensuring they are unobstructed and visible. Wobbly cuts can destroy copper connectors, hindering future connections. For a more durable installation, consider using outdoor-rated mounting clips for added support. Understanding how to cut precisely is similar to measuring cut zones on cordless blinds for a perfect fit. If the strip will be near moisture, applying a silicone sealant to the cut end can protect the exposed electronics.
Next, select a quick connector compatible with your strip’s contact count, usually 2, 3, or 4 pins. Remove the plastic cap from the connector, insert the strip so that the copper pads align with the connector’s metal contacts, and then press the plastic back into place to lock the strip securely. Always double-check that the copper pads are properly aligned and fully inserted before locking the connector, since incorrect installation can lead to poor connectivity or damage.
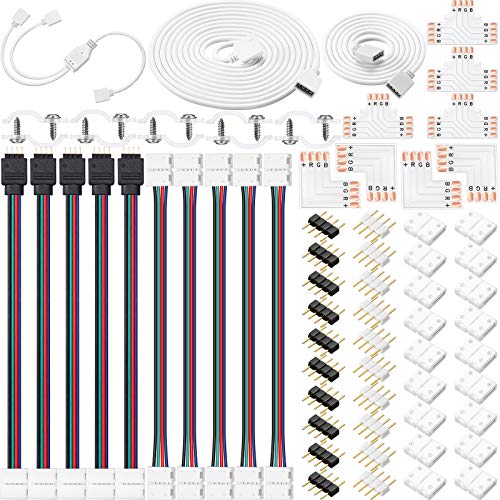
LED strip connector kit: the package includes 5 pieces female connector wire cables, 5 pieces LED connector cables, 10 piece fixing clips, 10 pieces screws, 10 pieces black male to male connectors, 10 pieces white male to male connectors, extension cable in 3.3 feet and 6.6 feet, 1 piece of 2 way separator, 20 pieces solderless gapless connectors, 4 pieces L-shaped connectors and 4 pieces T-shaped connectors, which can meet your DIY need

【Universal Power Adapter】-Input: AC 100~240V, 50/60Hz;Output: DC 12V 2A/24W Max(Power);Meiyue power supply compatible with devices with current below 2A(such as 150mA, 200mA,300mA, 500mA,1A,1.5A,2A). And the polarity of this adapter is:inside(+),outside(-). DC Connector Size: 5.5mm*2.1mm.
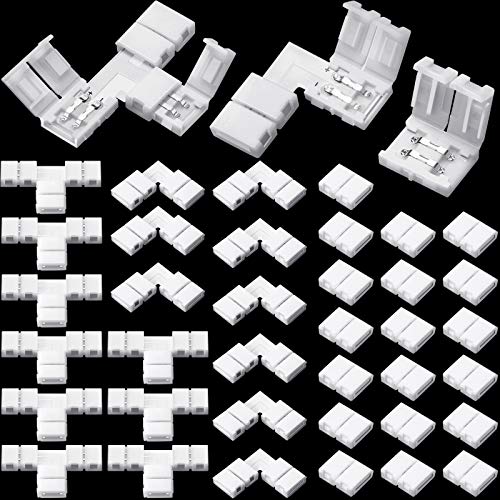
What You Will Get: the 8mm led strip connectors 2 pin package comes with 10 pieces L shape RGB connectors, 20 pieces gapless 2 pins connectors and 10 pieces T shape LED adapters light connectors, the sufficient quantity could meet your various demand in daily life
What Happens to the Cut Section? Can You Reuse It?
Once a copper trace or data line is cut incorrectly, it becomes unusable. The severed section no longer conducts electricity and is effectively dead. You cannot reuse it without re-cutting precisely at the nearest valid marker, which is often difficult or impossible if the damage is extensive. Damaged circuits may be beyond repair, making reusing the cut section unfeasible. For accurate results, always use a steel measuring tape to measure the strip length before cutting. Cutting on designated scissors marks ensures the remaining strip functions properly and avoids permanent damage. Therefore, take your time to make a clean, accurate cut, as a sloppy one can turn what could have been a reusable part into scrap. For a different kind of light control, consider how window film allows you to see out while blocking the view from outside. Properly securing your gear is similar to using tight roof rack straps to hold a kayak safely in place.
How to Reconnect Cut LED Strip Lights Using Connectors
To reconnect cut LED strip lights using connectors, start by selecting the appropriate solderless connector that matches your strip’s pin count—2-pin for single-color strips or 4-pin for RGB strips. Use straight connectors for extending the strip or T-connectors if you need to branch off in multiple directions. Ensure that the metal contacts inside the connector align precisely with the copper cutting marks on the strip.
Prepare the strip by making a clean cut at the designated scissor icon. Peel back the adhesive backing and clean the exposed copper pads with alcohol to remove any oils or dirt. Insert the strip into the connector so that the copper dots sit securely beneath the metal contacts. Firmly shut the connector, using pliers if necessary, to ensure a good connection. To prevent accidental disconnection or short circuits, reinforce the connection by wrapping electric tape over the pins and along the strip. Use small scissors to cut across the copper connection line, ensuring the copper connectors remain intact during preparation. A wire stripper is helpful for prepping wire ends if you later decide to solder instead of using connectors. For maximum brightness and color accuracy, choose connectors that match the quality and performance of your strip’s rated output.
Check that the polarity of the connection matches the R (Red), G (Green), B (Blue), and V+ (Voltage Positive) markings on the strip. Finally, test the lights and verify proper functionality. If the connection fails, carefully clean the copper pads and reassemble to ensure proper contact. These connectors provide flexible options for routing your lights and customizing their placement precisely.

Only for 8mm wide single color white led strips. Installation notes:1.Ensure metal in connector touches light strip; 2.Ensure the connection is correct with positive to positive.

COMPATIBLE LIGHTS: These connectors are designed solely for PWM single-color COB strips with an 8mm width

【Compatible Lights】This installation accessories set is ONLY compatible with 8mm width 2-Pin COB LED Strip lights(Not applicable to 10 mm board width and CCT Tunable COB LED Strip Lights).The strip to wire transparent connector allows you to easily connect a COB strip to another COB strip with wire without soldering
Common Mistakes That Kill LED Strips After Cutting
Cutting outside the designated lines is a major mistake that can kill your LED strip after cutting. This severs copper traces or data lines, breaking the circuit and causing dead sections or color shifting. If the data chain is interrupted, your remote control becomes useless because addressable strips lose signal beyond the cut point. Leaving copper pads exposed without insulation risks short circuits, which can damage the entire strip. Using mismatched power supplies or controllers can lead to voltage drops and instability, reducing performance and lifespan. Poor soldering, incorrect clip-on connectors, or misaligned pins create weak joints or reverse polarity, which instantly destroys segments. The entire section may not function after being cut, as cutting between code points disables the circuit. Mounting the strip on dirty surfaces or neglecting moisture protection accelerates corrosion, further damaging the LEDs over time. Avoiding these common errors is essential to keep your LED strip functioning properly.
Safety First: Disconnect Power Before Cutting LED Strip Lights
Always disconnect all power sources before cutting your LED strip lights. Unplug the strip from the wall outlet or remove the batteries to ensure there is no current. Confirm that the power supply is completely off to prevent electric shock and short circuits. Cutting a strip while it’s powered risks a power surge that can damage internal components or cause circuit overloads, even on low-voltage systems. Exposed copper pads become live and can cause accidental shorts. Once you’ve made the cut, immediately insulate those exposed pads with proper connectors or electrical tape. Never reconnect power until you have verified the cut is made at a safe, marked line. Testing the strip in small, controlled steps helps avoid damage and ensures safe operation. Remember, rushing through this process with the power still on significantly increases the risk of mistakes that can’t be fixed afterward.