Looking for a simple way to add storage and organization without breaking the bank? Building your own cube storage unit can free up vertical space and cost around $14 in supplies.
With just some basic cuts, pocket-hole joinery, and quick assembly, you can create a customizable piece that fits your needs. Keep reading for all the easy steps to make yours in just a few hours.
Why DIY Cube Organizers Work for Every Room in Your House
Cube organizers are effective in every room because they maximize vertical space. Stacking compartments into a compact footprint allows you to reclaim valuable floor area, especially in small rooms. Many DIY projects use reclaimed wood or eco-friendly materials, making these units sustainable choices that reduce waste and environmental impact. You can personalize each cube by painting or finishing it to match your room’s decor, whether you want a sleek entryway or a cozy nursery. For added durability and a custom look, you can create a custom bed frame by assembling three cube storage units with painted pine bed sides and plywood. To further enhance the quality of your setup, consider integrating a high-performance night light to softly illuminate the cubbies for easier access in the dark.
Shallow cubbies keep contents visible, which helps with quick sorting and prevents overfilling. Multi-cubby structures condense many items into one organized system, reducing clutter around the room. Their modular design allows you to expand or reconfigure the setup as your needs change, making them highly adaptable for tight spaces. Open-front storage units enable fast visual scanning, saving you time when searching for items.
Adding labels or color-coded bins enhances organization further, making it easier to maintain order in shared spaces. Cube organizers help you keep everything in its place, simplifying daily tidying without the need for major renovations.
Tools and Materials for a Wood Cube Organizer
Before starting, gather the right tools and materials. For wood selection, 1×10 boards are common because they measure a true 0.75-inch thickness and 9.25 inches wide, ideal for sturdy cube compartments. You can also opt for 1x5s for a smaller build or 1x12s with 1×2 trim for larger units. For fastening, pocket-hole screws are standard. A Kreg system uses 81 one-inch screws and 21 one-and-a-quarter-inch screws. Don’t forget to use wood glue to strengthen joints. Essential tools include a miter saw for precise crosscuts, a tape measure, a square to ensure right angles, and a drill with a pocket-hole jig. Clamps help hold pieces steady during assembly, and a random orbit sander smooths the surfaces for a clean finish. To secure shelves into the cabinet sides, you can make dado cuts set to a depth of 3/16 inch for a tight, stable fit. For covering the cube openings, consider single cell shades for a simpler, budget-friendly option with a clean look. Consider the lighting type for the final cube display, as tungsten bulbs offer a warm aesthetic while LEDs provide longer life and lower energy costs. For outdoor relaxation, consider using weather-resistant materials if the cube storage will be placed on a patio or porch.

Packaging: You will receive 60pcs wooden blocks for crafts, the size is 1x1x1 inches. Satisfy diverse DIY and crafting demands

Versatile Cubes: A pack of 50 solid wood cubes, each measuring 1 inch on each side, ideal for various crafting projects and activities.
Build a Custom Cube Unit in 3 Hours or Less
You can build a custom cube unit in 3 hours or less by using a straightforward, repeatable design and pocket-hole joinery. Begin with careful material selection—opt for plywood or melamine to ensure quick cutting and durability. Cut all parts first using a miter saw or circular saw; batch-cutting like this saves significant time. Use pocket holes on the middle shelf, short side boards, and each shelf piece to speed up assembly.
Assemble the outer frame on a flat surface first, then add dividers and shelves after ensuring the frame is square. Mark shelf locations at regular intervals, such as every 8-1/4 inches with 3/4-inch spaces, to keep everything aligned. Drive screws from the sides or underside to hide fasteners and make assembly quicker. Clamp each shelf and check squareness throughout the process to avoid rework. For a room that also needs window coverage, consider that cellular shades offer better insulation than roller shades, helping to control temperature and light near your new storage unit. Using mobility-enhancing caster wheels makes repositioning the completed unit convenient for different room layouts. When choosing the unit’s location, consider whether you prefer a dedicated vanity for grooming tasks or a standard desk for work. Consider pairing the unit with top storage baskets to keep smaller items tidy and accessible.
Avoid using glue or complex finishes if you want to finish the project within the three-hour window. Preplan your configuration to prevent misalignment, streamlining the process and keeping you on schedule.

Functional Storage for Any Space: Versatile pine wood crates serve as attractive backdrops for decorative items while providing functional storage in various environments.

Each 3-Cube Storage Kit contains seven (7) boxes of 90-degree PlayWood Connectors (28 connectors in total) and twelve (12) 14" x 14" nominal panels.

Ample Storage & Organization: Featuring 10 spacious cubbies and 5 sturdy hooks, this wall-mounted locker provides plenty of room to neatly organize coats, books, lunch bags, and other essentials. Ideal for classrooms, daycares, preschools, playrooms, mudrooms, and more.
Turn a Cube Organizer Into a Living Room Console or TV Stand
Turning a cube organizer into a living room console or TV stand is quick and straightforward. Lay the unit horizontally to create a low-profile surface ideal for placing beneath your television. Use the cubbies to organize remotes, game controllers, and charging cords into labeled bins for easy access. If your unit has a back panel, you can pre-drill holes to route cords neatly behind the cubes. Keep a few open for books or decorative items to add personality. Aim for a 70/30 balance between hidden storage and open display to maintain a tidy, intentional look. Adding decorative lighting inside the open cubes can highlight collectibles or small décor pieces. For safety, it’s essential to wall-mount the unit, especially if it will support a heavy TV. Choose a finish that complements your décor style, and with minimal effort, you’ll have a stylish, functional console that keeps clutter out of sight without sacrificing style. For those particularly sensitive to light from windows while watching TV, you could also pair this setup with top blackout roller blinds to eliminate glare and ensure perfect window darkness. Before final assembly, review a detailed step-by-step process to ensure every component is aligned properly. To make the decorative lighting more effective, consider installing LED strip lights behind the cubes for a warm, even glow.

Spacious 8-Cube Open Storage Organizer: This versatile 8-cube bookshelf greatly expands your storage space. Measuring 46.5"W x 11.8"D x 26.4"H, its open design provides flexible storage for books, bins, potted plants, and media devices. Each cube measures 10.6" x 10.5" x 11", ideal for standard storage baskets. Keep books, toys, everyday items, and décor neatly organized, and say goodbye to clutter

CUSTOMIZABLE SHELVING: Two optional back panels let you create the ideal layout to suit your needs, mixing open and enclosed backings to help diversify your storage solution

CUSTOMIZABLE SHELVING: Two optional back panels let you create the ideal layout to suit your needs, mixing open and enclosed backings to help diversify your storage solution
Create a Desk Hutch or Workstation With Cube Units
Turning a cube organizer into a desk hutch or workstation allows you to maximize vertical storage while keeping your desktop clear. To do this securely, anchor the hutch to wall studs using brackets or screws. Construct a rigid frame from plywood or MDF that matches your desk’s width, providing a solid base for the cube units. Stack the cubes into rows, then customize the layout by adjusting the sizes of individual cubes to accommodate your supplies—divided compartments are ideal for items like markers or files. To optimize shelf height, position one shelf 8 inches from the top; this space works well for a monitor or decorative items. For a more affordable option, you can build a similar hutch using approximately $14 worth of supplies including zip ties, spray paint, and foam board.
Secure the entire assembly with pocket-hole joinery and screws. Fasten it directly to your desk to prevent shifting. Place heavier items in the lower cubes to improve balance and stability. Also, always attach a back panel to square the structure and provide added support. This approach transforms your workspace into a functional, organized area without adding clutter to your desktop.

6-Tier Versatile Storage: Includes a mix of wide and narrow shelves in an open layout, allowing you to store books, stationery, plants, clocks, and even a small printer or monitor riser on the top tier

Compact But Large Storage Space: This multi-color desktop bookshelf with 7 storage cubes delivers smart organization while saving limited desk space. The 7 cubes and 3 adjustable shelves can plan the space reasonably, ideal to storage books, plants, ornaments and photos according their varying usages.

Spacious Storage: This desktop bookshelf measures 29.1"D x 9.4"W x 31.5"H, providing ample space for organizing books, documents, plants, decorations and more, with 3 hooks for hanging small items, helping you create a tidy and efficient workspace
Use Cube Storage in Bedrooms and Closets
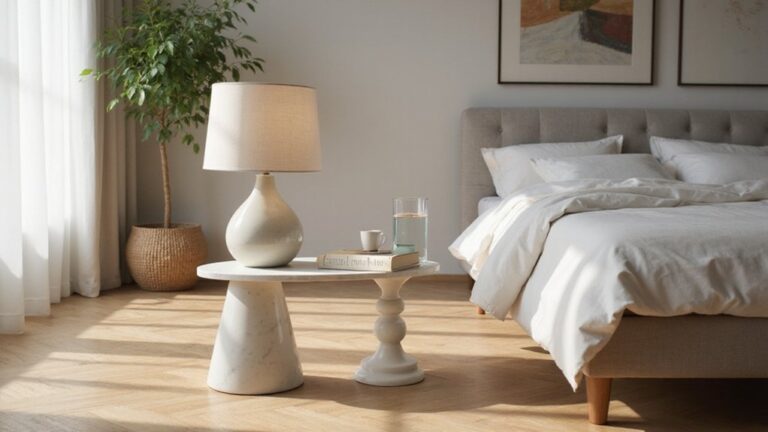
Cube storage is highly adaptable for bedrooms and closets, thanks to its modular design that supports flexible layouts. You can place units along walls, beside beds, or in corners, stacking them vertically to make use of the full wall height. This creates surface space for bedside lamps, plants, or decorative items, and doubles as nightstands or benches with built-in storage that provide both seating and hidden organization. For a truly tidy space, reviews of top drawer organizer picks can help refine your storage choices.
In closets, cubes help organize folded clothes, accessories, and linens into separate compartments, reducing clutter and making items easy to find. For kids’ rooms, they hold toys and books while hiding less attractive items in bins. To enhance their appearance, you can paint or stain the units, but choose durable materials like plywood or pre-cut panels to withstand daily use. For added mobility, casters can be attached, and dimensions can be customized to fit awkward or unique spaces. The versatile placement of these cubes, including under beds or as room dividers, maximizes storage efficiency. Budget-conscious builders can source inexpensive lumber or repurpose old shelves to keep costs low.
Style Cube Storage With Floating Shelves and Paint
Painting the units with satin enamel makes a significant visual impact and is both easy to apply and durable. You can use it without priming, and applying two coats results in a smooth, even finish. Use a soft-bristle brush and long, consistent strokes to prevent streaks that can ruin the look. For custom hues, experiment with color mixing, and remember that additional coats give you the chance to refine the shade precisely. Neutral tones like white, black, beige, or smoke gray are versatile options that complement many decor styles. For secure installation, keyhole hangers are attached to the back of the shelf for wall mounting. If your room uses LED lighting, be aware that incompatible dimmer switches can cause persistent flickering issues that may be mistaken for poor wiring. Additionally, ensure that your LED strip lights are properly connected to the correct power source to avoid any performance problems. Using curtain rings can similarly enhance the look of window treatments with minimal effort.
Choose Bins, Baskets, and Labels for a Finished Look
Choose bins, baskets, and labels that match your shelf dimensions for a polished, cohesive look. Start by measuring your cube’s depth and height—most bins are around 12 inches by 12 inches, but variations can affect fit. Deep bins in shallow shelves look sloppy, so select options that match your cube’s depth for a seamless front edge. If rigid plastic bins don’t fit, flexible fabric bins can be a good alternative. Products like the Criusia 8-pack use heavy-duty fabric reinforced with thick boards to maintain shape and support heavy loads. For a garage sale setup, you can repurpose a DIY clothing rack to display folded bins vertically, saving floor space while keeping your cubes accessible.
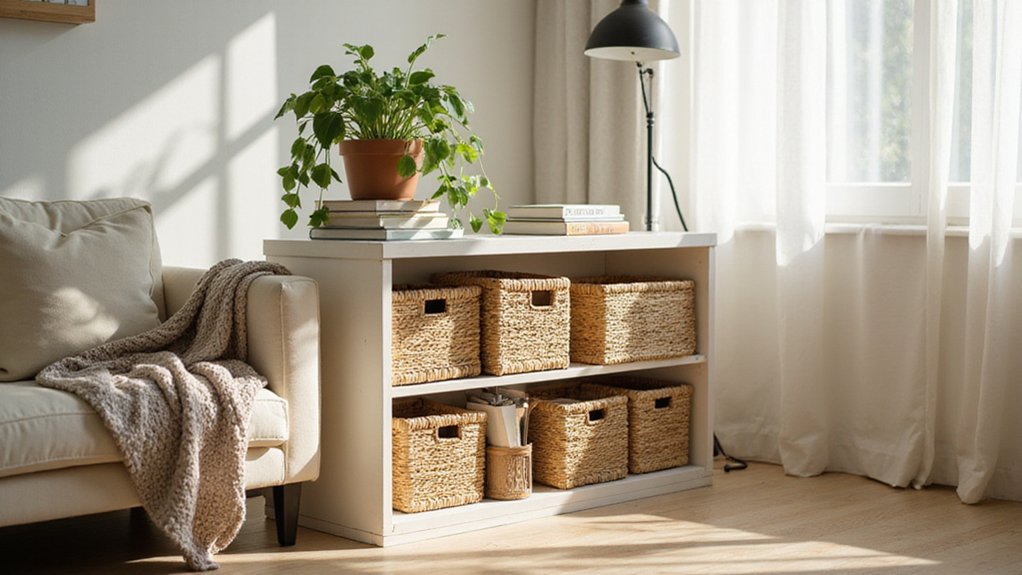
Material choice influences the overall aesthetic and maintenance. Fabric bins soften the look and add a cozy feel, while plastic bins are easy to wipe clean and ideal for high-use areas. Board-backed bins provide structure and a polished silhouette, whereas woven baskets bring texture and warmth. To maintain visual harmony, stick to one material type across all cubes.
Finish with uniform labels on each bin’s front face. Choose matching fonts or tag shapes to streamline sorting and create a cohesive appearance. Consistent labeling speeds retrieval and adds to the intentional look of your storage system. Neutral-colored baskets and aligned front edges contribute to a built-in, custom cabinetry effect.

INCLUDES SIX CUBES: Keep your home tidy and organized with this set of six cloth storage cubes

Odorless & Holds Its Shape: No more smelly, sagging cardboard boxes! Made with 2 mm thick, moisture-resistant PP sheets, our storage boxes are odorless and retain their shape, providing fresh, reliable storage

INCLUDES SIX CUBES: Keep your home tidy and organized with this set of six cloth storage cubes
Build a Cardboard Version for Under $10
A cardboard cube organizer can be built for under $10 using common household materials. Start with corrugated cardboard from shipping boxes, which is sturdy enough for lightweight storage and easy to upcycle. Measure your designated space first to determine the size of your cube; then, cut five panels—four sides and a bottom—to fit those dimensions. Use a ruler and box cutter to ensure straight, precise edges, guiding the blade carefully along the ruler. For a smooth application technique, use a squeegee or credit card to eliminate air bubbles when attaching contact paper to your panels. Consider incorporating soft toy storage by simply adding fabric bins to the finished cubes. For a more polished look, you can also build a window valance box using similar cardboard techniques for a coordinated room update.
For added strength, double-layer the load-bearing edges with thin cardboard to minimize flex. Temporarily secure pieces with packing tape to keep everything aligned during assembly, then reinforce seams with hot glue for a durable hold. Pay special attention to stress points like handle cutouts, reinforcing them with fiberglass-reinforced tape for extra durability. Always dry-fit your panels before gluing to confirm the fit and make adjustments as needed. For consistency, cut components into squared strips using stop blocks as demonstrated in advanced woodworking projects.
You can finish the look by wrapping the assembled cube with contact paper or fabric, which provides a cleaner appearance without much effort or cost. This project is ideal for light-duty storage, such as in kids’ rooms or temporary setups. For increased capacity, stack multiple cubes to create a modular, customizable organizer system that suits your needs.