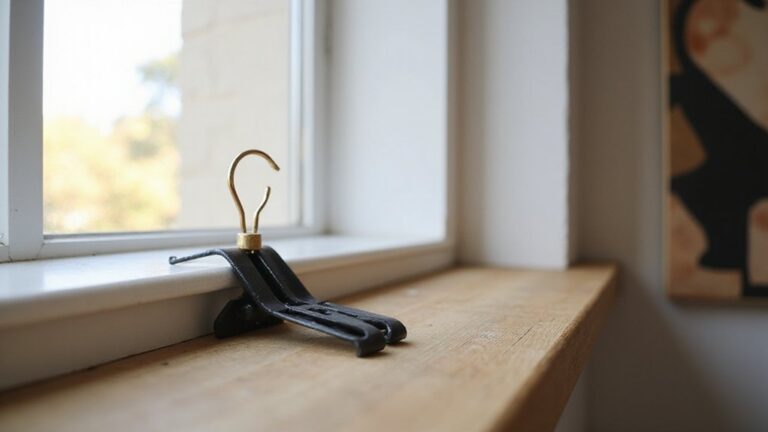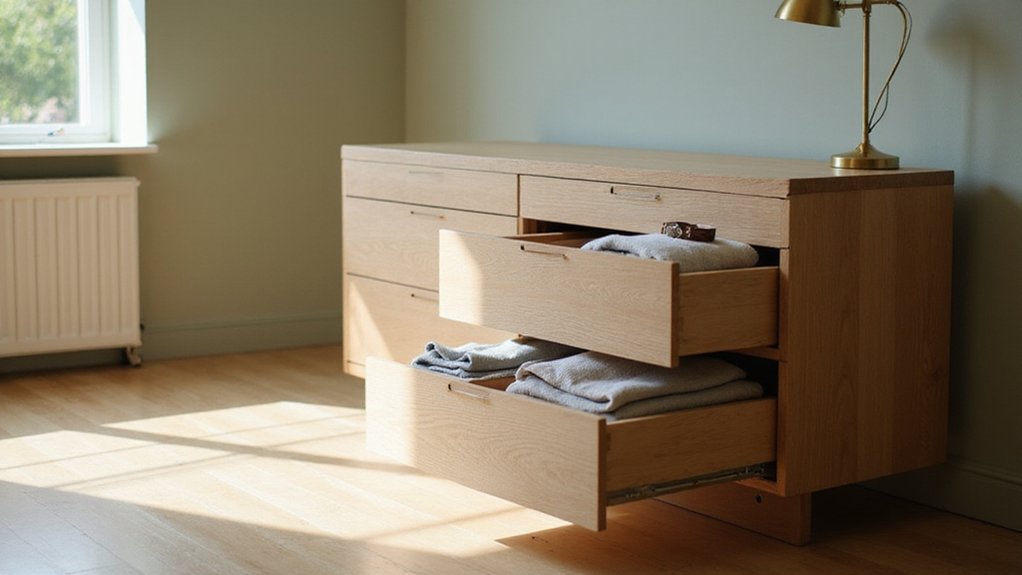
Ever tried to pull out a stubborn dresser drawer and wondered why it won’t budge? Sometimes the problem is simply knowing how the slides or mechanisms work.
With a few easy steps, you can safely remove drawers, whether they have metal levers, plastic tabs, or wooden glides.
Keep reading to learn the techniques that will help you get those drawers out with confidence.
Identify Your Drawer Slide Type to Choose the Correct Removal Method
To identify your drawer slide type, start by pulling the drawer out fully. Look on both sides—if you see metal tracks with visible ball-bearing rollers, you have side-mount slides. These are the most common and are easy to spot because the tracks are exposed along the sides of the drawer. If instead you notice a hidden track underneath, which is low-profile and concealed, it’s an undermount slide. These slides usually sit behind the drawer’s sides, making them less visible but offering a clean look.
A third possibility is a center-mount system, which typically features a single rail running down the middle beneath the drawer. To confirm, remove the drawer and check for this middle-positioned track. Once identified, observe how much of the drawer extends when you pull it out. Partial extension slides leave about 25% of the drawer inside, while full extension slides allow you to access everything right to the back. Similar to how LED bulb flickering is often caused by incompatible dimmer switches, a mismatched removal technique can lead to broken drawer components.
Knowing the type of slide helps you determine the proper removal method. For side-mount slides, look for a release lever or tab near the end of the track at full extension. With undermount slides, the release often involves pressing or lifting tabs located towards the sides or bottom of the track. Center-mount slides typically have a small release latch either underneath or at the back of the drawer. Approaching the removal with this knowledge ensures you won’t force anything and risk damage. If you are instead converting a space, remember that balancing style and function is key when choosing between a vanity or a desk for the room.
Gather the Right Tools for Your Specific Drawer Mechanism
Once you identify your slide type, gather tools that are compatible with your specific drawer mechanism. For modern ball-bearing slides, steel levers designed for releasing the ball bearings or a screwdriver for removing retaining screws work best. Undermount slides often require access tools for locking pins, while soft-close drawers typically need nylon tabs for disengagement. Lubricate wooden glides or metal rollers with beeswax or silicone spray to ensure smooth operation; dry powder can help prevent dust buildup and keep everything moving freely. For dimmer switches, selecting the correct slide type ensures compatibility with your overall fixture. When working on custom lighting installations, it can also be useful to understand how to safely cut Govee LED strips to achieve the exact length needed. Additionally, using a salt lamp in the room can create a calming ambiance that reduces stress during DIY projects.
To ensure proper removal and alignment, use shims to stabilize and straighten the slides. Rubber pads are helpful to prevent slipping when pulling out drawers. Always prioritize safety by wearing heavy-duty gloves to protect against sharp edges. Floor damage can be avoided by placing a drop cloth underneath the work area. If you plan to paint or refinish the drawer later, remove any decorative handles or hardware first. When handling heavy drawers—those over 50 pounds—a two-person lift makes the process safer and easier. For wooden slides, applying wax and mineral oil improves sliding performance and reduces friction during removal.

【Heavy Duty & Anti-Rust Construction】Crafted from high-grade cold-rolled steel with a professional zinc-plated finish. These drawer slides offer superior oxidation resistance and long-lasting durability. Rated for heavy-duty use with a load capacity of up to 100 lbs, perfect for both home renovation and industrial projects
【Heavy Duty & Anti-Rust Construction】Crafted from high-grade cold-rolled steel with a professional zinc-plated finish. These drawer slides offer superior oxidation resistance and long-lasting durability. Rated for heavy-duty use with a load capacity of up to 100 lbs, perfect for both home renovation and industrial projects
【Heavy Duty & Anti-Rust Construction】Crafted from high-grade cold-rolled steel with a professional zinc-plated finish. These drawer slides offer superior oxidation resistance and long-lasting durability. Rated for heavy-duty use with a load capacity of up to 100 lbs, perfect for both home renovation and industrial projects
Remove Drawers With Wood Glides or Free-Rolling Systems
To remove drawers with wood glides or free-rolling systems, start by fully opening the drawer until it reaches its natural stopping point. Then, lift the front edge about six inches to pivot the back above the track stopper. For drawers with wood glides, push down on both sides simultaneously to raise the back lip past the front stop. Next, apply a firm, sudden tug straight toward you, keeping the drawer level to overcome friction. If needed, use a slight side-to-side wiggle to loosen the fit. Heavier drawers may require more force, but applying wax to the glide surface can reduce friction and noise. For drawers with pre-attached side rail guides, ensure the drawer is fully open and identify the side clips before attempting removal to avoid damage. For those tackling other household projects, the same resourceful mindset applies when sourcing budget-friendly materials for creating custom storage solutions. If you are deciding on furniture for your space, understanding the differences between a chest of drawers and dresser can help you choose the best option for your style and storage needs.
For free-rolling systems, locate the wheels on the back edge of the drawer. Elevate the rear of the drawer by lifting the front so the wheels clear the track obstruction. Once the wheels are free, slide the drawer forward at an angle. Immediately place the detached drawer on a flat, stable surface to prevent rolling away. Always begin with the top drawer to maintain stability and avoid tipping during removal. Pre-attached side rail guides simplify the process when the clips are accessible and operable.

Perfect for Restoring Old Drawers:Designed for replacing worn or broken wooden drawer slides, ideal for old drawers, dressers, and vintage furniture repair projects.

EFFORTLESS GLIDE - Perfect for wooden drawer slides, ensuring drawers open and close smoothly.

Package Included: This package includes 6 pieces of wood drawer slides, crafted from durable beech wood. Measuring 44 cm (17.2 inch) in length, 4.7 cm (1.86 inch) in width, and 1.5 cm (0.6 inch) in height, these classic wooden drawer glides provide a sturdy and reliable solution for your drawer needs
Release Drawers With Metal Slide Levers or Plastic Tabs
To release drawers with metal slide levers or plastic tabs, start by locating the mechanism on each side of the track. For metal levers, push one lever up and the other down simultaneously, then gently pull the drawer toward you. For plastic tabs, press one tab up while pressing the opposite tab down, then slide the drawer forward. Keep the drawer level during removal to prevent ball bearings from jamming, which can cause damage or make reinstallation difficult. If you encounter resistance, avoid forcing the drawer; instead, try tilting it slightly upward to free stuck rollers. After removing the drawer, inspect the glides for signs of wear or damage. Remember, hinge adjustments only apply to doors, not drawers, so focus on your slide hardware for any alignment issues. To make removal easier, empty the drawer first and work from the top downward. If slides feel sticky or bind during reinstallation, apply a light lubricant to the tracks to ensure smooth operation. This process also works on standard National Business Furniture models. For a similar hands-on home improvement approach, proper lighting can transform a room’s functionality and ambiance. When securing items on a roof rack, kayak roof rack tying is a critical skill for safe transport. For a coordinated room aesthetic, consider how fabric roman shades can complement your furniture hardware and add soft, polished texture to the space.

100-Pound load capacity

All components constructed of a thick and durable plastic, for sure support
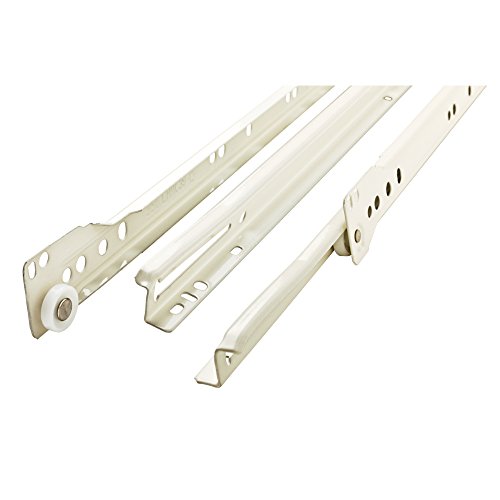
Made from stamped steel with a white epoxy finish
Remove a Stuck Drawer by Clearing Obstructions and Releasing Stops
A stuck drawer often has a physical obstruction between the drawer box and the cabinet frame. To clear it, start by shining a flashlight into the narrow gap to identify what’s blocking the track. Common culprits include coins, small toys, or clothing tangled in the track. Use a thin metal ruler or putty knife to gently dislodge debris or tweezers for tiny objects. Swelling wood from humidity can also cause sticking; in this case, apply a hair dryer on low heat to shrink the wood or run a dehumidifier nearby to reduce moisture. If these steps don’t free the drawer, locate the mechanical stop levers or plastic tabs that prevent movement. Hold down these stops and then pull the drawer out to release it. After freeing the drawer, rub wax paper onto the drawer slides to create a thin, even coating that smooths movement. For particularly stubborn film residue that can mimic sticky buildup, using a plastic scraper gently can prevent scratching the surface. These methods are effective for both DIY repairs and professional furniture restoration, allowing you to fix the drawer without damaging the unit. For drop ceiling maintenance, similar access panels can be removed by releasing spring-loaded retention clips to clear obstructions. When selecting replacement drawer organizers for a tidy space, consider top-rated drawer dividers that keep items separated and prevent future blockages.

IMPRESA Wood Lubricant: Experience the IMPRESA Wood Drawer Wax Lubricant Paste, a reliable choice for friction-free drawer operation. This versatile paste wax for wood is designed to enhance the movement of wooden drawer slides, preventing annoying squeaks and sticks

💪 SMOOTH STICKING WOOD-TO-WOOD DRAWERS - Designed for drawer tracks and other wood-to-wood contact points, this paste wax helps reduce sticking, friction, and drag for smoother drawer movement. Ideal for older dressers, vintage desks, cabinets, and other wooden parts that no longer slide easily

Fix Sticky Drawers, Squeaky Hinges & Sliding Doors - Wood lubricant paste helps reduce sticking, squeaking, and hard sliding. Ideal for drawer slides, cabinet doors, hinges, window tracks, and sliding glass doors.
Reinstall Drawers Safely and Push the Tracks Back Into Place
Before reinstalling the drawer, you need to realign and secure the tracks to ensure smooth operation. Start by loosening the screws holding the slides to the dresser frame. Gently push or pull the slides to match the drawer glides, making sure they are aligned properly. Once in position, tighten all screws firmly to hold the tracks in place. Check for worn screw holes; if the screws no longer grip securely, drill new 3/16-inch holes beside the old ones on the drawer box. Clear any debris from the tracks with a soft cloth to ensure there are no obstacles to movement. Ensure old glue is removed from joints for a secure bond, applying glue carefully with a brush to avoid excess squeeze-out. For a clear view of the track alignment, consider using a window film on nearby glass surfaces to reduce glare and improve visibility. If you find the tracks are misaligned, you can use a small level to verify they are perfectly horizontal for smooth operation.
Next, focus on the track reinstallation process. Hold the drawer with both hands, tilt its front slightly upward, and carefully align the glides with the corresponding track slots. Push the drawer in with a gentle, controlled motion—avoiding force that could damage the tracks. Listen for a click sound, which indicates that the drawer has snapped into the ball-bearing slides. Before fully loading the drawer, test its movement by pulling it in and out to confirm smooth operation and that it is securely seated. This ensures safe use and prevents future misalignment. For a successful installation, always turn off the power at the circuit breaker before handling any wiring.

【Heavy Duty 100 lb Capacity】 BAIDICE full extension drawer slides are built with 1.0mm cold-rolled steel and dual industrial-grade ball bearings, supporting up to 100 lbs—40 lbs more than standard slides. The precision ball bearing mechanism ensures smooth gliding even under heavy loads, while the built-in rubber crash pad keeps operation as quiet as 35 decibels.

[Choose The Size Wisely] To ensure you select the correct size for your dresser drawer slides, measure the depth of your drawer and make sure there is an extra 0.5 inches of space on both sides for mounting. These slides are suitable for drawer depths ranging from (depth range)

Direct Replacement for Worn or Broken Slides: Designed as a perfect, hassle-free replacement for your existing drawer slides. The common industry dimensions and standard sizing make swapping out old, damaged slides straightforward, restoring smooth drawer operation immediately