Struggling to find space to air-dry your clothes? Small apartments or limited laundry areas can make it tough to hang garments without clutter.
Luckily, there are simple DIY solutions like wall-mounted racks or repurposed household items that can turn tight spots into efficient drying stations.
Keep reading to discover ideas that fit your small space and your drying needs.
Why a Drying Rack Beats a Dryer for Small-Space Living
A drying rack offers superior fabric safety because it uses only air to dry your clothes, eliminating the high heat and aggressive tumbling in a dryer. This gentler process prevents shrinking wool, stretching cotton, and damaging delicate synthetics. As a result, your sweaters and sportswear keep their shape, and you avoid wrinkles without needing to steam. In small spaces, a drying rack provides an energy-efficient and fabric-friendly solution that doesn’t take up much room or generate excess heat. However, if your DIY rack uses an integrated light fixture, ensure the wiring is secure to prevent LED bulb flickering caused by loose connections or incompatible dimmers. For those deciding between a vanity or desk, a drying rack is a more practical choice for maximizing limited floor space. Approaching a drying rack as a DIY project allows you to customize the design and materials to perfectly suit your limited space.

Generous sized mesh surface for fast drying - ideal for sweaters and other delicate items

Clothes drying laundry rack for energy savings and gentle air drying so clothes last longer; for indoor use
Make a Temporary Rack From a Clothesline or Shower Rod
A tension shower rod or a simple clothesline can serve as an effective temporary drying rack. Install the rod securely between two narrow walls, or use doorknobs as anchor points to create tension. Ensure the line is pulled tight to prevent sagging when wet clothes are hung. For customized spacing, cut two-foot sections of PVC pipe to act as supports along the line, keeping garments evenly spaced for better airflow. Before hanging, squeeze excess moisture from clothing to speed drying. Place a towel underneath to catch drips, especially on water-resistant flooring like tiles. Running a fan nearby helps accelerate the process. Just be cautious not to overload the line, as over-tensioning can cause instability or damage. For a more stable structure, secure the PVC sections with chain links to hold the drying rack upright and prevent sagging. While this temporary setup works well for small spaces, HID bulb vs. LED lighting can significantly affect how quickly clothes dry in a dimly lit room. For an even more efficient setup, consider cutting the clothesline to a precise length using best practices for cutting to ensure a perfect fit and avoid frayed ends. Using a closet organizer can further streamline your laundry and storage routine by keeping drying supplies neatly accessible.
Turn a Baby Gate or Ladder Into a Drying Rack
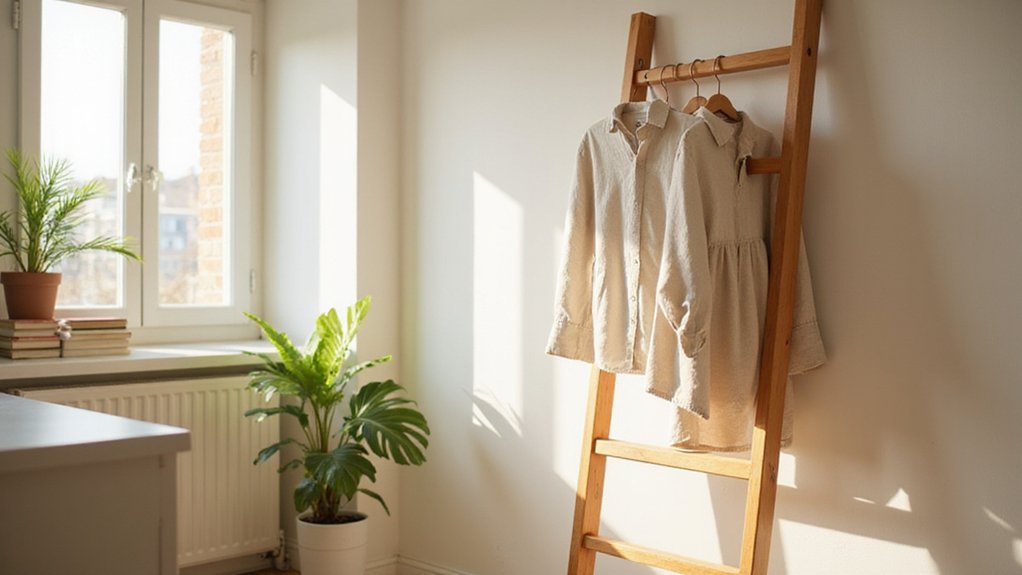
A baby gate or ladder can be converted into a functional drying rack with some simple modifications. For a baby gate, mount it horizontally between two sturdy support points using brackets or hooks. Attach it with U-bolts and wing-nuts to allow easy tension adjustment, making it stable yet adaptable. If childproof locks are present, disable them to prevent obstruction. A ladder offers a more versatile option: suspend it securely from the ceiling with identical chain lengths on each side. Ensure the ladder is clean before draping hangers over the steps. Place the entire setup over water-resistant flooring to protect your surfaces from moisture. To enhance its look, consider painting the ladder to match your decor. For additional drying capacity, stretch a clothesline around the top rungs. Both setups typically cost about $30 when assembled from salvaged or inexpensive materials, providing an affordable, sturdy alternative to traditional drying methods. For a polished finish, follow removal techniques like using a heat gun to soften adhesive that might be left behind from any film on the hardware. For those seeking to upgrade their laundry setup, consider pairing this with top smart bulb lamps for better illumination while working. A review of similar projects might rate the best light books for their construction advice and material suggestions.

Versatile Clothes Drying Solution: The Stromberg Carlson Extend-A-Line functions as a retractable drying line, holding up to 60 pounds of laundry across its 35” swing arms—ideal for your RV, camper, or home.

Aluminum Alloy Materials: Newly upgraded screw accessories are 304 stainless steel, Clothes Drying Rack is made of Aluminum Alloy, high strength, anti-aging, anti-rust, and easy to clean, You can safely use it outdoors without worrying about rusting and staining your clothes

【Universal RV Ladder Fit】 This premium RV drying rack features an adjustable clamping system that fits most RV ladder rails (Round Pipe Rail Only, 1"-1.5" diameter), perfect for travel trailers and campers. The patented anti-loosening nuts ensure vibration resistance during road trips, requiring an electric screwdriver for permanent stability - essential for any RV clothes drying solution.
Budget Drying Rack Hacks Using Dollar Store Items
You can build a versatile drying rack for under five dollars using Dollar Tree items. Start by gathering wire cabinet shelves and zip-tying them together to create a modular base. Add small wire baskets to hold utensils or small items, and use plastic file holders inverted as upper tiers for smaller garments or delicate products. This design promotes better air circulation, which helps keep fabrics soft and free from dryer heat damage. Placing a dish drying mat underneath catches drips, and changing towels every few days prevents odors from developing. For a similar budget approach, you can cut a 1×6 scrap of wood at 17-degree angles to create grooves that support cooling racks as a wall-leaning drying frame. This method costs significantly less than professional window film and offers similar savings by avoiding expensive installation fees. When needed, you can easily disassemble everything with zip ties for quick cleaning and maintenance, making this a practical solution even in tight spaces.

Clothes drying laundry rack for energy savings and gentle air drying so clothes last longer; for indoor use
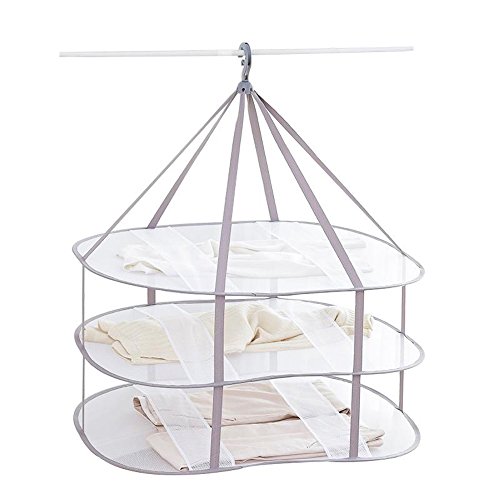
Open it flat can dry large size sweater or feather jacket. Fold it back into Φ11" flat circle for easy storage. Holding Weight: 10 pounds.

Collapsible design for easy storage
Where to Find Cheap or Free Materials for Your Project
You can find free or nearly-free materials for your DIY drying rack from a variety of sources. Start by scouting local construction sites for reclaimed wood scraps—just remember to ask permission first. Community waste-exchange apps often list free lumber and leftover building materials. Yard sales and neighborhood cleanup events are excellent places to find discarded boards, dowels, and other usable wood pieces. Woodworking shops may also give away short offcuts that are too small for commercial sale but perfect for your project. Consider how a shoe rack versus storage options could inform your design choices for the drying rack, balancing style, cost, and function for your small space. If your drying rack will be placed near a salt lamp, remember that salt lamps attract moisture and can become sticky, so keep wooden materials dry and well-sealed to prevent damage.
For hardware, salvage picture hangers, screws, and hinges can be found in thrift stores, often from wall art or old electronics. Leftover paint, stain, or wood glue from previous projects can help you upgrade your drying rack on a budget. Upcycling materials like broken curtain rods, old broom handles, or PVC pipe scraps makes for sturdy, repurposed drying bars. Donation centers can provide old mosquito nets, T-shirts, or mesh produce bags to serve as fabric supports. For a secure installation, consider using a mounting bracket to anchor the rack to the ceiling, similar to the method for hanging a pendant light.
Every free find not only saves money but also helps keep your project sustainable and eco-friendly.

【Drill-Required Wall Mounting & 3-Tier Design】: Secure wall-mount installation (drilling needed) makes this herb drying rack holds weight safely. The space-saving 3-tier frame(Dimensions: 15.74"L x 9.29"H x 5.51"D)features: a top shelf for potted plants, open middle layer for jars, and 12 hooks to hang drying herbs/flowers – ideal for kitchens or studios.

laundry rack portable clothes rack Lightweight and easy to drop into position for use; cloth drying rack folds flat for storage

a sturdy clothes drying rack featuring a wood X‑frame with slanted feet for enhanced stability
Build a Wall-Mounted Fold-Down Rack in One Afternoon
To build a wall-mounted fold-down rack in one afternoon, start by cutting your reclaimed wood to size. Measure and cut the outer frame to 38 inches by 25 inches, providing a sturdy base that fits your space. Cut the vertical stiles to 27 inches, which will support the rack when folded down. Drill ¼ inch deep holes for dowels, spacing them approximately 3.43 inches apart to ensure even support for the shelves. Secure the frame with glue and finish nails, making sure the corners are square for stability. The side pieces support 6.5-inch dowels for clothes, which can be cut using a gang-cutting method for consistent lengths.
Attach the inner frame using pivot hinges with the knuckles facing outward so the rack folds smoothly. Install eye hooks along the edges of both the inner and outer frames, then connect them with a doubled-over light chain to hold the rack open when in use. Before mounting, use a level to ensure the rack is straight, a common step when hanging curtain rods. For mounting, drive screws into wall studs through both the top and bottom crossbars to ensure a solid—safety-oriented—installation. If studs aren’t available, use heavy-duty wall anchors to secure the rack safely. Finish by sanding all surfaces smooth and applying a stain-sealer mix to protect the wood and enhance its appearance. With these steps complete, your functional and space-saving fold-down rack is ready to use.
Speed up Drying Time With Better Airflow
Arranging garments with proper airflow can significantly speed up drying time. Leave 2 to 3 inches of space between each piece on your fold-down rack, ensuring air can circulate freely around every item. Group similar fabric weights together, such as lightweight blouses with each other and heavier items like jeans separately, but keep gaps between these groups to avoid airflow blockages. Position heavy denim on the outer edges of the rack where air flows best. Turn sleeves and pant legs away from the main body of each garment to create additional channels for air to reach all surfaces. Angling garments slightly diagonally rather than keeping them perfectly straight enhances airflow around each piece. This principle works because ambient light itself is not involved, but the same concept of unobstructed circulation applies to ensuring air moves freely around the space. Designing your drying rack with an open-grid structure, similar to a walk-in closet shelving system, further promotes this unimpeded air movement. For even better airflow around heavier items, consider how a top dresser with a mirror relies on balanced stability to maintain its function without obstruction.

Save Money & Energy: The indoor clothes drying rack serves as a home humidifier during winter, adding moisture to dry indoor environments. In summer, it is an outdoor clothes drying rack that provides the freshest, healthiest smell under warm sunlight. Conserve energy and contribute to the environment by air-drying your laundry.

[Foldable & Space-Saving] Standing at 25.6"D x 25.6"W x 59"H during use, this clothes drying rack takes up little space, perfect for small spaces. Fold the arms and legs into a small size of 2.2"D x 2.2"W x 71.9"H, it will stay out of the way after use

Easy Fold & Flexible Move: The clothes drying rack measures 19.29"D x 48.81"W x 47.63"H when fully expanded, folds flat to 4.5"D x 48.81"W. Its lightweight design allows for effortless carrying, Ideal for small rooms or department
Choose the Best Room for Your Drying Rack
Choosing a room with good ventilation is crucial for effective drying. Avoid spaces that trap moisture or lack airflow. Bathrooms are often ideal because they have built-in ventilation systems that actively remove humid air, reducing the risk of mold. However, if the bathroom is windowless, moisture can build up quickly, making it necessary to keep the fan running to regulate humidity. Hallways tend to have natural airflow without prone humidity traps, making them suitable spots. Living rooms with higher ceilings also enhance drying efficiency because they allow better air circulation around your clothes. For extra moisture control, place a dehumidifier nearby to prevent damp odors. Avoid kitchens since clothing can absorb grease and cooking fumes. Bedrooms should be used carefully; keep damp items away from beds to avoid dampness affecting bedding and furniture. Always choose rooms with open windows or doors, as this ensures fresh air circulates and speeds up drying.
Avoid Collapses: Weight Limits for Hooks and Ladders
To prevent collapses and potential damage or injury, always match hook strength and ladder capacity to your laundry load. Steel hooks can support between 15 and 25 pounds each, making them suitable for heavier loads. Aluminum hooks hold only 8 to 12 pounds, so they are better for lighter items. Plastic hooks max out at 3 to 5 pounds and should be avoided for heavy laundry or wet towels.
Ladder strength varies based on construction and material. Wooden ladders with a 1.5-inch thickness can safely hold around 40 pounds. Metal frames with 0.75-inch tubing are often rated for 50 to 60 pounds. Never exceed 35 pounds on unbraced ladders; adding cross-bracing can increase stability by approximately 45 percent. For a more permanent solution, a can light conversion kit can offer a secure ceiling mount for heavier drying racks.
Wet bath towels typically add 5 to 7 pounds each, and a typical load of ten towels can weigh over 30 pounds. When choosing hooks, use drywall anchors rated for 20 to 25 pounds per hook or concrete anchors designed for 40 to 50 pounds. Always verify the weight capacities of both hooks and ladders to avoid dangerous collapses. Incorporating budget tips from DIY curtain rod projects can help you select cost-effective hardware for your drying rack. To keep your rack clean, periodic dusting with a microfiber cloth is recommended as part of routine maintenance.