Need a way to organize your closet without breaking the bank? Building your own shelves can be a simple, cost-effective solution.
By measuring carefully and using sturdy materials like plywood or hardwood, you can create custom storage that fits perfectly and looks built-in.
Once you know how to plan and assemble, you’ll have a tidy, functional space in no time.
Measure Your Closet Like a Pro
To measure your closet like a pro, start by gathering essential tools—a sturdy tape measure, pencil, and notepad—to record every dimension with accuracy. Begin by measuring the width at the back, middle, and front of the closet, noting the smallest number to determine the true usable width, especially if walls are uneven. Check for baseboard molding or irregularities in the walls; use a bevel square to ensure corners are square, which affects the fitting of shelving. Measure the depth from the back wall to the front edge, subtracting 1.5 inches to allow for shelf support clearances, ensuring proper installation space. Measure height at several points to identify any ceiling variations, which is crucial for custom shelving. For reach-in closets, ensure a minimum depth of 24 inches to provide enough space for hanging garments. Maintain at least 12 inches between shelves for folded clothes and 24 inches for bins, optimizing storage efficiency and preventing wasted space. If you notice any flickering in LED bulbs installed near your closet, it is often caused by incompatible dimmer switches that disrupt the electronic driver. To ensure the data is reliable, measure each wall twice at different heights to check for irregularities or distortions. Compare the style and function of different window treatments to ensure your closet measurements align with the room’s overall design. Accurate measurements like these form the foundation for designing a closet system that fits perfectly. If your closet has windows, removing the existing film first requires a plastic scraper to avoid scratching the glass beneath.
Pick the Best Materials for Sturdy Shelves
Hardwoods like maple or oak are top choices for very sturdy shelves because they offer exceptional material durability and can handle significant weight. They are ideal for supporting heavy items such as shoes or handbags. However, they tend to be more expensive than other options. A more budget-friendly alternative is cabinet-grade 3/4-inch plywood, which resists sagging and warping due to its cross-layered grain structure. For moisture resistance, especially in humid closets, consider using cedar or melamine rather than MDF, which can flex under load or moisture exposure. If you are prioritizing style and a furniture-like appearance, a vanity or desk might influence your material selection differently. Pine or spruce are also cost-effective choices that support standard loads well but should be avoided for longer spans over 36 inches, as they tend to sag. Typically, 3/4 inch thickness handles most closet shelving needs, but for longer or heavier spans, 2-inch solid wood can provide additional support. To prevent sagging under heavy use, reinforce shelves with L-brackets or vertical supports. For narrower shelves without a middle support, adding a 1×2 support across the back can enhance stability. If you desire adjustable lighting to highlight your shelves, consider choosing a high-quality night light for added functionality. For a polished finish that mimics built-in furniture, consider using trim to box in the shelves, similar to how an end-of-bed bench conceals its frame for a seamless look.
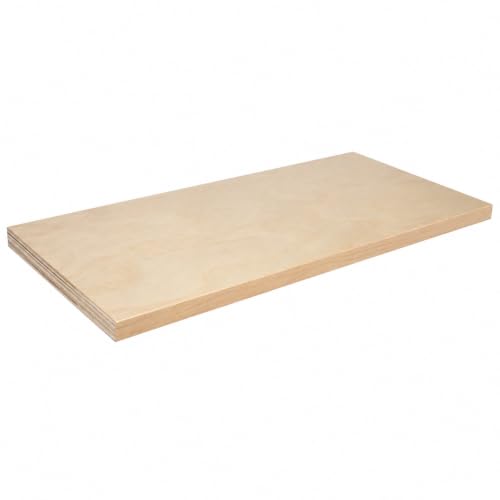
✔ REPLACE YOUR CABINET SHELVES – PERFECT FIT Custom cut to your exact width and depth for a seamless replacement inside your cabinets or pantry.

We understand that every space is different, which is why our shelves are custom-cut to your desired dimensions. This ensures a perfect fit and a seamless integration into your interior design

√【BRAND GUARANTEE】- GSCIT Club is a company specialized in Edge banding.
Cut Shelves to Fit Your Exact Dimensions
To get a perfect fit, measure your space carefully before cutting your shelves. Deduct about 1 inch from the total width to prevent binding and ensure easy fitting. Create a cardboard template to trace irregular wall contours, and use a compass to capture the exact profile. Transfer this profile directly onto your shelf board for an accurate outline. Furring strips provide sturdy support for the shelf once it is cut to size. A DIY approach can save you a significant amount on labor costs compared to professional installation. For enhanced privacy, consider applying window film to nearby glass that lets in natural light without compromising your view. If you are also installing LED lighting, you can cut LED strip lights along their designated cut marks to match your shelf length.
For precise cuts, clamp a straight wood guide to your work surface to keep your saw on a straight line. Use a fine-toothed blade to minimize chipping. Apply painter’s tape along the cut line to further prevent damage. Adjust the saw blade height to cut just over half the thickness of the board. Always cut from the back edge toward the front for a cleaner finish. Flip the shelf to repeat the cut for a smooth, even edge.
After cutting, sand any high spots or rough edges with 180-grit paper so the shelf fits snugly against the wall. Always measure twice before cutting once—this simple step helps you avoid costly mistakes and ensures a professional-looking fit.
Install Shelf Supports Into Studs or Drywall
To install shelf supports securely, you need to locate wall studs or select appropriate drywall anchors. Use a stud finder and slide it across the wall; it will beep when it detects solid wood or metal behind the drywall. Confirm the stud’s center by knocking or using a level to trace from a visible nail. Mark both edges of the stud to determine its width, typically 1.5 inches apart. Use a zircon finder or magnetic stud finder, which is cost-effective and non-electronic, for precise stud detection. A can light conversion kit can also be used to repurpose existing ceiling fixtures for pendant lighting, adding flexibility to your room layout. If your smart bulb is unresponsive, a similar reset procedure can restore its factory settings and connectivity. For a more permanent connection between components, you can also use soldering iron and solder to join wires directly instead of relying on connectors.
Choose your fasteners based on the wall type. For studs, drill a 2-inch pilot hole and secure brackets with 2-inch wood screws. For drywall without studs, opt for toggle bolts or elephant anchors. Push these anchors through a pre-drilled hole until they expand behind the drywall, providing a strong hold. Avoid rely solely on generic anchors if you plan to load heavy shelves, as they may fail under weight.
Once your brackets are positioned along a straight, level line, tighten all fasteners by hand. This prevents stripping the screws or damaging the anchors. After securing the supports, your shelf is ready to be mounted with confidence.

MULTIPLE SIZE OPTIONS – This heavy duty toggle bolt assortment includes 3 sizes (1/8 in, 3/16 in, 1/4 in) to help you choose the appropriate size for drywall anchor applications based on wall type and intended use. Suitable for selected hanging projects such as hanging pictures, curtain rods, and plants when used correctly. Please refer to the size chart and installation guidance before use.

COMPLETE KIT CONTENTS: This package includes 28PCS drywall anchors and wing nut kit with toggle bolts in 3 different sizes 1/4" 3/16" 1/8" for your choice according to your actual mounting and load bearing requirements

20 Heavy Duty Zinc Plated Toggle Straps & 20 High Strength Carbon Steel Threaded Studs for a complete, Corrosion Resistant Master Toggle Kit to tackle your home projects
Finish With Built-In Touches and Trim
Finish with built-in touches and trim to add a polished, custom look. Start by using 1-inch by 4-inch boards as face frame trim. Cut each piece individually to fit uneven wall surfaces, ensuring a clean appearance. Attach the trim with an 18-gauge brad nailer, starting with the top trim and then adding vertical and horizontal pieces in a bookshelf style. Dry fit each piece to confirm fit before nailing.
Pre-paint the lumber before installation to minimize touch-ups later. Apply all-purpose caulk to fill any gaps between the shelves and walls, smoothing it with your finger for a clean, seamless finish. Use a small tip hole when applying the caulk to control the flow. Once dried, fill nail holes with wood filler and sand lightly for a smooth surface. To complement the storage area, consider selecting ceiling light fixtures that provide ample task lighting for the closet. Choosing proper hanger types can further protect clothing from stretching and maintain garment shape.
For a truly finished look, consider adding decorative molding around the perimeter of the closet. Secure hanging hardware like brass hooks and add storage cubes or baskets for extra organization. Finish the project by installing baseboards and replacing door trim to give the space a built-in, custom-built appearance.