Ever wonder how to safely swap out a pendant light? It’s a smart skill that can update your space and improve lighting without much hassle.
By knowing the basic steps, you can replace that old fixture with a new one in no time. Keep reading to learn how to do it right and ensure everything works perfectly afterward.
Shut Off Power to the Pendant Light Fixture
Shutting off power to the pendant light fixture is essential for safety before working on wiring. The first step is to locate the correct circuit breaker in your electrical panel, which controls the fixture. Turn the breaker to the “off” position and observe the light; if it turns off, you’ve found the right breaker. If the light remains on, flip through other breakers one by one until the light goes dark. Once identified, tape the breaker down to prevent accidental reactivation. Intermittent power supply issues can also cause LED bulb flickering due to voltage fluctuations in the circuit. While power is off, you can plan the decorative placement of fairy lights if you want to add ambient glow after the replacement is complete.
Never rely solely on the wall switch to turn off power. Handling electrical components without proper power disconnection increases the risk of electric shock. Wiring faults can leave the hot wire live even when the switch is off. Always use the circuit breaker as your primary power shutdown. Before touching any wires, confirm zero voltage at the ceiling junction box with a non-contact voltage tester. Test all wires—hot, neutral, and ground—to ensure there is no live current before proceeding. If you prefer a combined fixture for lighting and study, consider how a vanity or desk might better suit your space. Never disconnect wires until you are completely confident the power is off.

Quick & Accurate Circuit Targeting: This digital receiver offers precise detection to quickly locate breakers, effectively filtering out interference and minimizing the need for manual testing and troubleshooting.

All-in-One Electrical Diagnosis: The KT303P Circuit Breaker Finder Tools quickly locate breakers, check outlet wiring, test GFCI protection, and non-contact voltage testing in one compact tool. The innovative nesting design allows the transmitter and receiver to store together securely, reducing the risk of misplaced components while improving portability for residential and commercial electrical troubleshooting

All-in-One Electrical Diagnosis:Combine a circuit breaker finder, GFCI tester and outlet tester in one compact tool. Quickly locate breakers, test outlet wiring, and verify GFCI protection for efficient electrical troubleshooting. Just simply plug in the transmitter, then scan your panel twice ('Learn' and 'Scan' mode). The receiver pinpoints the exact breaker with a red light, buzzer alarm, and vibration alert.
Gather the Tools You Need for the Job
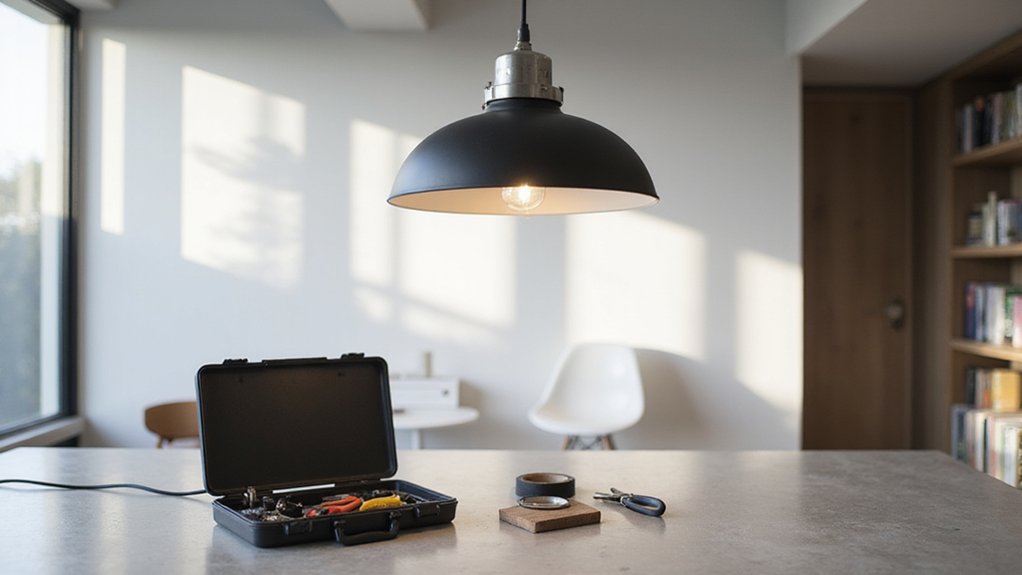
Gather all the tools and materials you need before starting to replace a pendant light. This helps prevent interruptions halfway through the job. Start with a non-contact voltage tester to make sure the circuit is dead. Have screwdrivers, wire strippers, needle-nose pliers, and wire nuts ready for disconnecting and connecting wires. Check that your new pendant’s wattage rating and bulb base size, typically E26 medium-base, match your existing fixture. Ensure the ceiling fixture weight does not exceed the capacity of your mounting bracket and junction box. For heavy fixtures over 50 pounds, additional support hardware is needed to ensure stability. If the fixture is lighter and requires floor storage, consider that storage benches provide convenient hiding spots for tools and supplies during the project. Weighing style, cost, and function can also help you choose a pendant that best fits your space. Understanding the cordless blind mechanism can help you apply similar principles of tension and spring adjustment to managing pendant light cords neatly.
A sturdy ladder, insulated gloves, and a soft cloth are essential to keep yourself safe and protect your flooring. Keep electrical tape nearby to secure connections, and strip about an inch of wire casing for a solid fit. Organize your workspace so that all tools are within reach but out of the way to avoid clutter. Proper preparation like this helps you work efficiently and reduces the risk of missing a key step or encountering issues midway through the installation.

【Vintage Style】 The industrial pendant light kit combines modern and vintage styles with a retro design. The pendant light socket makes it a perfect decoration for the living room, bedroom, dining room, kitchen, office, porch, warehouse, barn, hallway, bar, stairway, kitchen, corridor etc.

Smooth dimming: Compatible with most dimmers on the market, these LED bulbs provide smooth dimming control from 10% to 100% without flickering or buzzing, giving you the perfect brightness for any moment

Efficient LED Bulbs: Ascher pack of 4 units E26 LED filament bulbs replace 60W incandescent bulb by 6W LED, save over 90% on electricity bill of lighting. Note: This E26 LED bulb is not dimmable, please do not use them with dimmer switch
Take Down the Old Pendant Light Step by Step
To take down the old pendant light, start by organizing your tools and ensuring the circuit breaker is turned off to cut power safely. First, remove the light bulb by turning it counterclockwise, and set it aside. If the bulb is hot, wait until it cools down before handling. Different bulb types may require different handling, so handle yours carefully to avoid damage or injury. Next, detach the shade by loosening any screws or locking rings holding it in place and gently lowering it onto your drop cloth. Loosen screws evenly to prevent the fixture from falling apart unexpectedly if the screws are uneven.
Support the canopy with one hand while loosening its screws with a screwdriver. Once the canopy is free, carefully expose the wiring. Take note of the wire colors, which help determine how to connect your new fixture later. For a more secure connection, you can use wire connectors to join the wires before installing the new light. Loosen the wire nuts securing the black (hot), white (neutral), and ground wires, then twist these wires together and push them back into the electrical box. For a secure and stylish finish, consider using decorative curtain rod styles when installing any new ceiling fixtures to complement the room’s design.
Finally, hold the fixture firmly, unhook it from the mounting bracket, and slowly lower it from the ceiling. Make sure it is completely detached and sets aside safely, leaving the ceiling ready for the new fixture. When evaluating your storage approach, you might prefer a shoe rack for its specialized, compact organization over general storage bins.
Wire the Pendant and Attach the Mounting Bracket
To wire the pendant and attach the mounting bracket, start by turning off the power and verifying it with a voltage tester. Remove the old connectors and screws from the junction box, then strip about 3/4 inch of insulation from the house wires. For safety, match the wires carefully: connect the pendant’s black or red hot wire to the ceiling’s black or red wire, then join the white neutral wires. Secure each connection with a wire nut to ensure a solid contact. For the ground connection, link the bare copper wire from the house to the fixture’s grounding wire, and attach it to the mounting bracket’s grounding prong if one exists. Confirm the bracket is securely mounted to ensure stability before proceeding. Similar to applying window film, ensure the surface is clean and dry for the best adhesion. For a budget-friendly approach, consider using simple materials like a basic metal rod and brackets from a hardware store. Additionally, always test the wire connections by gently tugging on each wire nut to confirm a firm hold before tucking them into the junction box.
Next, position the mounting bracket against the ceiling. Use a stud finder to identify a sturdy support—preferably a stud—for secure attachment. Mark the screw holes on the ceiling. If a stud is available, use appropriate screws to fasten the bracket directly into it. If no stud is present, apply drywall anchors to ensure stability. Thread the pendant’s wires through the center of the bracket. Then, insert the mounting screws and tighten them by hand, ensuring the bracket is firmly secured. Tuck all wires neatly into the junction box, avoiding pinched or exposed wires that could cause issues later.
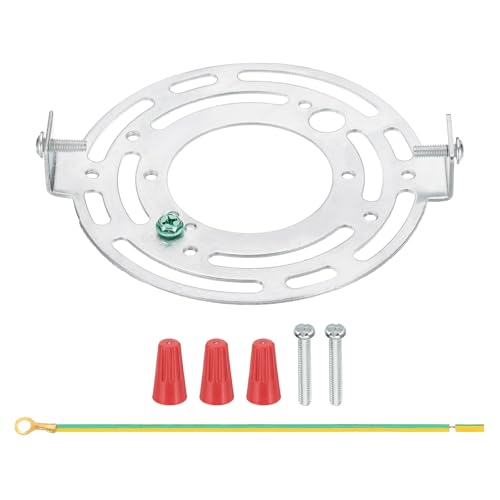
Specifications: Color: Silver; Material: Galvanized Carbon Steel; Overall Size: 115 x 100 x 15mm / 4.53 x 3.94 x 0.59 inches (L*W*H); Board Thickness: 1.5mm / 0.06 inches; Ground Wire Length: 150mm / 5.9 inches; Packing List: 1 x Ceiling Light Plates (Including Screws, Wiring Caps, Ground Wires)

4Pieces full metal plate with slots version,very flexible hardware for affixing lighting fixtures to electrical boxes

Specifications: Color: Silver; Material: Galvanized Carbon Steel; Overall Size: 125 x 100 x 14mm / 4.92 x 3.94 x 0.55 inches (L*W*H); Board Thickness: 1.5mm / 0.06 inches; Ground Wire Length: 150mm / 5.9 inches; Packing List: 1 x Ceiling Light Plates (Including Screws, Wiring Caps, Ground Wires)
Test Your Pendant Light for Flickers and Wobbles
To test your pendant light for flickers and wobbles, follow these steps. First, turn the power on and use your smartphone camera aimed at the bulb. Look for dark bands traveling across the screen, which indicates flicker. You can also download a flicker test app for more precise rate detection. Make sure the bulb’s voltage matches the fixture’s specifications and that your dimmer switch is LED-compatible, typically labeled CL or ELV. If the flicker continues, inspect both switches in three-way circuits for proper wiring and operation. To reduce flicker, choose a bulb that is recommended in guides for best night lights due to their rigorous testing. Additionally, applying window film to nearby windows can help diffuse harsh light and reduce perceived flicker.
Next, for wobble inspection, physically twist the bulb clockwise to ensure it seats tightly. Turn the power off and check the socket for any signs of damage. Inside the canopy, examine the wire nuts to confirm they are secure and not loose. If the light continues to wobble after tightening, it’s best to replace the bulb as your first fix. These steps help ensure your pendant light operates smoothly without flickers or wobbles.