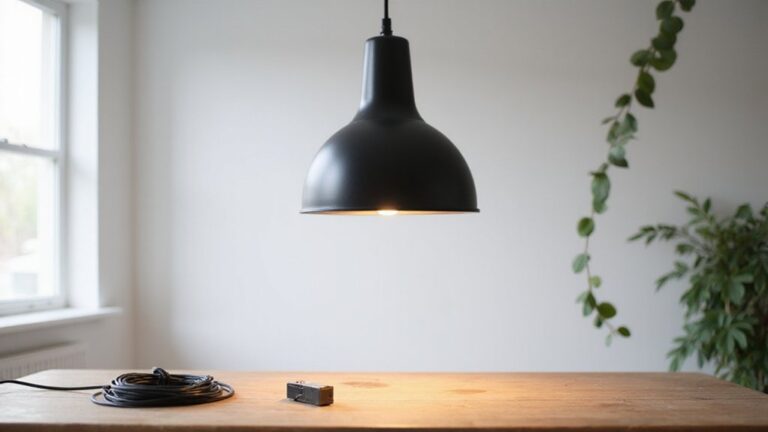
Wondering how to put up a wall sconce safely and correctly? Whether you’re adding a bit of charm or functional light, the key steps involve carefully positioning, cutting into the drywall, and connecting the electrical wires.
By following a straightforward process, you can achieve a professional-looking installation that’s both safe and stylish. Keep reading for all the details.
Measure Your Wall Sconce Location (60–65 Inches)
The standard height for wall sconces is between 60 and 65 inches from the finished floor to the fixture’s center. Start your measurement at this range, but feel free to adjust based on your wall height preferences. For rooms with 8-foot ceilings, positioning the sconce around 66 inches works well. In spaces with vaulted or 9-foot ceilings, aim for 66 to 72 inches to ensure proper lighting and balance. For bedside or seated areas, lower the fixture to about 55 to 60 inches to align with eye level. Task lighting often works best when centered between 55 and 65 inches. In hallways, bathrooms, and entryways, placement within the 60 to 66 inch range helps avoid shadows and ensures even illumination. Always measure from the finished floor to the center of the junction box. Before installing, use painter’s tape to mark the spot and live with it for a day to see if it feels right. If your sconce uses a dimmer or LED bulb, check for incompatible dimmer switches that can cause flickering. For a more rustic or functional alternative, consider building a DIY hat rack to hang your sconce accessories or hats nearby. Remember that measuring twice and using proper tools for the job will help you avoid mistakes and achieve a professional finish.

PACKAGE CONTENTS- 2 packs of steel universal light stand plates with all mounting hardware including grounding screws: 2 fixture crossbars, 4 crossbar mounting screws, 4 grounding screws, 6 wiring nuts, 4 black acorn cap nuts, 4 silver acorn cap nuts.

【180° Adjustable Angle】The flexible design allows you to customize the position and alignment of the lighting fixture for perfect illumination.
Shut off Power and Test With a Voltage Tester
To safely work on a sconce circuit, you need to shut off the correct breaker in your electrical panel and verify the circuit is dead. First, locate the circuit breaker that controls the sconce. If your panel labels are missing or unclear, plug a work light into an outlet on that circuit and toggle the breakers until the light turns off. This confirms you’ve identified the right breaker.
Next, test your voltage tester to ensure it works properly. Read the manual for specific instructions, insert fresh batteries, and test the device on a known live outlet—you should see a beep or a red glow. Retest the tester to build confidence in its reliability. Always verify voltage before performing electrical work to prevent hazards. Considering your space’s layout, you might also weigh whether a vanity or desk better suits your needs once the sconce is installed.
Remove the switch faceplate and carefully touch the tester probe to both screw terminals. A red light indicates voltage is present; green confirms the circuit is off. Finally, test the wire ends at the fixture location, making sure no red LED or beep is detected. Once these steps are complete, the circuit is de-energized and safe for work.
Install the Electrical Box and Pull Wires
To install the electrical box, start by confirming your drywall cut aligns with a stud bay. Trace the outline of the box onto the wall and cut cleanly with a drywall saw. To ensure a tight fit, chisel away any excess material. Mount the box securely to the stud using screws. If a stud isn’t available, use drywall anchors to hold it in place. Make sure the bottom of the box is level with the base of the sconce to ensure proper alignment. For a whimsical accent, you can incorporate a dragon night light theme into the surrounding decor. For heavier fixtures, expansion metal boxes provide greater strength and long-lasting support. Consider DIY bedside table designs to match the sconce’s height with furniture proportions. For optimal energy efficiency around the fixture, select LED bulbs that match the sconce’s intended brightness and color temperature.

Cable clamps suitable for use with steel & alum armored cable, mci cable, mci-a cable, and flexible conduit

With proper fitting can be used for conduit, nmsc, armored, metal clad, flex cable

Connect Black, White, and Ground Wires
To connect the black, white, and ground wires, start by matching the fixture’s black (hot) wire to the black supply wire in the junction box. Twist them together tightly with a wire nut, ensuring no bare copper extends beyond the nut. Next, connect the white (neutral) fixture wire to the white supply wire using another wire nut, making sure the connection is secure. Verify the twist is tight and no copper is exposed. For the ground connection, twist the bare copper or green fixture wire with the ground wire in the junction box. Secure them with a wire nut and attach the ground bundle to the metal box using a grounding screw, tightening it clockwise. To ensure a secure three-point connection, create a loop in the ground wire and hook it under the screw in the same direction as the tightening rotation. Before finishing, tuck all wires neatly into the box, keeping hot and neutral wires separated to avoid shorts. Always verify that the circuit is dead with a voltage tester before making any connections. For a cleaner look, you may also consider how blackout blinds can block light from nearby windows that could interfere with your work. A DIY approach can save you significant money on installation costs, as professional window film installation often adds to the overall expense. To keep your worksite dust-free, gently remove debris from window frames using a soft brush attachment on a vacuum, a method also recommended for cleaning cellular shades without damaging the fabric.

🔘 What you can get: 350 pcs wire caps in total, includes 100 pcs Grey, 100 pcs Blue, 70 pcs Orange, 50 pcs Yellow, 30 pcs Red.
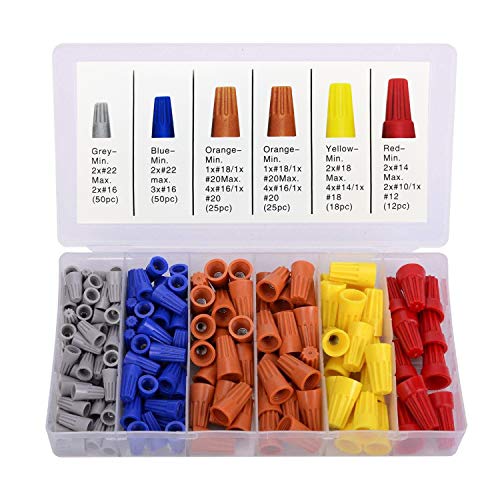
INSULATION MATERIAL: These electrical wire connectors are made of plastic shell. The nylon shaped shell has thick wall, high hardness and is not easy to aging. It can effectively prevent the unstable connection of leakage box and enhance the safety and insulation.
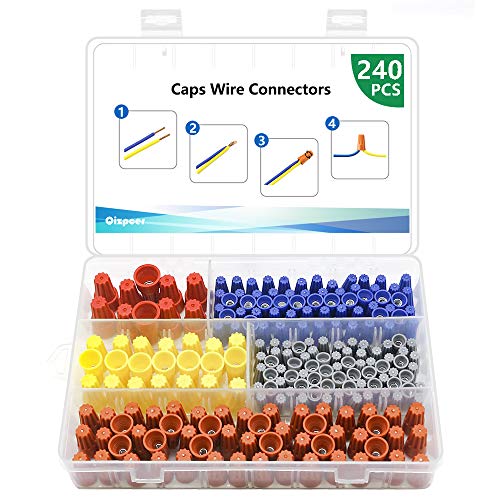
Easy Practical: Great for connecting wires without soldering; push the stripped conductors into the connector and screw on
Mount the Sconce and Restore Power to Test
Return to the breaker panel and restore power. Flip the wall switch to test the sconce. If it doesn’t light, use a voltage tester to confirm power reaches the fixture. Once the tester glows steadily, you know the wiring is live and the sconce should light up. At this point, your installation is complete, and the fixture is functioning properly. Before testing, always confirm the fixture is de-energized by using a voltage tester to verify no power is present after turning off the breaker. To ensure the wall surface is not damaged during the process, consider applying heat evenly to loosen old adhesive residues, similar to techniques used for removing window film. For a tidy entryway, you could instead build a budget-friendly shoe organizer using simple materials like plywood and dowels. If you later decide to add a dimmer for this sconce, remember to match the load rating of the switch to your light fixture’s wattage.